macOS 앱이 “손상되어 열 수 없습니다”라고 나올 때: 테스트부터 서명·공증까지
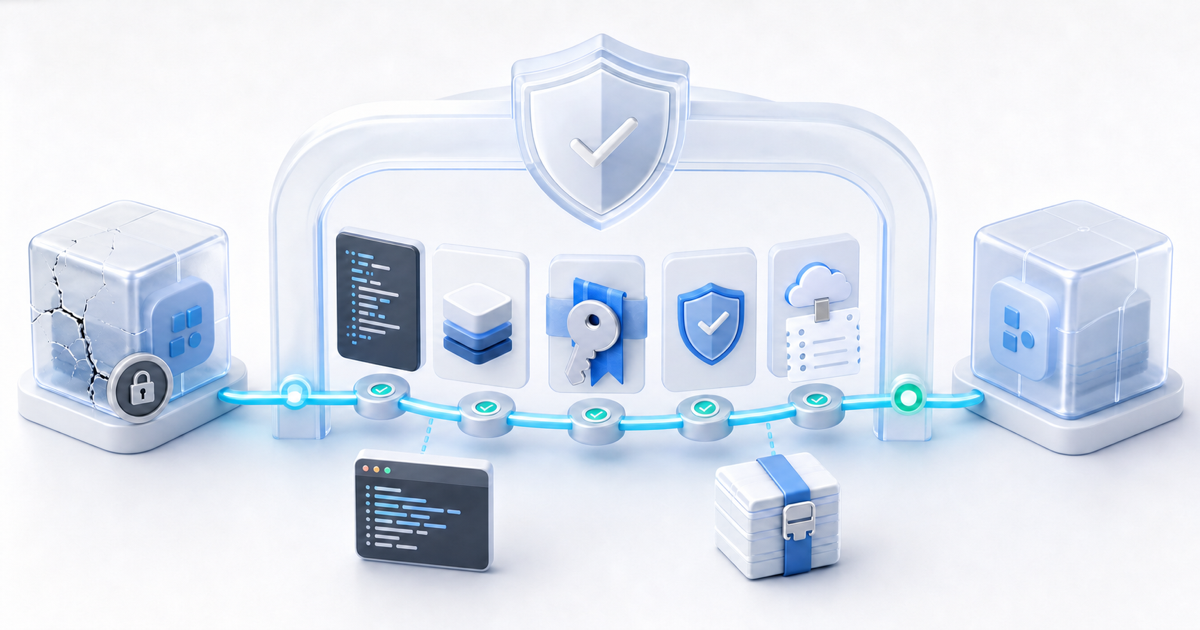
직접 개발한 macOS 앱을 다른 Mac에서 실행했을 때 다음과 같은 경고가 나타날 수 있다.
“앱이 손상되어 열 수 없습니다. 해당 앱을 휴지통으로 이동해야 합니다.”
이 문구가 항상 파일의 물리적인 손상을 뜻하는 것은 아니다. 코드 서명이 없거나 깨졌고, 공증되지 않았거나, 다운로드 격리 상태에서 Gatekeeper 검사를 통과하지 못했을 때도 비슷한 경고가 나타날 수 있다.
하지만 반대로 무조건 서명 문제라고 단정해서도 안 된다. Apple은 앱이 실제로 변경·손상됐거나 인증이 취소됐고, 알려진 악성 콘텐츠가 감지된 경우에도 실행을 차단한다고 설명한다. 따라서 해결 순서는 “일단 보안 기능을 끄기”가 아니라 경고의 종류를 구분하고 서명 상태를 확인하는 것부터 시작해야 한다.
이 글은 두 상황을 분리해 다룬다.
- 내가 만든 앱을 내 Mac이나 테스트 Mac에서 잠시 실행하는 경우
- 웹사이트, GitHub, 이메일, DMG 등으로 일반 사용자에게 배포하는 경우
두 상황의 해결책은 같지 않다.
먼저 확인할 핵심 결론
| 상황 | 적절한 대응 |
|---|---|
| 출처를 모르는 앱이 “Mac을 손상시킴” 또는 악성코드 경고를 표시 | 우회하지 말고 삭제하거나 개발자에게 확인 |
| 내가 방금 빌드한 앱이 테스트 Mac에서 차단 | 서명·격리 속성·Gatekeeper 판정을 진단 |
| 신뢰할 수 있는 미공증 앱을 한 번 실행 | 시스템 설정의 그래도 열기를 우선 사용 |
| 일반 사용자에게 외부 배포 | Developer ID 서명, Hardened Runtime, 공증, 검증이 필요 |
| 공증까지 했는데 일부 Mac에서 실패 | 실제 배포 파일과 공증 파일이 같은지, 중첩 코드 서명이 완전한지 확인 |
Apple의 최신 지원 문서는 “손상됨” 경고가 실제 손상이나 변조를 뜻할 수도 있다고 안내한다. 따라서 인터넷에서 받은 알 수 없는 앱에 xattr 명령을 적용하는 방식은 권장할 수 없다.
Gatekeeper가 검사하는 것
Gatekeeper는 App Store 밖에서 받은 앱, 플러그인, 설치 패키지가 신뢰할 수 있는지 확인하는 macOS 보안 체계다. Apple의 Gatekeeper 보안 안내에 따르면 다운로드한 소프트웨어를 처음 열 때 다음 내용을 확인한다.
- 등록된 개발자가 서명했는가
- Apple 공증을 받았는가
- 서명 이후 코드가 변경되지 않았는가
- 알려진 악성 콘텐츠가 없는가
- 사용자가 실제로 실행하려던 파일인가
브라우저나 메신저, 클라우드 저장소에서 내려받은 파일에는 출처 정보가 붙는다. 이 때문에 같은 .app이라도 빌드 폴더에서 직접 실행할 때는 열리고, ZIP으로 올렸다가 다시 다운로드하면 차단될 수 있다.
이 차이는 유용하다. 배포 파일을 실제 다운로드 경로로 시험해야 사용자 환경에서 발생할 문제를 발견할 수 있기 때문이다.
경고 문구부터 구분하기
macOS 경고는 버전과 원인에 따라 표현이 달라진다.
“인터넷에서 다운로드한 앱입니다. 열겠습니까?”
정상적으로 서명·공증된 앱도 처음 실행할 때 이 확인창이 나타날 수 있다. 사용자가 의도한 다운로드인지 확인하는 정상 절차다.
“개발자를 확인할 수 없습니다” 또는 “악성 소프트웨어를 확인할 수 없습니다”
개발자 서명이나 공증을 확인할 수 없다는 의미다. 내가 만든 테스트 앱이고 변조되지 않았음을 알고 있다면 일시적으로 실행을 허용할 수 있다.
“앱이 손상되어 열 수 없습니다”
서명이 깨졌거나 앱이 서명 후 변경됐을 가능성이 있다. 전송·압축 과정에서 실제로 손상됐을 수도 있다. 우회하기 전에 codesign 검증부터 해야 한다.
“Mac을 손상시킵니다” 또는 악성코드 감지
Apple은 악성 콘텐츠나 취소된 인증이 감지될 때 이런 경고를 표시한다고 설명한다. 이 경우에는 Open Anyway나 격리 속성 제거로 우회하지 않는다.
안전한 로컬 테스트 순서
내가 직접 빌드했거나 해시와 전달 경로를 확실히 신뢰하는 앱에만 다음 순서를 사용한다.
1. 시스템 설정의 “그래도 열기”를 먼저 사용한다
앱을 한 번 열어 경고를 확인한 다음 다음 경로로 이동한다.
- 시스템 설정
- 개인정보 보호 및 보안
- 아래쪽 보안 영역
- 차단된 앱 옆의 그래도 열기
- 인증 후 다시 열기
Apple 사용 설명서에 따르면 이 버튼은 앱 실행을 시도한 뒤 약 한 시간 동안 표시될 수 있다. 조직에서 관리하는 Mac이라면 MDM 정책 때문에 선택지가 보이지 않을 수도 있다.
2. 격리 속성과 서명을 확인한다
먼저 격리 속성 존재 여부를 본다.
xattr -l "/Applications/MyApp.app"서명 구조와 무결성을 검증한다.
codesign --verify --deep --strict --verbose=4 "/Applications/MyApp.app"서명 상세 정보를 확인한다.
codesign -dv --verbose=4 "/Applications/MyApp.app"Gatekeeper의 현재 판정도 확인한다.
spctl --assess --type execute --verbose=4 "/Applications/MyApp.app"대표적인 결과는 다음과 같이 해석할 수 있다.
| 결과 | 의미 |
|---|---|
code object is not signed at all | 코드 서명이 없음 |
a sealed resource is missing or invalid | 서명 후 내부 파일이 변경·누락됨 |
rejected, no usable signature | Gatekeeper가 사용할 수 있는 서명을 찾지 못함 |
accepted, source=Notarized Developer ID | Developer ID 서명과 공증이 인정됨 |
codesign --deep은 검증할 때 중첩 코드를 재귀 확인하는 용도로 사용할 수 있다. 배포용 코드를 서명할 때 무조건 --deep을 사용하는 것과는 다르다.
3. 격리 속성 제거는 신뢰할 수 있는 테스트 앱에만 쓴다
내가 만든 앱이고 파일이 변조되지 않았음을 확실히 아는 경우, 테스트 목적으로 격리 속성을 제거할 수 있다.
xattr -dr com.apple.quarantine "/Applications/MyApp.app"
open "/Applications/MyApp.app"
이 명령은 앱을 올바르게 서명하거나 공증하는 것이 아니다. 단지 다운로드 출처에 따른 검사 트리거를 제거한다. 따라서 사용자에게 “실행이 안 되면 이 명령을 입력하라”고 안내하는 것은 배포 문제를 사용자에게 떠넘기는 방식이다.
4. Ad-hoc 서명은 마지막 로컬 진단 수단이다
서명이 전혀 없는 자체 빌드가 실행 가능한지만 확인하려면 임시 Ad-hoc 서명을 사용할 수 있다.
codesign --force --deep --sign - "/Applications/MyApp.app"이 방식은 기존 서명을 바꾸며, 일반 사용자에게 신뢰 가능한 개발자 신원을 제공하지 않는다. 복잡한 앱에서는 권한과 중첩 서명을 잘못 덮을 수 있으므로 배포용 해결책으로 사용하면 안 된다.
Developer ID 인증서만 받으면 해결될까?
아니다. Developer ID Application 인증서는 “이 코드를 누가 서명했는가”를 증명하는 수단이다. 인증서를 발급받았다는 사실만으로 기존 앱에 서명이 자동 적용되거나 공증되는 것은 아니다.
App Store 밖으로 안정적으로 배포하려면 일반적으로 다음 흐름이 필요하다.
완성된 앱 빌드
→ 중첩 실행 코드부터 안쪽에서 바깥쪽으로 서명
→ 최상위 앱 서명
→ 서명 검증
→ ZIP·DMG·PKG 패키징
→ Apple 공증 제출
→ 승인 결과와 로그 확인
→ 공증 티켓 스테이플링
→ 최종 배포 파일 재생성
→ 실제 다운로드 환경에서 테스트
Apple은 Developer ID 배포 안내에서 App Store 밖 앱에는 Developer ID 서명과 공증을 사용하도록 안내한다. 공증은 App Store 심사와 같지 않다. Apple 서비스가 알려진 악성코드와 흔한 코드 서명 문제를 자동 검사하고 티켓을 발급하는 절차다.
정식 배포 절차
1. 인증서와 개인 키를 확인한다
Apple Developer Program에서 Developer ID Application 인증서를 발급하고, 서명하는 Mac의 Keychain에 인증서와 대응하는 개인 키가 함께 있어야 한다.
security find-identity -v -p codesigning정상적인 identity는 다음과 비슷하게 보인다.
Developer ID Application: Developer Name (TEAMID)PKG 설치 프로그램은 앱 서명과 다른 Developer ID Installer 인증서가 필요하다.
2. Hardened Runtime과 필요한 Entitlement를 설정한다
공증에는 Hardened Runtime이 필요하다. Xcode 프로젝트라면 Signing & Capabilities에서 활성화하고, 앱 기능에 실제로 필요한 entitlement만 추가하는 것이 가장 안전하다.
커스텀 빌드에서 단순 앱을 CLI로 서명하는 기본 형태는 다음과 같다.
codesign \
  --force \
  --options runtime \
  --timestamp \
  --sign "Developer ID Application: Developer Name (TEAMID)" \
  "MyApp.app"
Electron의 JIT, Helper 앱, XPC Service, 로그인 항목처럼 구조가 복잡하면 프레임워크의 공식 빌드·서명 도구를 우선 사용해야 한다. entitlement를 넓게 추가하는 대신 실제 실행 기능에 필요한 예외만 설정한다.
3. 중첩 코드는 안쪽에서 바깥쪽으로 서명한다
.framework, .dylib, Helper 앱, XPC Service, 플러그인, 네이티브 모듈, 독립 실행 파일은 각각 적절한 entitlement로 먼저 서명한다. 마지막에 최상위 .app을 서명한다.
Apple의 배포용 코드 서명 문서는 서명 작업에서 codesign --deep을 사용하지 말라고 명시한다. 같은 옵션과 entitlement가 모든 중첩 코드에 잘못 적용되거나, 비표준 위치의 코드를 놓칠 수 있기 때문이다.
4. 서명을 검증한다
codesign --verify --deep --strict --verbose=4 "MyApp.app"
codesign -dv --verbose=4 "MyApp.app"Authority, TeamIdentifier, Timestamp, Runtime과 entitlement를 확인한다. 이 단계가 실패하면 패키징이나 공증으로 넘어가지 않는다.
5. 공증용 파일을 만든다
ZIP을 사용한다면 앱 번들 구조와 메타데이터를 유지하도록 ditto를 쓸 수 있다.
ditto -c -k --keepParent "MyApp.app" "MyApp.zip"공증 서비스는 ZIP, DMG, PKG를 받을 수 있다. 실제 배포 형식에 맞는 파일을 제출하는 편이 재현성을 높인다.
6. notarytool 인증 정보를 Keychain에 저장한다
Apple Account 방식은 일반 비밀번호가 아니라 앱 암호를 사용한다.
xcrun notarytool store-credentials "myapp-notary" \
  --apple-id "developer@example.com" \
  --team-id "YOUR_TEAM_ID" \
  --password "APP_SPECIFIC_PASSWORD"
CI에서는 App Store Connect API Key도 사용할 수 있다. Apple의 notarytool 워크플로 문서는 두 인증 방식과 Keychain profile 사용법을 설명한다.
7. 제출하고 로그를 확인한다
xcrun notarytool submit "MyApp.zip" \
  --keychain-profile "myapp-notary" \
  --wait
결과가 Accepted가 아니면 submission ID로 로그를 확인한다.
xcrun notarytool log "SUBMISSION_ID" \
  --keychain-profile "myapp-notary"
자주 발생하는 원인은 다음과 같다.
- 서명되지 않은 중첩 실행 코드
- Hardened Runtime 누락
- secure timestamp 누락
- 잘못된 인증서
- 부적절한 entitlement
- 서명 후 파일 변경
- 잘못된 번들 구조
Apple의 공증 문제 해결 문서는 로그의 구체적인 오류부터 고치는 방식을 권장한다.
8. 공증 티켓을 스테이플링하고 다시 패키징한다
ZIP으로 앱을 제출했다면 승인 후 원본 앱에 티켓을 스테이플링한다.
xcrun stapler staple "MyApp.app"
xcrun stapler validate "MyApp.app"
ZIP 자체에는 티켓을 스테이플링하지 않는다. 스테이플링된 앱으로 최종 ZIP을 다시 만든다.
ditto -c -k --keepParent "MyApp.app" "MyApp-final.zip"Stapling은 Mac이 Apple 서버에 연결할 수 없는 상황에서도 공증 티켓을 확인하도록 돕는다. DMG나 PKG를 최종 배포한다면 해당 컨테이너의 공증·스테이플링도 배포 흐름에 맞게 처리한다.
9. 최종 파일을 다시 검증한다
codesign --verify --deep --strict --verbose=4 "MyApp.app"
spctl --assess --type execute --verbose=4 "MyApp.app"
xcrun stapler validate "MyApp.app"
그다음 실제 배포 URL에서 파일을 다운로드해 실행한다. 개발 폴더의 원본만 실행해서는 Gatekeeper 경로를 재현할 수 없다.
공증했는데도 “손상됨”이 나오는 흔한 이유
서명 후 파일이 바뀌었다
아이콘, 설정 파일, JavaScript bundle, 실행 권한, framework를 서명 뒤에 변경하면 봉인된 리소스 해시가 달라진다. 코드 서명은 빌드가 완전히 끝난 다음 수행해야 한다.
공증한 파일과 배포한 파일이 다르다
공증 후 다시 빌드했거나 다른 ZIP을 업로드한 경우다. 공증 승인부터 최종 패키징까지 artifact를 명확히 추적해야 한다.
내부 Helper나 framework 서명이 빠졌다
최상위 앱만 서명해도 codesign 명령이 성공한 것처럼 보일 수 있다. --deep --strict 검증과 공증 로그로 중첩 코드 문제를 찾는다.
인증서만 있고 개인 키가 없다
다른 Mac으로 .cer 파일만 옮기면 인증서 이름은 보여도 서명할 수 없다. 인증서와 개인 키가 함께 있는 signing identity가 필요하다.
entitlement가 빌드 구조와 맞지 않는다
JIT나 library validation 예외가 필요한 런타임도 있지만, 불필요한 권한은 보안을 약화하고 문제 분석을 어렵게 한다. 프레임워크 공식 설정과 공증 로그를 기준으로 최소 권한만 적용한다.
앱 번들 구조가 잘못됐다
실행 코드가 예상하지 않은 폴더에 있거나 Info.plist의 실행 파일 이름과 실제 파일이 다르면 Gatekeeper 경고처럼 보이는 실행 실패가 발생할 수 있다.
배포 전 깨끗한 환경에서 테스트하기
개발자의 Mac에는 이전 실행 허용 기록, 인증서, 격리 속성 제거, 캐시가 남아 있다. 그래서 개발 Mac에서 열린다는 사실만으로 배포 성공을 판단하면 안 된다.
최종 테스트에는 다음 조건을 포함한다.
- 앱을 설치한 적 없는 사용자 계정 또는 Mac
- 개발 인증서가 설치되지 않은 환경
- 실제 브라우저 다운로드
- 기본 Gatekeeper 설정
- 온라인과 오프라인 실행
- 지원 대상 Apple Silicon·Intel 환경
- 지원하는 최소 macOS 버전
- 자동 업데이트를 사용한다면 업데이트 artifact까지 별도 검증
가상 머신은 반복 테스트에 유용하지만, 시스템 확장, 로그인 항목, 권한 요청, 보안 하드웨어 연동이 있다면 실제 Mac에서도 확인한다.
실무 체크리스트
로컬 테스트
- 경고가 단순 미확인 개발자 경고인지 악성코드 경고인지 구분
-
codesign --verify --deep --strict로 서명 확인 -
spctl --assess로 Gatekeeper 판정 확인 - 신뢰할 수 있는 자체 빌드일 때만 그래도 열기 또는 격리 속성 제거
- Ad-hoc 서명을 배포용 서명으로 오해하지 않기
외부 배포
- Developer ID Application identity와 개인 키 확인
- Hardened Runtime과 최소 entitlement 적용
- 중첩 코드를 안쪽부터 서명
- 최상위 앱 서명 후 검증
- 최종 artifact를
notarytool로 공증 - 승인 티켓 스테이플링
- 스테이플링된 앱으로 최종 ZIP·DMG·PKG 생성
- 실제 다운로드와 깨끗한 Mac 환경에서 테스트
정리
“앱이 손상되어 열 수 없습니다”라는 경고는 실제 파일 손상일 수도 있고, Gatekeeper가 서명·공증·무결성을 확인하지 못한 결과일 수도 있다. 먼저 경고 종류와 codesign, spctl 결과를 확인해야 한다.
내가 만든 앱을 잠시 테스트할 때는 시스템 설정의 그래도 열기가 가장 안전한 우선순위다. xattr 제거와 Ad-hoc 서명은 출처와 무결성을 확실히 아는 로컬 빌드에서만 제한적으로 사용한다.
일반 사용자에게 배포할 때의 해법은 우회 명령이 아니다. 완성된 artifact를 올바른 순서로 서명하고, Hardened Runtime을 적용하고, Apple 공증과 티켓 스테이플링을 거친 바로 그 파일을 배포하는 것이 핵심이다.
Apple 공식 자료
When you try to run a macOS app you developed on another Mac, you may see this warning:
“The app is damaged and can't be opened. You should move it to the Trash.”
This wording does not always mean the file is physically corrupted. Similar warnings can appear when the app has no valid code signature, the signature has been broken, the app has not been notarized, or a quarantined download fails Gatekeeper's checks.
However, you should not assume that every warning is merely a signing problem. Apple also blocks apps that have actually been modified or damaged, use revoked authorization, or contain known malicious content. The right first step is therefore not to disable security, but to identify the warning and inspect the signature.
This guide separates two situations:
- temporarily running your own build on a development or test Mac;
- distributing the app to other people through a website, GitHub, email, ZIP, DMG, or PKG.
The solutions are not the same.
The Short Answer
| Situation | Appropriate response |
|---|---|
| An unknown app reports malware or says it will damage the Mac | Do not bypass the warning; delete it or contact the developer |
| A build you just created is blocked on a test Mac | Diagnose its signature, quarantine state, and Gatekeeper assessment |
| You need to open a trusted, unnotarized app once | Prefer Open Anyway in System Settings |
| You are distributing outside the App Store | Use Developer ID signing, Hardened Runtime, notarization, and validation |
| A notarized app still fails on some Macs | Confirm that the distributed artifact is the notarized one and all nested code is signed |
Apple's current support guidance says a damaged-app warning may indicate real corruption or tampering. Applying xattr to an unknown internet download is therefore unsafe.
What Gatekeeper Checks
Gatekeeper is the macOS security system that evaluates apps, plug-ins, and installer packages obtained outside the App Store. According to Apple's Gatekeeper security guide, macOS checks whether downloaded software:
- is signed by a registered developer;
- has been notarized by Apple;
- remains unchanged after signing;
- contains no known malicious content; and
- is something the user actually intended to run.
Files downloaded through a browser, messaging app, or cloud service carry provenance information. As a result, the same .app may run directly from a build folder but be blocked after you upload it as a ZIP and download it again.
That difference is useful. Testing the real download path exposes problems your users would otherwise find first.
Distinguish the Warning Message
The exact wording varies by macOS version and cause.
“This app was downloaded from the Internet. Are you sure you want to open it?”
Even a correctly signed and notarized app may show this confirmation on first launch. It is a normal check that the download was intentional.
“The developer cannot be verified” or “Apple cannot check it for malicious software”
macOS cannot confirm the developer signature or notarization. If it is your own test build and you know it has not been altered, you may temporarily authorize it.
“The app is damaged and can't be opened”
The signature may be invalid, or files may have changed after signing. The archive or transfer may also be genuinely corrupt. Verify with codesign before bypassing anything.
“The app will damage your computer” or a malware alert
Apple uses these warnings when it detects malicious content or revoked authorization. Do not use Open Anyway or remove quarantine to bypass them.
A Safe Local Testing Sequence
Use the following steps only for an app you built yourself or whose hash and delivery path you fully trust.
1. Try “Open Anyway” first
Attempt to open the app once, then go to:
- System Settings
- Privacy & Security
- the Security section near the bottom
- Open Anyway beside the blocked app
- authenticate and confirm Open
According to the Apple user guide, this button may remain available for about an hour after the launch attempt. Managed Macs may hide it through MDM policy.
2. Inspect quarantine and the signature
Check for extended attributes:
xattr -l "/Applications/MyApp.app"
Verify the signature structure and integrity:
codesign --verify --deep --strict --verbose=4 "/Applications/MyApp.app"
Display signature details:
codesign -dv --verbose=4 "/Applications/MyApp.app"
Check Gatekeeper's current assessment:
spctl --assess --type execute --verbose=4 "/Applications/MyApp.app"
Typical results mean:
| Result | Meaning |
|---|---|
code object is not signed at all |
The app has no code signature |
a sealed resource is missing or invalid |
A signed file was changed or removed |
rejected, no usable signature |
Gatekeeper found no usable signature |
accepted, source=Notarized Developer ID |
Developer ID signing and notarization were accepted |
Using codesign --deep for verification recursively checks nested code. That is different from using --deep as a one-command production signing strategy.
3. Remove quarantine only from a trusted test build
If you built the app and know it has not been tampered with, you can remove quarantine for a local test:
xattr -dr com.apple.quarantine "/Applications/MyApp.app"
open "/Applications/MyApp.app"
This does not sign or notarize the app. It removes the download-provenance trigger. Telling end users to run this command transfers a distribution problem to them instead of fixing it.
4. Treat Ad-hoc signing as a last local diagnostic
To check whether an entirely unsigned local build can run, you can apply an Ad-hoc signature:
codesign --force --deep --sign - "/Applications/MyApp.app"
This changes any existing signature and provides no trusted developer identity to other users. It can also overwrite entitlements or nested signatures in a complex app, so it is not a distribution solution.
Is a Developer ID Certificate Enough?
No. A Developer ID Application certificate proves who signed the code. Obtaining the certificate does not automatically sign or notarize an existing app.
A reliable outside-the-App-Store workflow generally looks like this:
Finish the app build
→ Sign nested executable code from the inside out
→ Sign the top-level app
→ Verify signatures
→ Package as ZIP, DMG, or PKG
→ Submit to Apple's notary service
→ Inspect the result and log
→ Staple the notarization ticket
→ Create the final distribution artifact
→ Test the real download on a clean Mac
Apple's Developer ID distribution guidance recommends Developer ID signing and notarization for software distributed outside the App Store. Notarization is not App Store review. It is an automated scan for known malware and common code-signing problems that produces a ticket.
The Production Distribution Workflow
1. Confirm the certificate and private key
Create a Developer ID Application certificate through the Apple Developer Program. The certificate and its matching private key must both be present in the signing Mac's Keychain.
security find-identity -v -p codesigning
A valid identity looks similar to:
Developer ID Application: Developer Name (TEAMID)
A PKG installer uses a separate Developer ID Installer certificate.
2. Enable Hardened Runtime and required entitlements
Notarization requires Hardened Runtime. In an Xcode project, enable it in Signing & Capabilities and add only the entitlements the app actually needs.
For a simple custom build, a basic CLI signature looks like:
codesign \
  --force \
  --options runtime \
  --timestamp \
  --sign "Developer ID Application: Developer Name (TEAMID)" \
  "MyApp.app"
For Electron JIT, Helper apps, XPC Services, login items, and other complex structures, prefer the framework's official build and signing tools. Add the minimum required exceptions instead of broad entitlements.
3. Sign nested code from the inside out
Sign each .framework, .dylib, Helper app, XPC Service, plug-in, native module, and standalone executable first, using the correct entitlements for each. Sign the outer .app last.
Apple's distribution signing documentation explicitly says not to use codesign --deep for signing. It can apply the wrong options to all nested code and miss executable code stored in nonstandard locations.
4. Verify the signature
codesign --verify --deep --strict --verbose=4 "MyApp.app"
codesign -dv --verbose=4 "MyApp.app"
Inspect Authority, TeamIdentifier, Timestamp, Runtime, and entitlements. Do not continue to packaging or notarization if verification fails.
5. Create the notarization artifact
For a ZIP, ditto preserves the app bundle and metadata:
ditto -c -k --keepParent "MyApp.app" "MyApp.zip"
The notary service accepts ZIP, DMG, and PKG files. Submitting the format you actually distribute improves reproducibility.
6. Store notarytool credentials in Keychain
Apple Account authentication uses an app-specific password, not your ordinary account password:
xcrun notarytool store-credentials "myapp-notary" \
  --apple-id "developer@example.com" \
  --team-id "YOUR_TEAM_ID" \
  --password "APP_SPECIFIC_PASSWORD"
CI can use an App Store Connect API key instead. Apple's notarytool workflow guide documents both methods and Keychain profiles.
7. Submit and inspect the log
xcrun notarytool submit "MyApp.zip" \
  --keychain-profile "myapp-notary" \
  --wait
If the result is not Accepted, retrieve the log with the submission ID:
xcrun notarytool log "SUBMISSION_ID" \
  --keychain-profile "myapp-notary"
Common causes include:
- unsigned nested executable code;
- missing Hardened Runtime;
- missing secure timestamp;
- the wrong certificate;
- invalid entitlements;
- files modified after signing; and
- an invalid bundle structure.
Apple's notarization troubleshooting guide recommends fixing the specific issues reported in the log.
8. Staple the ticket and repackage
When you submit an app inside a ZIP, staple the accepted ticket to the original app:
xcrun stapler staple "MyApp.app"
xcrun stapler validate "MyApp.app"
You cannot staple a ZIP directly. Recreate the final ZIP from the stapled app:
ditto -c -k --keepParent "MyApp.app" "MyApp-final.zip"
Stapling helps a Mac verify notarization when it cannot reach Apple's servers. If your final distribution is a DMG or PKG, handle notarization and stapling for that container as part of the release workflow.
9. Validate the final artifact again
codesign --verify --deep --strict --verbose=4 "MyApp.app"
spctl --assess --type execute --verbose=4 "MyApp.app"
xcrun stapler validate "MyApp.app"
Then download the file from the real distribution URL and launch it. Running only the original app in the build folder does not reproduce the user's Gatekeeper path.
Why a Notarized App Can Still Look Damaged
Files changed after signing
Changing an icon, configuration file, JavaScript bundle, executable permission, or framework after signing changes the sealed resource hashes. Sign only after the build is fully complete.
The notarized artifact is not the distributed artifact
This happens when you rebuild after notarization or upload a different ZIP. Track the artifact from notarization approval through final packaging.
A Helper or framework is unsigned
Signing only the outer app can appear successful. Use --deep --strict verification and the notarization log to identify nested-code failures.
The certificate has no private key
Moving only a .cer file to another Mac may show the certificate name but cannot produce a signature. You need a signing identity containing both the certificate and private key.
Entitlements do not match the runtime
Some runtimes need JIT or library-validation exceptions. Unnecessary entitlements weaken security and make failures harder to diagnose. Follow the framework's official settings and add the minimum required permissions.
The app bundle is malformed
Executable code in an unexpected folder, or a mismatch between the executable name in Info.plist and the actual file, can produce launch failures that resemble Gatekeeper errors.
Test in a Clean Environment
A developer Mac may remember previous launch approvals, contain the signing certificate, or have quarantine removed. Successful launch there does not prove that distribution works.
Final testing should include:
- a Mac or user account that has never installed the app;
- no developer certificate installed;
- download through the real browser and URL;
- default Gatekeeper settings;
- online and offline launch;
- supported Apple Silicon and Intel environments;
- the minimum supported macOS version; and
- update artifacts, if the app has automatic updates.
Virtual machines are useful for repeatable tests. Apps with system extensions, login items, permission prompts, or security-hardware integration should also be tested on physical Macs.
Practical Checklist
Local testing
- Distinguish an unidentified-developer warning from a malware warning
- Verify with
codesign --verify --deep --strict - Check Gatekeeper with
spctl --assess - Use Open Anyway or quarantine removal only for a trusted self-built app
- Do not mistake Ad-hoc signing for distribution signing
External distribution
- Confirm the Developer ID Application identity and private key
- Enable Hardened Runtime and minimum entitlements
- Sign nested code from the inside out
- Sign and verify the outer app
- Notarize the final artifact with
notarytool - Staple the accepted ticket
- Build the final ZIP, DMG, or PKG from the stapled app
- Test a real download on a clean Mac
Summary
“The app is damaged and can't be opened” can indicate real corruption, or it can mean Gatekeeper could not verify the app's signing, notarization, or integrity. Start by identifying the warning and checking codesign and spctl.
For a temporary test of your own build, Open Anyway in System Settings is the safest first option. Use xattr removal and Ad-hoc signing only for a local artifact whose source and integrity you know.
For users, the fix is not a bypass command. The essential workflow is to sign the finished artifact in the correct order, enable Hardened Runtime, notarize it, staple its ticket, and distribute that exact artifact.
Official Apple Resources
当你尝试在另一台 Mac 上运行自己开发的 macOS 应用时,可能会看到下面的警告:
“应用已损坏,无法打开。你应该将它移到废纸篓。”
这句话并不总是表示文件在物理上已经损坏。当应用没有有效的代码签名、签名已失效、尚未经过公证,或者带隔离属性的下载未能通过 Gatekeeper 检查时,也可能出现类似警告。
但也不能把所有警告都当作单纯的签名问题。Apple 也会阻止实际被修改或损坏、授权已撤销,或包含已知恶意内容的应用。因此,第一步不是关闭安全功能,而是区分警告类型并检查签名。
本文将两种情况分开处理:
- 在自己的开发 Mac 或测试 Mac 上临时运行自己的构建;
- 通过网站、GitHub、邮件、ZIP、DMG 或 PKG 向其他用户分发。
两者的解决方案并不相同。
先看结论
| 情况 | 合适的处理方式 |
|---|---|
| 未知应用提示恶意软件或称会损坏 Mac | 不要绕过警告,删除应用或联系开发者 |
| 刚构建的应用在测试 Mac 上被阻止 | 检查签名、隔离状态和 Gatekeeper 判定 |
| 只需打开一次可信但未公证的应用 | 优先使用系统设置中的 Open Anyway |
| 在 App Store 之外正式分发 | 需要 Developer ID 签名、Hardened Runtime、公证和验证 |
| 已公证应用仍在部分 Mac 上失败 | 确认实际分发的 artifact 就是被公证的文件,并检查所有嵌套代码 |
Apple 当前的支持文档指出,“应用已损坏”也可能意味着真实损坏或篡改。因此,不应对来源不明的互联网下载执行 xattr。
Gatekeeper 会检查什么
Gatekeeper 是 macOS 用来评估 App Store 之外应用、插件和安装包的安全体系。根据 Apple 的 Gatekeeper 安全指南,macOS 会检查下载的软件是否:
- 由已注册开发者签名;
- 经过 Apple 公证;
- 签名后未被修改;
- 不包含已知恶意内容;
- 确实是用户有意运行的文件。
通过浏览器、聊天软件或云服务下载的文件会带有来源信息。因此,同一个 .app 可能在构建目录中直接运行正常,但上传成 ZIP 后重新下载就会被阻止。
这正是测试真实下载流程很重要的原因:它能让开发者先发现用户会遇到的问题。
先区分警告文案
具体文案会随 macOS 版本和原因而变化。
“此应用从互联网下载。确定要打开吗?”
即使应用已正确签名并公证,第一次启动时也可能出现这一确认框。这是系统确认下载行为是否符合用户意图的正常步骤。
“无法验证开发者”或“Apple 无法检查其中是否包含恶意软件”
macOS 无法确认开发者签名或公证。如果这是你自己的测试构建,并且能确认未被篡改,可以暂时授权运行。
“应用已损坏,无法打开”
签名可能失效,或文件在签名后被修改。压缩包或传输过程也可能真的损坏。绕过之前先用 codesign 验证。
“应用会损坏你的电脑”或恶意软件警告
Apple 在检测到恶意内容或授权被撤销时会显示此类警告。此时不要使用 Open Anyway,也不要移除隔离属性。
安全的本地测试顺序
以下步骤只适用于你亲自构建,或能够完全确认哈希与传输路径可信的应用。
1. 优先使用“Open Anyway”
先尝试打开一次应用,然后进入:
- System Settings
- Privacy & Security
- 页面底部的 Security
- 被阻止应用旁的 Open Anyway
- 身份验证后再次选择 Open
根据 Apple 使用指南,该按钮可能在启动尝试后保留约一小时。受管理的 Mac 也可能因 MDM 政策看不到此选项。
2. 检查隔离属性与签名
查看 extended attributes:
xattr -l "/Applications/MyApp.app"
验证签名结构和完整性:
codesign --verify --deep --strict --verbose=4 "/Applications/MyApp.app"
显示签名详情:
codesign -dv --verbose=4 "/Applications/MyApp.app"
检查 Gatekeeper 当前判定:
spctl --assess --type execute --verbose=4 "/Applications/MyApp.app"
常见结果可这样理解:
| 结果 | 含义 |
|---|---|
code object is not signed at all |
应用没有代码签名 |
a sealed resource is missing or invalid |
签名后的文件被修改或删除 |
rejected, no usable signature |
Gatekeeper 未找到可用签名 |
accepted, source=Notarized Developer ID |
Developer ID 签名和公证被接受 |
在验证时使用 codesign --deep 可以递归检查嵌套代码。这和把 --deep 当作生产签名的一键方案不是一回事。
3. 只对可信测试构建移除隔离属性
如果应用是你自己构建的,并能确认未被篡改,可以为本地测试移除隔离属性:
xattr -dr com.apple.quarantine "/Applications/MyApp.app"
open "/Applications/MyApp.app"
这不会给应用签名或公证,只是移除下载来源触发器。让用户在终端执行此命令,相当于把分发问题转嫁给用户。
4. 将 Ad-hoc 签名视为最后的本地诊断手段
如果只想验证完全未签名的本地构建能否运行,可以添加 Ad-hoc 签名:
codesign --force --deep --sign - "/Applications/MyApp.app"
它会改变现有签名,也无法向其他用户提供可信的开发者身份。复杂应用中还可能覆盖 entitlement 或嵌套签名,因此它不是正式分发方案。
只有 Developer ID 证书就够了吗?
不够。Developer ID Application 证书只能证明代码由谁签名。获得证书不会自动给现有应用签名或公证。
可靠的 App Store 外分发流程通常如下:
完成应用构建
→ 从内到外签署嵌套执行代码
→ 签署顶层应用
→ 验证签名
→ 打包为 ZIP、DMG 或 PKG
→ 提交 Apple 公证
→ 检查结果和日志
→ Staple 公证票据
→ 创建最终分发 artifact
→ 在干净 Mac 上测试真实下载
Apple 的 Developer ID 分发指南建议 App Store 外的软件使用 Developer ID 签名与公证。公证并不是 App Store 审核,而是对已知恶意软件和常见代码签名问题的自动扫描,并为通过的软件签发票据。
正式分发流程
1. 确认证书与私钥
通过 Apple Developer Program 创建 Developer ID Application 证书。证书和匹配的私钥都必须在签名 Mac 的 Keychain 中。
security find-identity -v -p codesigning
有效 identity 类似:
Developer ID Application: Developer Name (TEAMID)
PKG 安装器使用单独的 Developer ID Installer 证书。
2. 启用 Hardened Runtime 并配置必要 entitlement
公证要求 Hardened Runtime。Xcode 项目应在 Signing & Capabilities 中启用,并只添加应用实际需要的 entitlement。
简单自定义构建的基本 CLI 签名形式为:
codesign \
  --force \
  --options runtime \
  --timestamp \
  --sign "Developer ID Application: Developer Name (TEAMID)" \
  "MyApp.app"
对于 Electron JIT、Helper 应用、XPC Service、登录项等复杂结构,应优先使用框架官方构建与签名工具,并只加入最低限度的例外权限。
3. 从内到外签署嵌套代码
先分别签署每个 .framework、.dylib、Helper 应用、XPC Service、插件、原生模块和独立执行文件,并为每项使用正确 entitlement。最后再签署外层 .app。
Apple 的分发代码签名文档明确要求签名时不要使用 codesign --deep。它可能给所有嵌套代码应用错误的选项,也可能漏掉非标准位置中的执行代码。
4. 验证签名
codesign --verify --deep --strict --verbose=4 "MyApp.app"
codesign -dv --verbose=4 "MyApp.app"
检查 Authority、TeamIdentifier、Timestamp、Runtime 和 entitlement。验证失败时不要继续打包或公证。
5. 创建公证 artifact
如果使用 ZIP,可以用 ditto 保留应用 bundle 与元数据:
ditto -c -k --keepParent "MyApp.app" "MyApp.zip"
公证服务支持 ZIP、DMG 和 PKG。提交实际分发的格式有助于保持流程可复现。
6. 将 notarytool 凭据保存到 Keychain
Apple Account 验证使用 app-specific password,而不是普通账号密码:
xcrun notarytool store-credentials "myapp-notary" \
  --apple-id "developer@example.com" \
  --team-id "YOUR_TEAM_ID" \
  --password "APP_SPECIFIC_PASSWORD"
CI 也可以使用 App Store Connect API Key。Apple 的 notarytool 工作流指南介绍了这两种方式及 Keychain profile。
7. 提交并检查日志
xcrun notarytool submit "MyApp.zip" \
  --keychain-profile "myapp-notary" \
  --wait
如果结果不是 Accepted,用 submission ID 获取日志:
xcrun notarytool log "SUBMISSION_ID" \
  --keychain-profile "myapp-notary"
常见原因包括:
- 嵌套执行代码未签名;
- 未启用 Hardened Runtime;
- 缺少 secure timestamp;
- 证书错误;
- entitlement 无效;
- 签名后文件被修改;
- bundle 结构无效。
Apple 的公证问题排查指南建议根据日志中的具体错误逐项修复。
8. Staple 票据并重新打包
如果提交的是包含应用的 ZIP,应把通过的票据 staple 到原始应用:
xcrun stapler staple "MyApp.app"
xcrun stapler validate "MyApp.app"
ZIP 本身不能直接 staple。应从已 staple 的应用重新创建最终 ZIP:
ditto -c -k --keepParent "MyApp.app" "MyApp-final.zip"
Stapling 可以让无法连接 Apple 服务器的 Mac 验证公证状态。如果最终分发的是 DMG 或 PKG,也要把容器的公证和 stapling 纳入发布流程。
9. 再次验证最终 artifact
codesign --verify --deep --strict --verbose=4 "MyApp.app"
spctl --assess --type execute --verbose=4 "MyApp.app"
xcrun stapler validate "MyApp.app"
然后从真实分发 URL 下载并启动。只运行构建目录中的原始应用,无法复现用户的 Gatekeeper 路径。
为什么已公证应用仍会显示损坏
签名后文件被修改
签名后修改图标、配置文件、JavaScript bundle、执行权限或 framework,会改变 sealed resource hash。必须在构建完全结束后再签名。
被公证的 artifact 与分发文件不同
公证后重新构建或上传了另一个 ZIP 都会导致此问题。应从公证批准到最终打包持续追踪同一个 artifact。
Helper 或 framework 未签名
只签外层应用可能看似成功。使用 --deep --strict 验证和公证日志寻找嵌套代码问题。
证书没有私钥
只把 .cer 文件复制到另一台 Mac,可能看得到证书名称,却无法完成签名。signing identity 必须同时包含证书和私钥。
Entitlement 与运行时不匹配
有些 runtime 需要 JIT 或 library validation 例外,但多余权限会削弱安全并增加排查难度。应遵循框架官方设置,只添加最低限度的权限。
应用 bundle 结构错误
执行代码位于非预期文件夹,或 Info.plist 中的执行文件名与真实文件不一致,都可能造成类似 Gatekeeper 问题的启动失败。
在干净环境中测试
开发 Mac 可能记住了之前的运行许可,也可能装有签名证书或已移除隔离属性。能在开发机运行,并不能证明分发成功。
最终测试应包括:
- 从未安装过应用的 Mac 或用户账号;
- 未安装开发证书;
- 通过真实浏览器和 URL 下载;
- 默认 Gatekeeper 设置;
- 在线和离线启动;
- 支持的 Apple Silicon 与 Intel 环境;
- 最低支持的 macOS 版本;
- 如果有自动更新,还要验证更新 artifact。
虚拟机适合重复测试。包含系统扩展、登录项、权限请求或安全硬件集成的应用,还应在真实 Mac 上测试。
实用检查清单
本地测试
- 区分无法验证开发者的警告与恶意软件警告
- 使用
codesign --verify --deep --strict验证 - 使用
spctl --assess检查 Gatekeeper - 只对可信的自建应用使用 Open Anyway 或移除隔离属性
- 不要把 Ad-hoc 签名当作分发签名
外部分发
- 确认 Developer ID Application identity 与私钥
- 启用 Hardened Runtime 与最低 entitlement
- 从内到外签署嵌套代码
- 签署并验证外层应用
- 用
notarytool公证最终 artifact - Staple 通过的票据
- 从已 staple 的应用创建最终 ZIP、DMG 或 PKG
- 在干净 Mac 上测试真实下载
总结
“应用已损坏,无法打开”可能表示真实损坏,也可能表示 Gatekeeper 无法验证应用的签名、公证或完整性。首先应区分警告,并检查 codesign 和 spctl。
临时测试自己的构建时,系统设置中的 Open Anyway 是最安全的首选。只有在完全知道本地 artifact 的来源和完整性时,才使用 xattr 移除与 Ad-hoc 签名。
面向用户时,解决方案不是绕过命令。核心流程是:按正确顺序签署最终 artifact,启用 Hardened Runtime,完成公证和票据 stapling,并分发完全相同的文件。
Apple 官方资料
自分で開発したmacOSアプリを別のMacで実行すると、次のような警告が表示されることがあります。
「アプリが壊れているため開けません。ゴミ箱に入れる必要があります。」
この文言は、必ずしもファイルが物理的に壊れていることを意味しません。有効なコード署名がない、署名が壊れている、公証されていない、または隔離されたダウンロードがGatekeeperの検査に失敗した場合にも、似た警告が出ることがあります。
一方で、すべてを単なる署名問題だと決めつけるのも危険です。Appleは、実際に変更・破損したアプリ、認証が取り消されたアプリ、既知の悪意あるコンテンツを含むアプリもブロックします。最初にすべきことはセキュリティを無効にすることではなく、警告の種類を見分けて署名を調べることです。
この記事では、次の2つを分けて説明します。
- 自分のビルドを開発MacまたはテストMacで一時的に実行する場合
- Webサイト、GitHub、メール、ZIP、DMG、PKGで一般ユーザーに配布する場合
両者の解決策は同じではありません。
先に結論
| 状況 | 適切な対応 |
|---|---|
| 不明なアプリがマルウェア警告やMacを損傷するという警告を表示 | 回避せず、削除するか開発者に確認 |
| 直前に作ったビルドがテストMacでブロック | 署名、隔離状態、Gatekeeper判定を診断 |
| 信頼できる未公証アプリを一度だけ開く | システム設定の このまま開く を優先 |
| App Store外で一般配布 | Developer ID署名、Hardened Runtime、公証、検証が必要 |
| 公証済みアプリが一部Macで失敗 | 配布artifactが公証対象と同一か、全ネストコードが署名済みか確認 |
Appleの現在のサポート文書では、「壊れている」という警告が実際の破損や改ざんを示す場合もあると説明しています。出所不明のダウンロードにxattrを適用するのは安全ではありません。
Gatekeeperが確認すること
Gatekeeperは、App Store以外から入手したアプリ、プラグイン、インストーラーパッケージを評価するmacOSのセキュリティ機構です。AppleのGatekeeperセキュリティガイドによると、ダウンロードしたソフトウェアについて次を確認します。
- 登録済み開発者が署名しているか
- Appleの公証を受けているか
- 署名後に変更されていないか
- 既知の悪意あるコンテンツがないか
- ユーザーが意図して実行したファイルか
ブラウザ、メッセージアプリ、クラウドサービスから取得したファイルには出所情報が付きます。そのため、同じ.appでもビルドフォルダでは動き、ZIPにしてアップロード後に再ダウンロードするとブロックされることがあります。
実際のダウンロード経路をテストすれば、ユーザーより先に問題を発見できます。
警告文を区別する
具体的な文言はmacOSのバージョンと原因で変わります。
「インターネットからダウンロードされたアプリケーションです。開いてもよろしいですか?」
正しく署名・公証されたアプリでも、初回起動時に表示されることがあります。ダウンロードがユーザーの意図どおりかを確認する正常な手順です。
「開発元を確認できません」または「悪質なソフトウェアかどうかをAppleでは確認できない」
macOSが開発者署名または公証を確認できません。自分のテストビルドで改ざんされていないと分かっている場合は、一時的に許可できます。
「アプリが壊れているため開けません」
署名が無効、または署名後にファイルが変更された可能性があります。転送・圧縮で実際に破損した場合もあります。回避する前にcodesignで検証します。
「コンピュータに損害を与えます」またはマルウェア警告
Appleは悪意あるコンテンツや取り消された認証を検出した場合にこの警告を表示します。このまま開く、または隔離属性の削除で回避しないでください。
安全なローカルテストの順序
自分でビルドしたアプリ、またはハッシュと配布経路を完全に信頼できるアプリだけに使います。
1. 最初に「このまま開く」を試す
一度アプリを開いて警告を出し、次の順に進みます。
- システム設定
- プライバシーとセキュリティ
- 下部の セキュリティ
- ブロックされたアプリ横の このまま開く
- 認証して再度 開く
Appleユーザーガイドによると、このボタンは起動を試してから約1時間表示される場合があります。管理対象MacではMDMポリシーにより表示されないことがあります。
2. 隔離属性と署名を調べる
extended attributesを確認します。
xattr -l "/Applications/MyApp.app"
署名構造と整合性を検証します。
codesign --verify --deep --strict --verbose=4 "/Applications/MyApp.app"
署名の詳細を表示します。
codesign -dv --verbose=4 "/Applications/MyApp.app"
Gatekeeperの現在の判定を確認します。
spctl --assess --type execute --verbose=4 "/Applications/MyApp.app"
代表的な結果の意味は次のとおりです。
| 結果 | 意味 |
|---|---|
code object is not signed at all |
コード署名がない |
a sealed resource is missing or invalid |
署名済みファイルが変更または削除された |
rejected, no usable signature |
Gatekeeperが利用可能な署名を見つけられない |
accepted, source=Notarized Developer ID |
Developer ID署名と公証が認められた |
codesign --deepを検証で使うと、ネストコードを再帰的に確認できます。--deepを本番署名の一括手段にすることとは異なります。
3. 隔離属性の削除は信頼できるテストビルドだけ
自分でビルドし、改ざんされていないと分かっている場合、ローカルテスト用に隔離属性を削除できます。
xattr -dr com.apple.quarantine "/Applications/MyApp.app"
open "/Applications/MyApp.app"
これは署名や公証ではありません。ダウンロード出所による検査トリガーを削除するだけです。エンドユーザーにこのコマンドを案内するのは、配布側の問題をユーザーへ移すことになります。
4. Ad-hoc署名は最後のローカル診断手段
完全に未署名のローカルビルドが動くかだけを確認するなら、Ad-hoc署名を適用できます。
codesign --force --deep --sign - "/Applications/MyApp.app"
既存署名を変更し、他のユーザーへ信頼できる開発者IDを提供しません。複雑なアプリではentitlementやネスト署名を上書きする可能性もあるため、配布用の解決策ではありません。
Developer ID証明書だけで十分か
十分ではありません。Developer ID Application証明書は誰がコードを署名したかを証明します。証明書を取得しても、既存アプリが自動的に署名・公証されるわけではありません。
App Store外での安定した配布フローは通常、次のようになります。
アプリのビルドを完了
→ ネストした実行コードを内側から外側へ署名
→ 最上位アプリを署名
→ 署名を検証
→ ZIP・DMG・PKGにパッケージ
→ Apple公証へ提出
→ 結果とログを確認
→ 公証チケットをstaple
→ 最終配布artifactを作成
→ クリーンなMacで実際のダウンロードをテスト
AppleのDeveloper ID配布ガイドは、App Store外のソフトウェアにDeveloper ID署名と公証を推奨しています。公証はApp Store審査ではなく、既知のマルウェアと一般的なコード署名問題を自動検査し、チケットを発行する処理です。
正式な配布手順
1. 証明書と秘密鍵を確認する
Apple Developer ProgramでDeveloper ID Application証明書を作成します。署名するMacのKeychainに証明書と対応する秘密鍵の両方が必要です。
security find-identity -v -p codesigning
有効なidentityは次のように表示されます。
Developer ID Application: Developer Name (TEAMID)
PKGインストーラーには別のDeveloper ID Installer証明書を使います。
2. Hardened Runtimeと必要なentitlementを設定する
公証にはHardened Runtimeが必要です。XcodeプロジェクトではSigning & Capabilitiesで有効にし、実際に必要なentitlementだけを追加します。
単純なカスタムビルドの基本的なCLI署名は次の形です。
codesign \
  --force \
  --options runtime \
  --timestamp \
  --sign "Developer ID Application: Developer Name (TEAMID)" \
  "MyApp.app"
ElectronのJIT、Helperアプリ、XPC Service、ログイン項目など複雑な構造では、フレームワークの公式ビルド・署名ツールを優先し、必要最小限の例外だけを設定します。
3. ネストコードを内側から外側へ署名する
各.framework、.dylib、Helperアプリ、XPC Service、プラグイン、ネイティブモジュール、独立実行ファイルを、個別に正しいentitlementで先に署名します。外側の.appは最後です。
Appleの配布用コード署名文書は、署名時にcodesign --deepを使わないよう明記しています。すべてのネストコードに誤った設定を適用したり、非標準位置の実行コードを見落としたりするためです。
4. 署名を検証する
codesign --verify --deep --strict --verbose=4 "MyApp.app"
codesign -dv --verbose=4 "MyApp.app"
Authority、TeamIdentifier、Timestamp、Runtime、entitlementを確認します。失敗した状態でパッケージングや公証へ進みません。
5. 公証用artifactを作る
ZIPならdittoでアプリbundleとメタデータを維持できます。
ditto -c -k --keepParent "MyApp.app" "MyApp.zip"
公証サービスはZIP、DMG、PKGを受け付けます。実際に配布する形式を提出すると再現性が上がります。
6. notarytool認証情報をKeychainに保存する
Apple Account認証では通常のパスワードではなく、app-specific passwordを使います。
xcrun notarytool store-credentials "myapp-notary" \
  --apple-id "developer@example.com" \
  --team-id "YOUR_TEAM_ID" \
  --password "APP_SPECIFIC_PASSWORD"
CIではApp Store Connect API Keyも使用できます。Appleのnotarytoolワークフローガイドに両方式とKeychain profileが説明されています。
7. 提出してログを確認する
xcrun notarytool submit "MyApp.zip" \
  --keychain-profile "myapp-notary" \
  --wait
結果がAcceptedでなければsubmission IDでログを取得します。
xcrun notarytool log "SUBMISSION_ID" \
  --keychain-profile "myapp-notary"
よくある原因は次のとおりです。
- 未署名のネスト実行コード
- Hardened Runtimeの不足
- secure timestampの不足
- 誤った証明書
- 不正なentitlement
- 署名後のファイル変更
- 無効なbundle構造
Appleの公証トラブルシューティングに従い、ログに示された具体的な問題から直します。
8. チケットをstapleして再パッケージする
ZIP内のアプリを提出した場合、承認済みチケットを元のアプリにstapleします。
xcrun stapler staple "MyApp.app"
xcrun stapler validate "MyApp.app"
ZIP自体には直接stapleできません。staple済みアプリから最終ZIPを作り直します。
ditto -c -k --keepParent "MyApp.app" "MyApp-final.zip"
Staplingにより、Appleサーバーへ接続できないMacでも公証を確認しやすくなります。最終配布がDMGまたはPKGなら、そのコンテナの公証とstaplingもリリースフローへ組み込みます。
9. 最終artifactを再検証する
codesign --verify --deep --strict --verbose=4 "MyApp.app"
spctl --assess --type execute --verbose=4 "MyApp.app"
xcrun stapler validate "MyApp.app"
その後、実際の配布URLからダウンロードして起動します。ビルドフォルダ内の原本だけではユーザーのGatekeeper経路を再現できません。
公証済みアプリが壊れていると表示される理由
署名後にファイルが変わった
署名後にアイコン、設定ファイル、JavaScript bundle、実行権限、frameworkを変更するとsealed resource hashが変わります。ビルドが完全に終わった後で署名します。
公証対象と配布artifactが異なる
公証後に再ビルドした、または別のZIPを配布した場合です。公証承認から最終パッケージまで同一artifactを追跡します。
Helperまたはframeworkが未署名
外側だけを署名すると成功したように見える場合があります。--deep --strict検証と公証ログでネストコード問題を探します。
証明書に秘密鍵がない
.cerだけを別のMacへ移すと証明書名は見えても署名できません。証明書と秘密鍵を含むsigning identityが必要です。
Entitlementがruntimeと合っていない
JITやlibrary validationの例外が必要なruntimeもありますが、不要な権限はセキュリティを弱め、診断を難しくします。公式設定に従い最小権限だけを追加します。
アプリbundleの構造が誤っている
実行コードが想定外のフォルダにある、またはInfo.plistの実行ファイル名と実体が違うと、Gatekeeperエラーに似た起動失敗が起きます。
クリーンな環境でテストする
開発Macには以前の許可、署名証明書、隔離属性削除の状態が残っています。そこで起動できても配布成功の証明にはなりません。
最終テストには次を含めます。
- アプリを入れたことがないMacまたはユーザーアカウント
- 開発証明書がインストールされていない環境
- 実際のブラウザとURLからのダウンロード
- 既定のGatekeeper設定
- オンライン・オフライン起動
- 対応するApple Silicon・Intel環境
- 最小対応macOSバージョン
- 自動更新がある場合は更新artifact
仮想マシンは反復テストに便利です。システム拡張、ログイン項目、権限要求、セキュリティハードウェア連携があるアプリは実機Macでも確認します。
実務チェックリスト
ローカルテスト
- 未確認開発者の警告とマルウェア警告を区別
-
codesign --verify --deep --strictで検証 -
spctl --assessでGatekeeperを確認 - 信頼できる自作アプリだけに このまま開く または隔離削除を使用
- Ad-hoc署名を配布用署名と誤解しない
外部配布
- Developer ID Application identityと秘密鍵を確認
- Hardened Runtimeと最小entitlementを有効化
- ネストコードを内側から外側へ署名
- 外側アプリを署名・検証
- 最終artifactを
notarytoolで公証 - 承認チケットをstaple
- staple済みアプリから最終ZIP・DMG・PKGを作成
- クリーンなMacで実ダウンロードをテスト
まとめ
「アプリが壊れているため開けません」は実際の破損を示すことも、Gatekeeperが署名・公証・整合性を確認できなかったことを示す場合もあります。まず警告を区別し、codesignとspctlを確認します。
自分のビルドを一時的に試すなら、システム設定の このまま開く が最も安全な第一候補です。xattr削除とAd-hoc署名は、出所と整合性が分かるローカルartifactだけに使います。
ユーザー向けの解決策は回避コマンドではありません。完成したartifactを正しい順序で署名し、Hardened Runtimeを有効にし、公証してチケットをstapleし、その同じartifactを配布することが重要です。
Apple公式資料
Al intentar ejecutar en otro Mac una app de macOS que has desarrollado, puede aparecer este aviso:
«La app está dañada y no se puede abrir. Deberías trasladarla a la Papelera».
El mensaje no siempre significa que el archivo esté físicamente corrupto. También puede aparecer si la app no tiene una firma válida, la firma se ha roto, no está notarizada o una descarga en cuarentena no supera las comprobaciones de Gatekeeper.
Sin embargo, tampoco hay que asumir que todo es un simple problema de firma. Apple bloquea aplicaciones que realmente se han modificado o dañado, cuya autorización fue revocada o que contienen software malicioso conocido. El primer paso correcto no es desactivar la seguridad, sino identificar el aviso e inspeccionar la firma.
Esta guía separa dos situaciones:
- ejecutar temporalmente tu propio build en un Mac de desarrollo o pruebas;
- distribuir la app mediante una web, GitHub, correo, ZIP, DMG o PKG.
Las soluciones no son las mismas.
Respuesta rápida
| Situación | Respuesta adecuada |
|---|---|
| Una app desconocida muestra malware o dice que dañará el Mac | No evites el aviso; elimina la app o consulta al desarrollador |
| Un build recién creado queda bloqueado en un Mac de pruebas | Diagnostica firma, cuarentena y evaluación de Gatekeeper |
| Necesitas abrir una vez una app fiable sin notarizar | Usa primero Open Anyway en System Settings |
| Distribuyes fuera de App Store | Necesitas firma Developer ID, Hardened Runtime, notarización y validación |
| Una app notarizada falla en algunos Mac | Confirma que el artifact distribuido es el notarizado y que todo el código anidado está firmado |
La guía actual de Apple indica que el aviso de app dañada también puede significar corrupción o manipulación real. Por eso no es seguro aplicar xattr a una descarga desconocida.
Qué comprueba Gatekeeper
Gatekeeper es el sistema de seguridad de macOS que evalúa apps, plug-ins e instaladores obtenidos fuera de App Store. Según la guía de seguridad de Gatekeeper, macOS comprueba si el software:
- está firmado por un desarrollador registrado;
- ha sido notarizado por Apple;
- permanece sin cambios después de firmarse;
- no contiene contenido malicioso conocido;
- es el archivo que el usuario quería ejecutar.
Los archivos descargados mediante navegador, mensajería o nube incluyen información de procedencia. Por ello, el mismo .app puede abrirse desde el directorio de build, pero quedar bloqueado después de subirlo como ZIP y volver a descargarlo.
Probar la ruta real de descarga permite detectar antes los problemas que encontrarían los usuarios.
Distinguir el mensaje de aviso
La redacción varía según la versión de macOS y la causa.
«Esta app se descargó de Internet. ¿Seguro que quieres abrirla?»
Incluso una app correctamente firmada y notarizada puede mostrar esta confirmación en el primer inicio. Es una comprobación normal para confirmar que la descarga fue intencionada.
«No se puede verificar el desarrollador» o «Apple no puede comprobar si contiene software malicioso»
macOS no puede confirmar la firma o la notarización. Si es tu propio build de pruebas y sabes que no se ha alterado, puedes autorizarlo temporalmente.
«La app está dañada y no se puede abrir»
La firma puede ser inválida o los archivos pueden haber cambiado después de firmar. El archivo también puede haberse corrompido durante la transferencia. Verifica con codesign antes de evitar la protección.
«La app dañará el ordenador» o aviso de malware
Apple utiliza estos avisos cuando detecta contenido malicioso o autorización revocada. No uses Open Anyway ni elimines la cuarentena para evitarlos.
Secuencia segura para pruebas locales
Utiliza estos pasos solo con una app creada por ti o cuyo hash y ruta de entrega sean completamente fiables.
1. Probar primero “Open Anyway”
Intenta abrir la app una vez y ve a:
- System Settings
- Privacy & Security
- la sección Security cerca del final
- Open Anyway junto a la app bloqueada
- autentícate y confirma Open
Según la guía de Apple, el botón puede estar disponible durante aproximadamente una hora después del intento. Un Mac administrado puede ocultarlo mediante MDM.
2. Inspeccionar la cuarentena y la firma
Comprueba los extended attributes:
xattr -l "/Applications/MyApp.app"
Verifica la estructura e integridad de la firma:
codesign --verify --deep --strict --verbose=4 "/Applications/MyApp.app"
Muestra sus detalles:
codesign -dv --verbose=4 "/Applications/MyApp.app"
Consulta la evaluación actual de Gatekeeper:
spctl --assess --type execute --verbose=4 "/Applications/MyApp.app"
Interpretación habitual:
| Resultado | Significado |
|---|---|
code object is not signed at all |
La app no tiene firma |
a sealed resource is missing or invalid |
Un archivo firmado cambió o desapareció |
rejected, no usable signature |
Gatekeeper no encontró una firma utilizable |
accepted, source=Notarized Developer ID |
Firma Developer ID y notarización aceptadas |
Usar codesign --deep para verificar revisa recursivamente el código anidado. No es lo mismo que usar --deep como solución de firma de producción en un único comando.
3. Eliminar la cuarentena solo de un build fiable
Si tú creaste la app y sabes que no se ha manipulado, puedes quitar la cuarentena para una prueba local:
xattr -dr com.apple.quarantine "/Applications/MyApp.app"
open "/Applications/MyApp.app"
Esto no firma ni notariza la app. Solo elimina el indicador de procedencia. Pedir a los usuarios que ejecuten el comando traslada a ellos un problema de distribución.
4. Reservar la firma Ad-hoc para un último diagnóstico local
Para comprobar si un build totalmente sin firmar puede ejecutarse, puedes aplicar una firma Ad-hoc:
codesign --force --deep --sign - "/Applications/MyApp.app"
Esto modifica cualquier firma existente y no ofrece una identidad fiable a otros usuarios. En una app compleja puede sobrescribir entitlements o firmas anidadas, por lo que no es una solución de distribución.
¿Basta con un certificado Developer ID?
No. El certificado Developer ID Application demuestra quién firmó el código. Obtenerlo no firma ni notariza automáticamente una app existente.
Un flujo fiable fuera de App Store suele ser:
Terminar el build
→ Firmar el código ejecutable anidado desde dentro hacia fuera
→ Firmar la app de nivel superior
→ Verificar las firmas
→ Empaquetar como ZIP, DMG o PKG
→ Enviar al servicio de notarización de Apple
→ Revisar el resultado y el log
→ Staple el ticket de notarización
→ Crear el artifact final
→ Probar la descarga real en un Mac limpio
La guía de distribución con Developer ID recomienda firma Developer ID y notarización para software fuera de App Store. La notarización no es una revisión de App Store: es un análisis automático de malware conocido y problemas habituales de firma que genera un ticket.
Flujo de distribución
1. Confirmar certificado y clave privada
Crea un certificado Developer ID Application mediante Apple Developer Program. El certificado y su clave privada correspondiente deben estar en el Keychain del Mac que firma.
security find-identity -v -p codesigning
Una identity válida se parece a:
Developer ID Application: Developer Name (TEAMID)
Un instalador PKG usa un certificado Developer ID Installer separado.
2. Activar Hardened Runtime y los entitlements necesarios
La notarización exige Hardened Runtime. En Xcode, actívalo en Signing & Capabilities y añade solo los entitlements que la app necesite.
Para un build personalizado sencillo, la firma CLI básica es:
codesign \
  --force \
  --options runtime \
  --timestamp \
  --sign "Developer ID Application: Developer Name (TEAMID)" \
  "MyApp.app"
Para Electron JIT, Helper apps, XPC Services, elementos de inicio y estructuras complejas, usa preferentemente las herramientas oficiales del framework y aplica las mínimas excepciones necesarias.
3. Firmar el código anidado desde dentro hacia fuera
Firma primero cada .framework, .dylib, Helper app, XPC Service, plug-in, módulo nativo y ejecutable independiente, con sus entitlements correctos. Firma la .app exterior al final.
La documentación de firma para distribución de Apple dice explícitamente que no se use codesign --deep para firmar. Puede aplicar opciones incorrectas a todo el código anidado y omitir ejecutables en ubicaciones no estándar.
4. Verificar la firma
codesign --verify --deep --strict --verbose=4 "MyApp.app"
codesign -dv --verbose=4 "MyApp.app"
Revisa Authority, TeamIdentifier, Timestamp, Runtime y entitlements. No continúes con el empaquetado si falla.
5. Crear el artifact para notarización
En un ZIP, ditto conserva el bundle y los metadatos:
ditto -c -k --keepParent "MyApp.app" "MyApp.zip"
El servicio admite ZIP, DMG y PKG. Enviar el formato que realmente se distribuirá mejora la reproducibilidad.
6. Guardar las credenciales de notarytool en Keychain
La autenticación con Apple Account usa una contraseña específica de app:
xcrun notarytool store-credentials "myapp-notary" \
  --apple-id "developer@example.com" \
  --team-id "YOUR_TEAM_ID" \
  --password "APP_SPECIFIC_PASSWORD"
CI también puede usar una App Store Connect API Key. La guía de notarytool explica ambos métodos y los perfiles de Keychain.
7. Enviar y revisar el log
xcrun notarytool submit "MyApp.zip" \
  --keychain-profile "myapp-notary" \
  --wait
Si el resultado no es Accepted, recupera el log con el submission ID:
xcrun notarytool log "SUBMISSION_ID" \
  --keychain-profile "myapp-notary"
Causas frecuentes:
- código ejecutable anidado sin firma;
- Hardened Runtime ausente;
- secure timestamp ausente;
- certificado incorrecto;
- entitlements inválidos;
- archivos modificados después de firmar;
- estructura de bundle inválida.
La guía de problemas de notarización recomienda corregir los errores concretos del log.
8. Staple el ticket y volver a empaquetar
Si enviaste la app dentro de un ZIP, incorpora el ticket aceptado a la app original:
xcrun stapler staple "MyApp.app"
xcrun stapler validate "MyApp.app"
No se puede aplicar stapling directamente a un ZIP. Crea el ZIP final desde la app con ticket:
ditto -c -k --keepParent "MyApp.app" "MyApp-final.zip"
Stapling ayuda a verificar la notarización cuando el Mac no puede conectar con Apple. Si distribuyes un DMG o PKG, integra la notarización y stapling del contenedor en el proceso.
9. Validar de nuevo el artifact final
codesign --verify --deep --strict --verbose=4 "MyApp.app"
spctl --assess --type execute --verbose=4 "MyApp.app"
xcrun stapler validate "MyApp.app"
Después descarga desde la URL real y ejecuta. Abrir solo la app original del directorio de build no reproduce la ruta de Gatekeeper del usuario.
Por qué una app notarizada aún puede parecer dañada
Archivos modificados después de firmar
Cambiar icono, configuración, JavaScript bundle, permisos o framework después de firmar modifica los hashes sellados. Firma únicamente cuando el build esté completo.
El artifact notarizado no es el distribuido
Puede ocurrir si vuelves a compilar o distribuyes otro ZIP. Rastrea el mismo artifact desde la aprobación hasta el empaquetado final.
Un Helper o framework no está firmado
Firmar solo la app exterior puede parecer suficiente. Usa --deep --strict y el log para localizar fallos anidados.
El certificado no tiene clave privada
Copiar solo un .cer puede mostrar el nombre, pero no permite firmar. La signing identity necesita certificado y clave privada.
Los entitlements no corresponden al runtime
Algunos runtimes requieren excepciones de JIT o library validation. Los permisos innecesarios debilitan la seguridad y complican el diagnóstico. Sigue la configuración oficial y usa el mínimo.
El bundle está mal formado
Código ejecutable en una carpeta inesperada o un nombre en Info.plist diferente del archivo real puede producir fallos similares a Gatekeeper.
Probar en un entorno limpio
El Mac del desarrollador puede recordar autorizaciones, contener el certificado o tener la cuarentena eliminada. Que funcione allí no demuestra una distribución correcta.
Las pruebas finales deben incluir:
- Mac o cuenta que nunca haya instalado la app;
- ningún certificado de desarrollo instalado;
- descarga mediante navegador y URL reales;
- configuración Gatekeeper predeterminada;
- ejecución online y offline;
- Apple Silicon e Intel compatibles;
- versión mínima de macOS;
- artifacts de actualización si existe auto-update.
Las máquinas virtuales ayudan a repetir pruebas. Las apps con extensiones del sistema, elementos de inicio, permisos o integración con hardware de seguridad también deben probarse en Mac físicos.
Lista de comprobación
Pruebas locales
- Distinguir aviso de desarrollador no verificado y aviso de malware
- Verificar con
codesign --verify --deep --strict - Revisar Gatekeeper con
spctl --assess - Usar Open Anyway o eliminar cuarentena solo para una app propia fiable
- No confundir firma Ad-hoc con firma para distribución
Distribución externa
- Confirmar identity Developer ID Application y clave privada
- Activar Hardened Runtime y entitlements mínimos
- Firmar código anidado desde dentro hacia fuera
- Firmar y verificar la app exterior
- Notarizar el artifact final con
notarytool - Staple el ticket aceptado
- Crear ZIP, DMG o PKG final desde la app con ticket
- Probar una descarga real en un Mac limpio
Resumen
«La app está dañada y no se puede abrir» puede indicar corrupción real o que Gatekeeper no pudo verificar firma, notarización o integridad. Empieza identificando el aviso y comprobando codesign y spctl.
Para una prueba temporal de tu propio build, Open Anyway es la primera opción más segura. Usa xattr y firma Ad-hoc solo con un artifact local cuyo origen e integridad conozcas.
Para los usuarios, la solución no es un comando de evasión. Lo esencial es firmar el artifact terminado en el orden correcto, activar Hardened Runtime, notarizarlo, incorporar el ticket y distribuir exactamente ese artifact.