Mac Finder에서 HEIC를 JPG·PNG로 한 번에 변환하는 방법
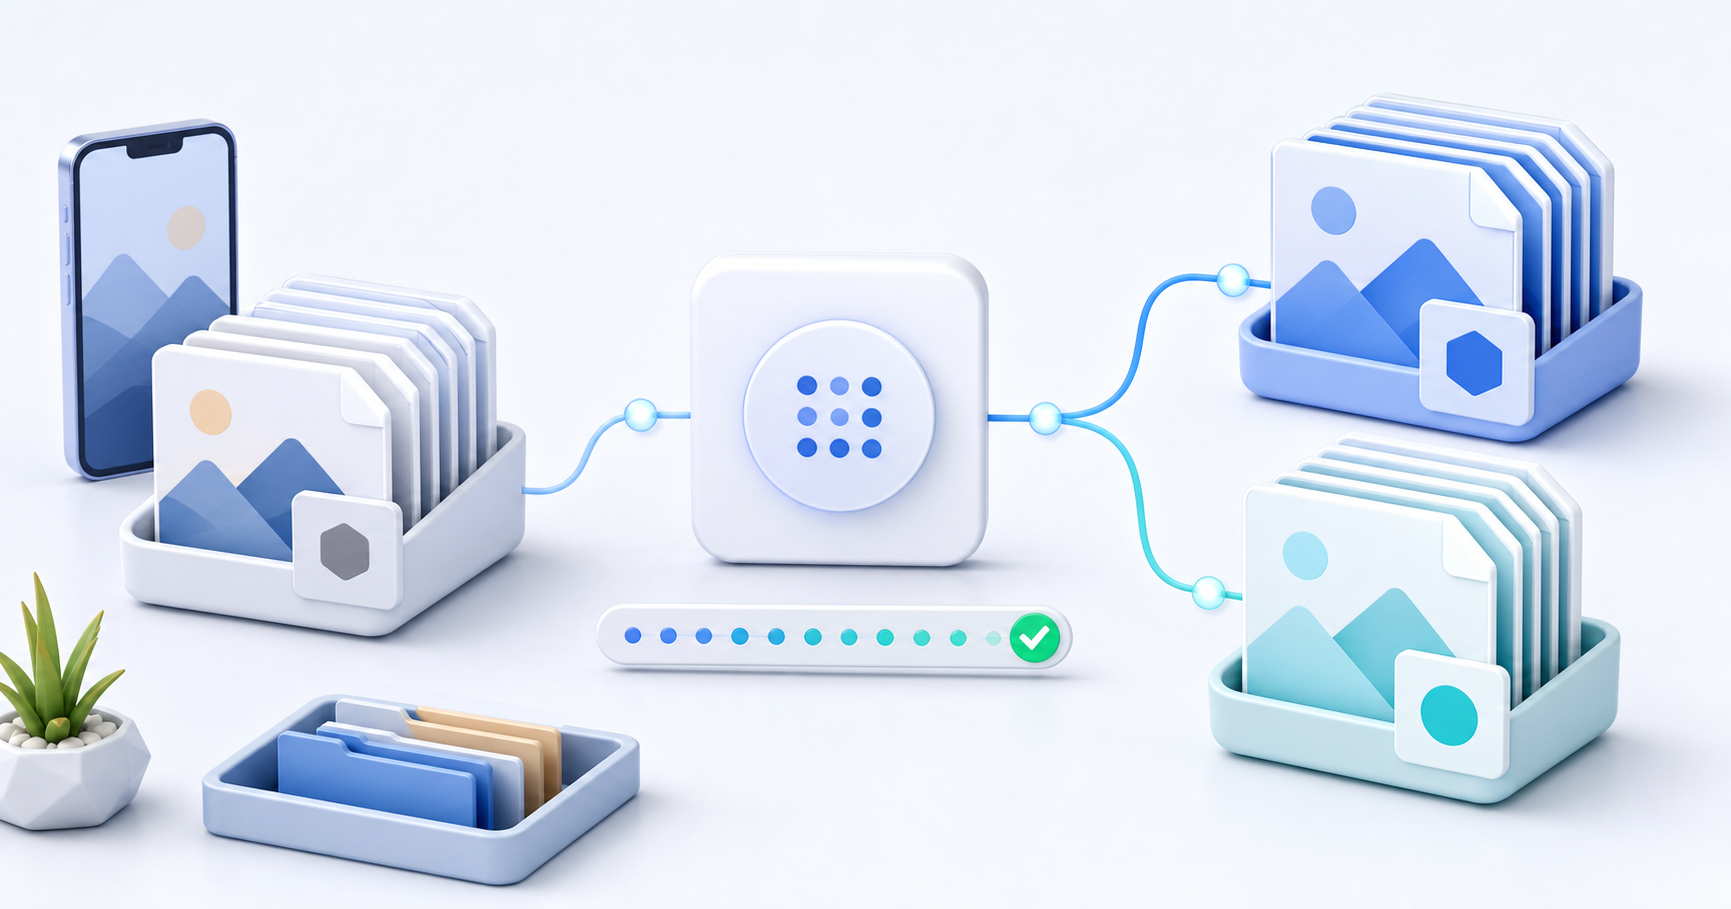
아이폰으로 촬영한 사진을 Mac으로 옮기다 보면 HEIC 형식의 이미지 파일을 자주 만나게 됩니다. HEIC는 같은 화질에서 파일 용량을 효율적으로 줄일 수 있지만, 일부 웹사이트와 프로그램에서는 JPG 또는 PNG만큼 폭넓게 지원되지 않습니다.
특히 ChatGPT 공식 웹사이트를 비롯한 LLM 기반 AI 서비스에 이미지를 업로드해 분석하거나 편집하려는 경우, 먼저 JPG 또는 PNG로 변환하면 형식 호환성 문제를 줄일 수 있습니다. 서비스와 기능마다 허용하는 이미지 형식이 다르기 때문입니다.
별도의 이미지 변환 프로그램을 설치할 필요는 없습니다. Mac의 Finder에는 여러 HEIC 이미지를 JPEG 또는 PNG로 한 번에 변환하는 빠른 동작이 기본으로 제공됩니다.
Finder에서 HEIC 파일을 JPG 또는 PNG로 변환하기
Apple 공식 Mac 사용 설명서는 Finder에서 파일을 Control-클릭한 뒤 빠른 동작의 ‘이미지 변환’을 선택하면 HEIC 사진을 JPEG 또는 PNG로 바꿀 수 있다고 안내합니다.
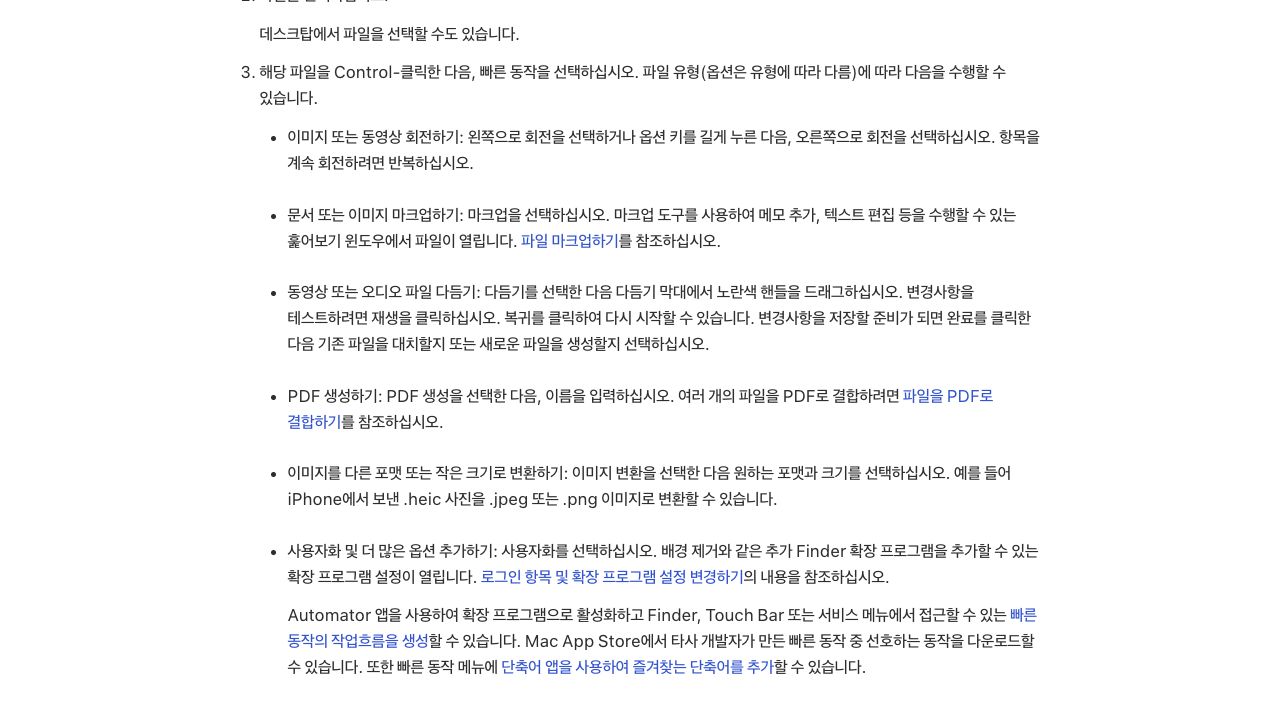
Apple 공식 Mac 사용 설명서의 공개 페이지. Finder의 ‘이미지 변환’ 빠른 동작과 HEIC·JPEG·PNG 지원 내용을 보여 준다. (출처: Apple, 2026-08-19 캡처)
1. 변환할 HEIC 파일 선택
Finder를 열고 변환하려는 HEIC 파일이 있는 폴더로 이동합니다.
여러 파일을 한꺼번에 변환하려면 Command 키를 누른 상태에서 각각의 파일을 클릭합니다. 연속된 파일이라면 첫 파일을 선택한 뒤 Shift 키를 누른 상태에서 마지막 파일을 클릭하면 됩니다.
2. 단축 메뉴 열기
선택한 파일 위에서 마우스 오른쪽 버튼을 클릭합니다. 트랙패드에서는 두 손가락으로 클릭하거나 Control 키를 누른 상태에서 클릭해도 됩니다.
3. 빠른 동작에서 이미지 변환 선택
단축 메뉴에서 빠른 동작 → 이미지 변환을 선택합니다. 별도의 앱을 실행하지 않고 Finder 안에서 바로 변환 설정을 열 수 있습니다.
4. JPEG 또는 PNG와 이미지 크기 선택
이미지 변환 창에서 원하는 포맷과 크기를 선택합니다.
- 일반적인 사진은 JPEG가 적합합니다. 파일 크기가 비교적 작아 웹사이트, 문서, AI 서비스에 공유하기 편합니다.
- 스크린샷, 투명 배경, 무손실 저장이 중요한 그래픽은 PNG가 적합합니다. 사진에서는 JPEG보다 파일이 커질 수 있습니다.
Finder 메뉴에는 JPEG라고 표시됩니다. JPG와 JPEG는 같은 이미지 압축 형식을 가리키는 서로 다른 파일 확장자입니다.
5. 변환 실행
설정을 마쳤다면 변환을 클릭합니다. 변환된 JPEG 또는 PNG 파일은 원본 HEIC 파일과 같은 폴더에 새 파일로 생성되며, 원본은 그대로 남습니다.
여러 HEIC 파일을 선택했다면 선택한 이미지가 한꺼번에 처리되므로 아이폰 사진을 대량으로 옮긴 뒤 정리할 때 특히 편리합니다.
JPEG와 PNG 중 무엇을 선택해야 할까
| 용도 | 권장 포맷 | 이유 |
|---|---|---|
| 아이폰 사진, 웹 업로드, 문서 첨부 | JPEG | 사진에서 용량과 화질의 균형이 좋음 |
| UI 스크린샷, 도형·텍스트가 많은 이미지 | PNG | 선과 글자가 선명하고 무손실로 저장됨 |
| 투명 배경이 필요한 이미지 | PNG | 알파 투명도를 지원함 |
| 파일 크기를 최대한 줄여야 하는 사진 | JPEG | 품질 설정에 따라 용량을 더 줄일 수 있음 |
LLM이나 AI 서비스에 올릴 때 변환하면 좋은 이유
HEIC를 처리할 수 있는 서비스와 모델도 있지만 지원 범위는 동일하지 않습니다. 예를 들어 OpenAI의 ChatGPT 이미지 입력 FAQ는 지원 형식으로 PNG, JPEG, 비애니메이션 GIF를 안내하고 있으며 HEIC는 목록에 포함하지 않습니다.
따라서 사진 내용 분석, UI 스크린샷 해석, 이미지 속 텍스트나 객체 인식처럼 업로드 성공 여부가 중요한 작업이라면 다음 흐름이 안전합니다.
HEIC → JPEG 또는 PNG 변환 → LLM 또는 AI 서비스에 업로드
이는 HEIC를 모든 LLM이 읽을 수 없다는 뜻이 아닙니다. 앱 버전, 업로드 경로, 모델에 따라 지원 범위가 달라질 수 있으므로, 범용성이 높은 JPEG 또는 PNG로 바꾸면 예기치 않은 업로드 실패와 인식 문제를 줄일 수 있다는 의미입니다.
이미지 지원 형식은 서비스 업데이트에 따라 바뀔 수 있습니다. 중요한 작업이라면 이용 중인 서비스의 최신 공식 도움말도 함께 확인하세요.
온라인 변환 사이트 대신 Finder를 쓰는 장점
온라인 변환 사이트는 간편하지만 사진을 외부 서버에 업로드해야 할 수 있습니다. Finder의 이미지 변환은 Mac 안에서 처리되므로 개인 사진, 고객 자료, 회사 내부 이미지처럼 외부 업로드가 부담스러운 파일에 더 적합합니다.
설치할 앱도, 회원가입도, 네트워크 연결도 필요하지 않습니다. 변환할 파일이 많을수록 Finder의 일괄 선택과 빠른 동작 조합이 시간을 크게 줄여 줍니다.
빠른 동작에 이미지 변환이 보이지 않는다면
빠른 동작 메뉴는 선택한 파일 유형과 활성화된 Finder 확장 프로그램에 따라 달라집니다. 먼저 실제 이미지 파일을 선택했는지 확인하고, 메뉴의 빠른 동작 → 사용자화에서 Finder 관련 확장 기능을 확인하세요.
그래도 사용할 수 없다면 Mac의 미리보기 앱에서 파일을 열고 파일 → 내보내기를 선택하는 방법도 있습니다. Apple의 미리보기 이미지 형식 변환 안내에서 지원 포맷과 절차를 확인할 수 있습니다.
정리
Mac에서 여러 HEIC 이미지를 JPG 또는 PNG로 바꾸는 과정은 다음과 같습니다.
HEIC 파일 선택 → 오른쪽 클릭 → 빠른 동작 → 이미지 변환 → JPEG 또는 PNG 선택 → 변환
아이폰 사진을 웹사이트, 문서, 이미지 편집 도구, ChatGPT와 같은 LLM 서비스에서 사용해야 한다면 먼저 Finder의 이미지 변환을 활용해 보세요. 별도 프로그램 없이 여러 파일을 한 번에 처리할 수 있고, 로컬에서 변환하므로 외부 업로드도 피할 수 있습니다.
When you move photos taken on an iPhone to a Mac, you will often encounter image files in the HEIC format. HEIC can reduce file size efficiently at comparable quality, but some websites and programs do not support it as broadly as JPG or PNG.
If you plan to upload an image to an LLM-based AI service such as the official ChatGPT website for analysis or editing, converting it to JPG or PNG first can reduce format compatibility problems. Accepted image formats vary by service and feature.
You do not need to install a separate image converter. Finder on Mac includes a Quick Action that can convert multiple HEIC images to JPEG or PNG at once.
Convert HEIC files to JPG or PNG in Finder
The official Apple Mac User Guide explains that you can Control-click a file in Finder, choose Convert Image under Quick Actions, and convert an HEIC photo to JPEG or PNG.
A public page from the official Apple Mac User Guide showing the Convert Image Quick Action and HEIC, JPEG, and PNG support. (Source: Apple, captured 2026-08-19)
1. Select the HEIC files
Open Finder and go to the folder containing the HEIC files you want to convert.
To select several files, hold Command while clicking each one. For a continuous range, select the first file and then hold Shift while clicking the last file.
2. Open the shortcut menu
Right-click the selected files. On a trackpad, use a two-finger click or hold Control while clicking.
3. Choose Convert Image under Quick Actions
From the shortcut menu, choose Quick Actions → Convert Image. The conversion settings open directly in Finder without launching another app.
4. Choose JPEG or PNG and an image size
In the Convert Image dialog, choose the format and size you need.
- JPEG is usually the best choice for photos. Its relatively small files are convenient for websites, documents, and AI services.
- PNG is a better fit for screenshots, transparent backgrounds, and graphics that need lossless storage. It can produce larger files than JPEG for photos.
Finder labels the format JPEG. JPG and JPEG are different filename extensions for the same image compression format.
5. Run the conversion
When the settings are ready, click Convert. Finder creates new JPEG or PNG files in the same folder as the original HEIC files and leaves the originals intact.
If you selected multiple HEIC files, Finder processes them together, which is especially useful after transferring a large set of iPhone photos.
Should you choose JPEG or PNG?
| Use case | Recommended format | Why |
|---|---|---|
| iPhone photos, web uploads, document attachments | JPEG | Good balance of quality and file size for photographs |
| UI screenshots and images with shapes or text | PNG | Keeps lines and text sharp with lossless storage |
| Images that need transparency | PNG | Supports alpha transparency |
| Photos that need the smallest practical file size | JPEG | Quality settings can reduce the file further |
Why convert before uploading to an LLM or AI service?
Some services and models can process HEIC, but support is not consistent. For example, OpenAI's ChatGPT Image Inputs FAQ lists PNG, JPEG, and non-animated GIF as supported formats and does not include HEIC.
For tasks where a successful upload matters—such as analyzing a photo, interpreting a UI screenshot, or recognizing text and objects—this workflow is a safer choice:
HEIC → convert to JPEG or PNG → upload to the LLM or AI service
This does not mean that every LLM is unable to read HEIC. Support may vary by app version, upload path, and model. Converting to the more widely accepted JPEG or PNG formats simply reduces unexpected upload and recognition problems.
Supported image formats can change as services are updated. For important work, check the latest official help page for the service you use.
Why use Finder instead of an online converter?
Online converters may be convenient, but they can require uploading your photos to an external server. Finder performs the conversion on your Mac, making it a better choice for personal photos, client materials, and internal company images that you would rather not upload elsewhere.
There is no app to install, account to create, or network connection to depend on. When you have many files, Finder's multi-selection and Quick Actions can save considerable time.
If Convert Image does not appear in Quick Actions
The Quick Actions menu changes according to the selected file type and enabled Finder extensions. First confirm that you selected actual image files, then check Finder-related extensions under Quick Actions → Customize.
If the action is still unavailable, open the file in Preview and choose File → Export. Apple's guide to converting image file types in Preview lists the supported formats and steps.
Summary
The workflow for converting multiple HEIC images to JPG or PNG on a Mac is:
Select HEIC files → right-click → Quick Actions → Convert Image → choose JPEG or PNG → Convert
Before using iPhone photos on a website, in a document or image editor, or with an LLM service such as ChatGPT, try Finder's Convert Image action. It handles multiple files without extra software and keeps the conversion local to your Mac.
将 iPhone 拍摄的照片传到 Mac 后,经常会看到 HEIC 格式的图像文件。HEIC 能在保持相近画质的同时有效减小文件体积,但一些网站和程序对它的支持不如 JPG 或 PNG 广泛。
如果要把图像上传到 ChatGPT 官方网站等基于 LLM 的 AI 服务中进行分析或编辑,先转换为 JPG 或 PNG 可以减少格式兼容问题,因为不同服务与功能所接受的图像格式并不相同。
无需安装单独的图像转换软件。Mac 的 Finder 内置了快速操作,可以一次将多个 HEIC 图像转换为 JPEG 或 PNG。
在 Finder 中将 HEIC 转换为 JPG 或 PNG
Apple 官方 Mac 使用手册说明,在 Finder 中按住 Control 点按文件,然后在“快速操作”中选择“转换图像”,即可把 HEIC 照片转换为 JPEG 或 PNG。
Apple 官方 Mac 使用手册的公开页面,展示“转换图像”快速操作以及对 HEIC、JPEG 和 PNG 的说明。(来源:Apple,截取于 2026-08-19)
1. 选择要转换的 HEIC 文件
打开 Finder,进入存放 HEIC 文件的文件夹。
要选择多个不连续文件,请按住 Command 并逐个点按。若文件连续,请先选择第一个文件,再按住 Shift 点按最后一个文件。
2. 打开快捷菜单
在所选文件上点按鼠标右键。使用触控板时,可以双指点按,或按住 Control 再点按。
3. 在快速操作中选择转换图像
从快捷菜单选择 快速操作 → 转换图像。无需打开其他 App,即可直接在 Finder 中进入转换设置。
4. 选择 JPEG 或 PNG 以及图像尺寸
在“转换图像”窗口中选择所需格式和尺寸。
- 普通照片通常适合使用 JPEG。文件相对较小,便于上传到网站、插入文档或用于 AI 服务。
- UI 截图、透明背景或需要无损保存的图形更适合 PNG。对于照片,PNG 文件可能比 JPEG 更大。
Finder 菜单显示的是 JPEG。JPG 与 JPEG 是同一种图像压缩格式的两种文件扩展名。
5. 执行转换
设置完成后,点按 转换。新的 JPEG 或 PNG 文件会出现在原 HEIC 文件所在的文件夹中,原文件会保留不变。
如果选择了多个 HEIC 文件,Finder 会一起处理,特别适合整理刚从 iPhone 传入的大批照片。
JPEG 与 PNG 应该如何选择?
| 用途 | 推荐格式 | 原因 |
|---|---|---|
| iPhone 照片、网页上传、文档附件 | JPEG | 对照片而言,画质与体积较平衡 |
| UI 截图、包含大量图形或文字的图像 | PNG | 无损保存,线条和文字更清晰 |
| 需要透明背景的图像 | PNG | 支持 Alpha 透明度 |
| 需要尽量减小体积的照片 | JPEG | 可通过质量设置进一步压缩 |
为什么上传到 LLM 或 AI 服务前值得转换?
有些服务和模型可以处理 HEIC,但支持范围并不一致。例如,OpenAI 的 ChatGPT 图像输入 FAQ列出的支持格式包括 PNG、JPEG 和非动画 GIF,其中没有 HEIC。
因此,在分析照片内容、理解 UI 截图、识别图像中的文字或对象等必须确保上传成功的场景中,建议采用以下流程:
HEIC → 转换为 JPEG 或 PNG → 上传到 LLM 或 AI 服务
这并不意味着所有 LLM 都无法读取 HEIC。支持范围可能因 App 版本、上传路径和模型而异;转换为更通用的 JPEG 或 PNG,只是为了减少意外的上传失败和识别问题。
服务更新后,支持的图像格式也可能变化。重要任务请同时查看所用服务的最新官方帮助文档。
为什么使用 Finder,而不是在线转换网站?
在线转换工具虽然方便,但可能要求把照片上传到外部服务器。Finder 在 Mac 本机完成转换,因此更适合个人照片、客户资料和公司内部图像等不便上传到外部的文件。
无需安装 App、注册账号或依赖网络。文件越多,Finder 的多选与快速操作组合越能节省时间。
如果快速操作中没有“转换图像”
快速操作菜单会根据所选文件类型和已启用的 Finder 扩展而变化。请先确认选择的确实是图像文件,再到 快速操作 → 自定义 中检查 Finder 相关扩展。
如果仍无法使用,可以在 预览 App 中打开文件,并选择 文件 → 导出。Apple 的使用预览转换图像文件类型指南列出了支持的格式与操作步骤。
总结
在 Mac 上将多个 HEIC 图像转换为 JPG 或 PNG 的流程如下:
选择 HEIC 文件 → 右键点按 → 快速操作 → 转换图像 → 选择 JPEG 或 PNG → 转换
如果要把 iPhone 照片用于网站、文档、图像编辑工具,或 ChatGPT 等 LLM 服务,可以先试用 Finder 的 转换图像。它无需额外软件,可批量处理文件,并把转换过程保留在 Mac 本机。
iPhoneで撮影した写真をMacへ移すと、HEIC形式の画像ファイルをよく目にします。HEICは同程度の画質でファイルサイズを効率よく抑えられますが、一部のWebサイトやアプリではJPGやPNGほど広く対応していません。
ChatGPT公式サイトなどのLLMベースのAIサービスへ画像をアップロードして分析や編集に使う場合、先にJPGまたはPNGへ変換すると形式の互換性問題を減らせます。利用できる画像形式はサービスや機能によって異なるためです。
専用の画像変換アプリをインストールする必要はありません。MacのFinderには、複数のHEIC画像をJPEGまたはPNGへまとめて変換できるクイックアクションが標準で用意されています。
FinderでHEICをJPGまたはPNGへ変換する
Apple公式Macユーザガイドでは、FinderでファイルをControlキーを押しながらクリックし、クイックアクションの「画像を変換」を選ぶと、HEIC写真をJPEGまたはPNGへ変換できると案内しています。
Apple公式Macユーザガイドの公開ページ。「画像を変換」クイックアクションとHEIC・JPEG・PNGへの対応を示している。(出典:Apple、2026-08-19取得)
1. 変換するHEICファイルを選ぶ
Finderを開き、変換したいHEICファイルがあるフォルダへ移動します。
複数のファイルを選ぶには、Commandキーを押しながら各ファイルをクリックします。連続した範囲なら最初のファイルを選び、Shiftキーを押しながら最後のファイルをクリックします。
2. ショートカットメニューを開く
選択したファイルを右クリックします。トラックパッドでは2本指でクリックするか、Controlキーを押しながらクリックします。
3. クイックアクションから画像を変換を選ぶ
ショートカットメニューで クイックアクション → 画像を変換 を選びます。別のアプリを起動せず、Finder内で変換設定を開けます。
4. JPEGまたはPNGと画像サイズを選ぶ
「画像を変換」ウインドウで、必要な形式とサイズを選びます。
- 一般的な写真には JPEG が向いています。ファイルが比較的小さく、Webサイト、文書、AIサービスで共有しやすい形式です。
- UIスクリーンショット、透明背景、可逆保存が重要なグラフィックには PNG が向いています。写真ではJPEGよりファイルが大きくなることがあります。
Finderのメニューでは JPEG と表示されます。JPG と JPEG は、同じ画像圧縮形式を指す異なる拡張子です。
5. 変換を実行する
設定ができたら 変換 をクリックします。変換後のJPEGまたはPNGファイルは元のHEICファイルと同じフォルダに新しく作成され、元ファイルはそのまま残ります。
複数のHEICファイルを選んだ場合はまとめて処理されるため、iPhoneから大量の写真を移した後の整理に便利です。
JPEGとPNGのどちらを選ぶべきか
| 用途 | 推奨形式 | 理由 |
|---|---|---|
| iPhone写真、Webアップロード、文書への添付 | JPEG | 写真で画質と容量のバランスがよい |
| UIスクリーンショット、図形や文字が多い画像 | PNG | 線や文字を鮮明なまま可逆保存できる |
| 透明背景が必要な画像 | PNG | アルファ透過に対応する |
| 容量をできるだけ抑えたい写真 | JPEG | 品質設定でさらに小さくできる |
LLMやAIサービスへアップロードする前に変換する理由
HEICを処理できるサービスやモデルもありますが、対応範囲は統一されていません。たとえばOpenAIのChatGPT画像入力FAQは、対応形式としてPNG、JPEG、非アニメーションGIFを挙げており、HEICは含めていません。
写真の内容分析、UIスクリーンショットの解釈、画像内の文字や物体の認識など、確実なアップロードが重要な作業では、次の流れが安全です。
HEIC → JPEGまたはPNGへ変換 → LLMまたはAIサービスへアップロード
これは、すべてのLLMがHEICを読めないという意味ではありません。アプリのバージョン、アップロード経路、モデルによって対応範囲が変わるため、より汎用的なJPEGまたはPNGへ変換することで、予期しないアップロード失敗や認識問題を減らせます。
対応する画像形式はサービスの更新によって変わる場合があります。重要な作業では、利用するサービスの最新公式ヘルプも確認してください。
オンライン変換サイトではなくFinderを使う利点
オンライン変換サイトは便利ですが、写真を外部サーバーへアップロードしなければならない場合があります。Finderの画像変換はMac内で処理するため、個人写真、クライアント資料、社内画像など、外部へ出したくないファイルに適しています。
アプリのインストールもアカウント登録もネットワーク接続も不要です。ファイルが多いほど、Finderの複数選択とクイックアクションの組み合わせが時間を節約します。
クイックアクションに画像を変換が表示されない場合
クイックアクションのメニューは、選択したファイル形式と有効なFinder機能拡張によって変わります。まず画像ファイルを選択しているか確認し、クイックアクション → カスタマイズ でFinder関連の機能拡張を確認してください。
それでも使えない場合は、Macの プレビュー でファイルを開き、ファイル → 書き出す を選ぶ方法があります。Appleのプレビューで画像ファイル形式を変換するガイドで対応形式と手順を確認できます。
まとめ
Macで複数のHEIC画像をJPGまたはPNGへ変換する流れは次のとおりです。
HEICファイルを選択 → 右クリック → クイックアクション → 画像を変換 → JPEGまたはPNGを選択 → 変換
iPhone写真をWebサイト、文書、画像編集ツール、ChatGPTなどのLLMサービスで使うなら、まずFinderの 画像を変換 を試してください。追加ソフトなしで複数ファイルを処理でき、変換はMac内で完結します。
Al pasar al Mac las fotos tomadas con un iPhone, es habitual encontrar archivos de imagen en formato HEIC. HEIC reduce el tamaño de manera eficiente manteniendo una calidad comparable, pero algunos sitios web y programas no lo admiten tan ampliamente como JPG o PNG.
Si vas a subir una imagen a un servicio de IA basado en LLM, como el sitio web oficial de ChatGPT, para analizarla o editarla, convertirla primero a JPG o PNG puede reducir los problemas de compatibilidad. Los formatos aceptados varían según el servicio y la función.
No hace falta instalar un conversor aparte. Finder en Mac incluye una acción rápida que permite convertir varios archivos HEIC a JPEG o PNG a la vez.
Convertir archivos HEIC a JPG o PNG en Finder
La guía oficial del usuario de Mac de Apple explica que puedes hacer clic en un archivo con la tecla Control pulsada, elegir Convertir imagen en Acciones rápidas y convertir una foto HEIC a JPEG o PNG.
Página pública de la guía oficial del usuario de Mac de Apple que muestra la acción rápida Convertir imagen y la compatibilidad con HEIC, JPEG y PNG. (Fuente: Apple, captura del 2026-08-19)
1. Selecciona los archivos HEIC
Abre Finder y ve a la carpeta que contiene los archivos HEIC que quieres convertir.
Para seleccionar varios archivos, mantén pulsada la tecla Command mientras haces clic en cada uno. Si forman un intervalo continuo, selecciona el primero y haz clic en el último con Shift pulsada.
2. Abre el menú contextual
Haz clic con el botón derecho sobre los archivos seleccionados. En un trackpad, usa un clic con dos dedos o haz clic mientras mantienes pulsada la tecla Control.
3. Elige Convertir imagen en Acciones rápidas
En el menú contextual, elige Acciones rápidas → Convertir imagen. Los ajustes de conversión se abren directamente en Finder, sin iniciar otra aplicación.
4. Elige JPEG o PNG y el tamaño de imagen
En la ventana Convertir imagen, selecciona el formato y el tamaño que necesites.
- JPEG suele ser la mejor opción para fotografías. Sus archivos relativamente pequeños son cómodos para sitios web, documentos y servicios de IA.
- PNG es más adecuado para capturas de interfaz, fondos transparentes y gráficos que necesitan guardarse sin pérdidas. En fotografías puede generar archivos más grandes que JPEG.
Finder muestra el formato como JPEG. JPG y JPEG son extensiones distintas para el mismo formato de compresión de imagen.
5. Ejecuta la conversión
Cuando los ajustes estén listos, haz clic en Convertir. Finder crea nuevos archivos JPEG o PNG en la misma carpeta que los HEIC originales y conserva estos últimos intactos.
Si seleccionaste varios archivos HEIC, Finder los procesa juntos, algo especialmente útil después de transferir muchas fotos del iPhone.
¿Conviene elegir JPEG o PNG?
| Uso | Formato recomendado | Motivo |
|---|---|---|
| Fotos del iPhone, cargas web, documentos adjuntos | JPEG | Buen equilibrio entre calidad y tamaño para fotografías |
| Capturas de UI e imágenes con formas o texto | PNG | Conserva líneas y texto nítidos sin pérdidas |
| Imágenes que requieren transparencia | PNG | Admite transparencia alfa |
| Fotografías cuyo tamaño debe reducirse al máximo | JPEG | Los ajustes de calidad permiten comprimirlas más |
Por qué convertir antes de subir a un LLM o servicio de IA
Algunos servicios y modelos pueden procesar HEIC, pero la compatibilidad no es uniforme. Por ejemplo, las preguntas frecuentes de OpenAI sobre entradas de imagen en ChatGPT enumeran PNG, JPEG y GIF no animado como formatos compatibles y no incluyen HEIC.
Para tareas en las que es importante que la carga funcione —como analizar una foto, interpretar una captura de UI o reconocer texto y objetos—, este flujo es una opción más segura:
HEIC → convertir a JPEG o PNG → subir al LLM o servicio de IA
Esto no significa que todos los LLM sean incapaces de leer HEIC. La compatibilidad puede cambiar según la versión de la aplicación, la vía de carga y el modelo. Convertir a JPEG o PNG, formatos más universales, simplemente reduce fallos inesperados de carga o reconocimiento.
Los formatos de imagen admitidos pueden cambiar con las actualizaciones del servicio. Para trabajos importantes, consulta también la ayuda oficial más reciente del servicio que utilices.
Ventajas de usar Finder en vez de un conversor en línea
Los conversores en línea pueden ser cómodos, pero quizá exijan subir las fotos a un servidor externo. Finder realiza la conversión en el Mac, por lo que resulta más apropiado para fotos personales, materiales de clientes e imágenes internas de empresa que prefieras no enviar fuera.
No hay que instalar aplicaciones, crear cuentas ni depender de una conexión de red. Cuantos más archivos tengas, más tiempo ahorra la combinación de selección múltiple y Acciones rápidas de Finder.
Si Convertir imagen no aparece en Acciones rápidas
El menú Acciones rápidas cambia según el tipo de archivo seleccionado y las extensiones de Finder habilitadas. Comprueba primero que hayas seleccionado archivos de imagen y revisa las extensiones relacionadas con Finder en Acciones rápidas → Personalizar.
Si la acción sigue sin estar disponible, abre el archivo en Vista Previa y elige Archivo → Exportar. La guía de Apple para convertir tipos de archivo de imagen en Vista Previa enumera los formatos compatibles y los pasos.
Resumen
El flujo para convertir varios archivos HEIC a JPG o PNG en un Mac es:
Seleccionar los HEIC → clic derecho → Acciones rápidas → Convertir imagen → elegir JPEG o PNG → Convertir
Antes de usar fotos del iPhone en un sitio web, un documento, un editor de imágenes o un servicio LLM como ChatGPT, prueba la acción Convertir imagen de Finder. Procesa varios archivos sin software adicional y mantiene la conversión dentro del Mac.