Threads API 활용 가이드: 앱 설정부터 OAuth, 게시 자동화까지
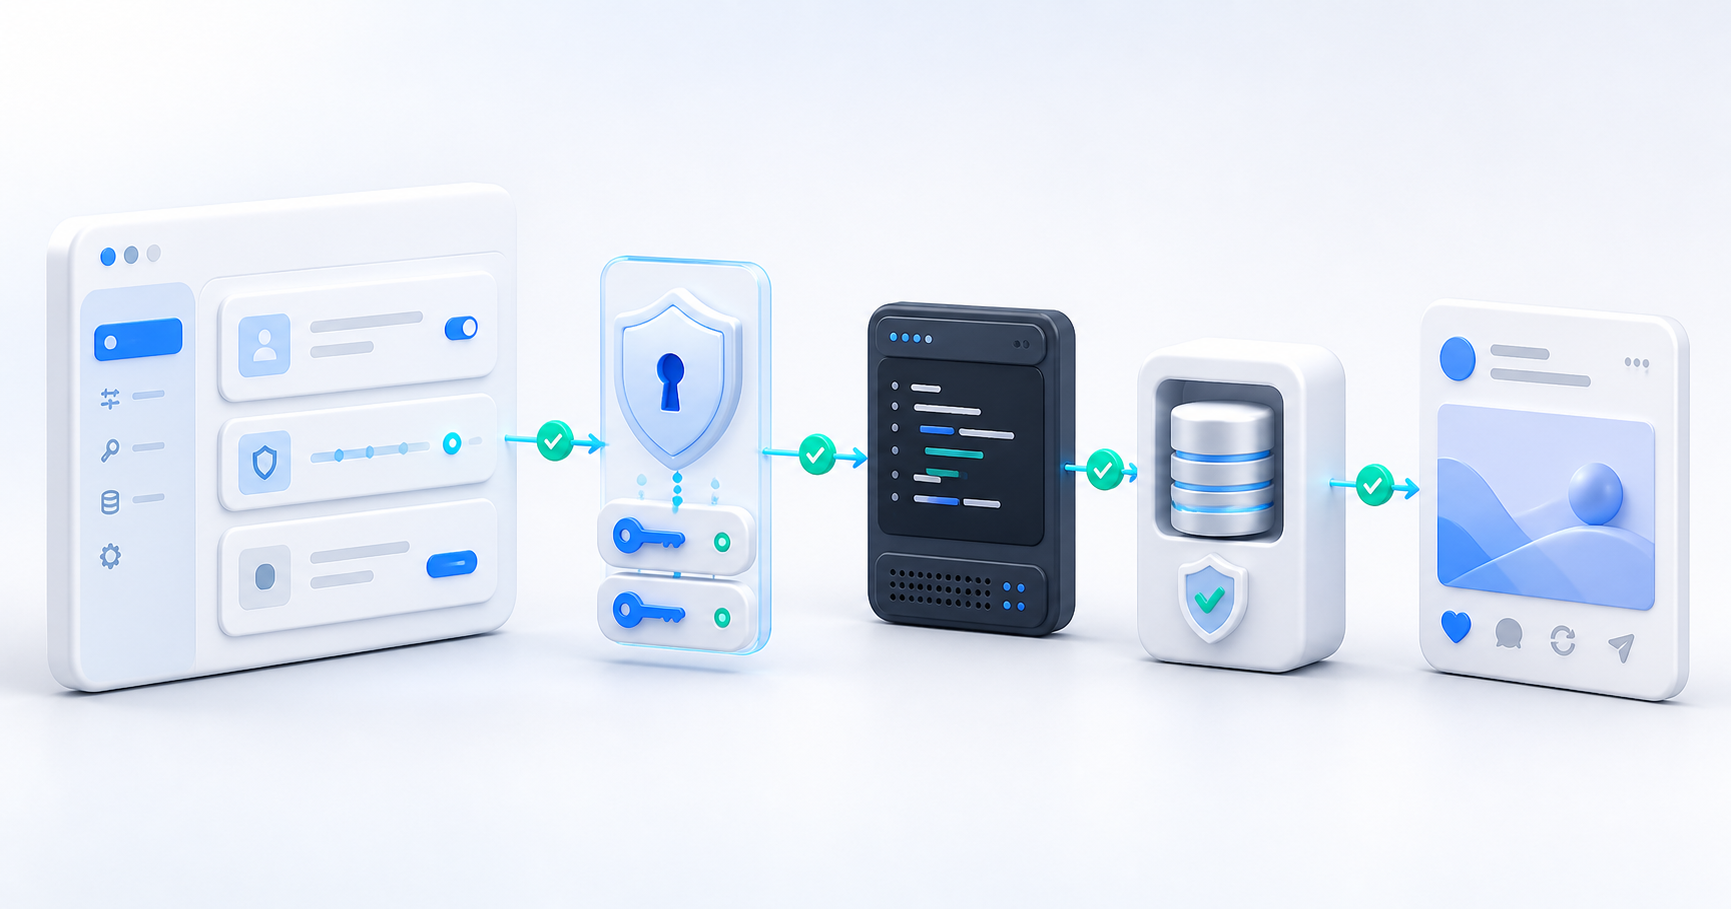
Threads 게시를 자동화하려고 Meta for Developers를 열면 가장 먼저 헷갈리는 부분이 있습니다. Threads API는 일반적인 서비스처럼 API Key 하나만 복사해 호출하는 구조가 아닙니다. 앱을 식별하는 Threads App ID와 App Secret, 사용자를 대신해 요청할 수 있는 Threads User Access Token, 그리고 기능별 권한 범위(scope)가 함께 필요합니다.
이 글은 Meta Threads API 공식 문서를 기준으로 앱 생성부터 OAuth, 장기 토큰, 텍스트 게시, 토큰 점검, 사용량 확인까지 실제 구현 순서대로 정리합니다. 예시는 Next.js 서버를 기준으로 하지만, 서버에서 비밀값과 토큰을 관리한다는 원칙은 다른 프레임워크에서도 같습니다.
먼저 바로잡을 내용
제공된 초안의 큰 흐름은 맞았습니다. 다만 현재 공식 문서와 비교하면 다음처럼 보완하는 편이 정확합니다.
- Threads API의 중심 관리 화면은 Meta for Developers App Dashboard가 맞습니다.
- 인증은 단일 API Key가 아니라 Threads App ID + Threads App Secret + 사용자 액세스 토큰 조합입니다.
- 최신 공식 예제는
graph.threads.com을 사용합니다. 공식 개요에는graph.threads.net도 지원된다고 명시되어 있지만, 새 구현에서는 문서 예제와 같은.com호스트를 사용하는 편이 이해하기 쉽습니다. - 단기 액세스 토큰은 1시간, 장기 액세스 토큰은 60일 동안 유효합니다. 장기 토큰은 발급 후 24시간이 지난 시점부터 만료 전까지 갱신할 수 있습니다.
- Graph API Explorer는 테스트 단계에서 토큰과 권한을 시험하는 용도로 사용할 수 있습니다. 실제 서비스의 OAuth 흐름과 안전한 토큰 저장을 대신하지는 않습니다.
- 앱 역할이 없는 일반 사용자의 데이터에 접근하려면 필요한 권한에 대한 App Review와 공개 상태가 필요합니다. 본인 계정과 Threads 테스터 계정만 다루는 개발 단계는 범위가 다릅니다.
Threads API에서 사용하는 세 가지 인증 값
| 항목 | 용도 | 확인·발급 위치 |
|---|---|---|
| Threads App ID | OAuth와 API가 어떤 앱의 요청인지 식별 | App Dashboard의 Threads 설정 또는 App settings → Basic |
| Threads App Secret | 인증 코드를 토큰으로 교환하고 장기 토큰을 발급할 때 서버 인증 | App Dashboard의 Threads 설정 또는 App settings → Basic |
| Threads User Access Token | 특정 Threads 사용자를 대신해 API 호출 | OAuth 인증 흐름 또는 개발용 도구 |
App Secret은 앱 자체의 비밀값이고, User Access Token은 사용자와 앱의 권한 관계를 나타냅니다. 둘은 서로 대체할 수 없습니다. Threads API 시작하기에서도 Threads 구현에는 Threads 전용 App ID와 App Secret을 사용하도록 안내합니다.
1. Meta 앱과 Threads Use Case 만들기
- Meta for Developers에 로그인합니다.
- My Apps → Create App으로 이동합니다.
- 앱 생성 과정에서 Threads API Use Case를 선택합니다.
- Use cases에서 필요한 Threads 권한을 추가합니다.
- Settings에서 OAuth 리디렉션 URI, 승인 취소 콜백 URL, 데이터 삭제 요청 URL을 등록합니다.
- 개발에 사용할 계정을 Threads Tester로 추가하고 Threads에서 초대를 수락합니다.
대시보드 구조는 UI 개편에 따라 메뉴 이름이 조금 달라질 수 있습니다. 최신 절차는 Threads API 사용 사례 설정 가이드에서 확인할 수 있습니다.
Meta for Developers
└─ My Apps
   └─ 내 앱
      ├─ Use cases
      │  └─ Threads API
      │     ├─ Permissions
      │     └─ Settings
      ├─ App settings
      │  └─ Basic
      └─ App roles
         └─ Threads Testers
2. 필요한 권한을 최소한으로 선택하기
모든 Threads API 호출에는 threads_basic이 필요합니다. 그 밖의 권한은 기능별로 추가합니다.
| 하고 싶은 일 | 필요한 권한 |
|---|---|
| 기본 프로필 조회 | threads_basic |
| 게시물 발행 | threads_basic, threads_content_publish |
| 답글 읽기 | threads_basic, threads_read_replies |
| 답글 관리 | threads_basic, threads_manage_replies |
| 인사이트 조회 | threads_basic, threads_manage_insights |
| 키워드 검색 | threads_basic, threads_keyword_search |
처음부터 모든 권한을 요청하지 말고 실제 기능에 필요한 범위만 선택하는 것이 좋습니다. 본인과 테스터 계정으로 개발할 때는 테스트가 가능하지만, 앱 역할이 없는 일반 사용자에게 기능을 제공하려면 해당 권한의 Advanced Access 승인과 App Review가 필요할 수 있습니다.
3. OAuth로 사용자 토큰 발급하기
전체 인증 흐름은 다음과 같습니다.
Threads App ID + Redirect URI + Scope
                ↓
        Threads 사용자 동의
                ↓
       Authorization Code
                ↓ 서버에서 교환
    Short-lived Access Token (1시간)
                ↓ 서버에서 교환
     Long-lived Access Token (60일)
                ↓ 만료 전 갱신
        다시 60일 동안 유효
사용자를 인증 화면으로 보내기
사용자를 다음 URL로 이동시킵니다. state는 로그인 요청과 콜백을 연결하고 CSRF 공격을 막기 위해 반드시 검증하는 편이 좋습니다.
https://threads.com/oauth/authorize
  ?client_id=<THREADS_APP_ID>
  &redirect_uri=<REDIRECT_URI>
  &scope=threads_basic,threads_content_publish
  &response_type=code
  &state=<RANDOM_STATE>
등록한 Redirect URI와 요청의 redirect_uri는 끝의 슬래시까지 정확히 일치해야 합니다. 인증이 성공하면 Meta가 code를 쿼리 파라미터로 전달합니다. 이 인증 코드는 1시간 동안 유효하며 한 번만 사용할 수 있습니다.
인증 코드를 단기 토큰으로 교환하기
이 요청에는 App Secret이 포함되므로 브라우저가 아니라 서버에서 실행해야 합니다.
curl -X POST \
  https://graph.threads.com/oauth/access_token \
  -F client_id="$THREADS_APP_ID" \
  -F client_secret="$THREADS_APP_SECRET" \
  -F grant_type=authorization_code \
  -F redirect_uri="$THREADS_REDIRECT_URI" \
  -F code="$AUTHORIZATION_CODE"
성공하면 단기 access_token과 앱 범위 user_id가 반환됩니다. 자세한 요청 매개변수는 액세스 토큰과 권한 가져오기에서 확인할 수 있습니다.
단기 토큰을 장기 토큰으로 교환하기
만료되지 않은 단기 토큰을 60일짜리 장기 토큰으로 교환합니다.
curl -G https://graph.threads.com/access_token \
  --data-urlencode grant_type=th_exchange_token \
  --data-urlencode client_secret="$THREADS_APP_SECRET" \
  --data-urlencode access_token="$SHORT_LIVED_ACCESS_TOKEN"
장기 토큰은 발급 후 24시간이 지난 시점부터 만료되기 전까지 갱신할 수 있습니다.
curl -G https://graph.threads.com/refresh_access_token \
  --data-urlencode grant_type=th_refresh_token \
  --data-urlencode access_token="$LONG_LIVED_ACCESS_TOKEN"
갱신하면 갱신 시점부터 다시 60일 동안 유효합니다. 만료된 토큰은 갱신할 수 없으므로 만료 전에 처리하는 작업이 필요합니다. 조건과 제한은 장기 액세스 토큰 공식 가이드를 기준으로 구현해야 합니다.
4. Next.js 서버에 비밀값 보관하기
THREADS_APP_ID=...
THREADS_APP_SECRET=...
THREADS_REDIRECT_URI=https://example.com/api/auth/threads/callbackTHREADS_APP_SECRET이나 장기 Access Token에 NEXT_PUBLIC_ 접두사를 붙이면 안 됩니다. React 컴포넌트, 브라우저 번들, 모바일 앱 바이너리에도 넣지 않습니다.
권장 구조는 다음과 같습니다.
Browser
  └─ OAuth 동의와 콜백
       ↓
Next.js Route Handler
  ├─ state 검증
  ├─ code → short-lived token
  ├─ short-lived → long-lived token
  └─ 암호화 저장
       ↓
Database / Secret Storage
       ↓
https://graph.threads.com
여러 사용자를 지원한다면 토큰을 사용자 레코드와 연결하고, 평문 대신 암호화해 저장하며, 만료 시점과 부여된 scope도 함께 기록하는 편이 좋습니다. 로그에는 토큰 전체를 남기지 마세요.
5. 텍스트 게시물 발행하기
Threads의 단일 게시물 발행은 컨테이너 생성과 게시의 두 단계로 이루어집니다. Threads 게시물 만들기 공식 문서의 기본 흐름입니다.
const THREADS_API = 'https://graph.threads.com/v1.0';

type ThreadsContainerResponse = { id: string };

export async function publishThreadsText({
  userId,
  accessToken,
  text,
}: {
  userId: string;
  accessToken: string;
  text: string;
}) {
  const createBody = new URLSearchParams({
    media_type: 'TEXT',
    text,
    access_token: accessToken,
  });

  const createResponse = await fetch(`${THREADS_API}/${userId}/threads`, {
    method: 'POST',
    body: createBody,
  });

  if (!createResponse.ok) {
    throw new Error(`Threads container creation failed: ${createResponse.status}`);
  }

  const container = (await createResponse.json()) as ThreadsContainerResponse;

  const publishBody = new URLSearchParams({
    creation_id: container.id,
    access_token: accessToken,
  });

  const publishResponse = await fetch(
    `${THREADS_API}/${userId}/threads_publish`,
    { method: 'POST', body: publishBody },
  );

  if (!publishResponse.ok) {
    throw new Error(`Threads publishing failed: ${publishResponse.status}`);
  }

  return publishResponse.json() as Promise<{ id: string }>;
}
텍스트 게시물은 500자로 제한됩니다. 이미지나 동영상 게시물은 media_type과 image_url 또는 video_url을 사용하며, Meta 서버가 미디어를 가져갈 수 있도록 URL이 외부에서 접근 가능해야 합니다. 미디어는 처리 시간이 필요하므로 상태를 확인한 뒤 게시하는 방식이 안전합니다.
6. 토큰 상태 디버깅하기
Access Token Debugger를 사용하거나 /debug_token 엔드포인트를 호출할 수 있습니다.
curl -G https://graph.threads.com/v1.0/debug_token \
  --data-urlencode access_token="$THREADS_TESTER_ACCESS_TOKEN" \
  --data-urlencode input_token="$TOKEN_TO_INSPECT"
여기서 다음 정보를 확인할 수 있습니다.
is_valid
issued_at
expires_at
data_access_expires_at
user_id
scopes
application
중요한 점은 access_token과 검사 대상인 input_token이 같은 앱에 연결되어 있어야 한다는 것입니다. 자세한 조건은 Threads 토큰 디버깅 가이드에 나와 있습니다.
7. 게시 한도와 검색 한도 확인하기
프로필은 API를 통해 연속 24시간 동안 최대 250개의 게시물을 발행할 수 있으며, 슬라이드는 한 개의 게시물로 계산됩니다. 현재 사용량은 다음 엔드포인트로 확인합니다.
curl -G \
  "https://graph.threads.com/v1.0/$THREADS_USER_ID/threads_publishing_limit" \
  --data-urlencode fields=quota_usage,config \
  --data-urlencode access_token="$THREADS_ACCESS_TOKEN"
응답의 quota_usage는 최근 24시간의 게시 수, config는 전체 한도와 기간을 보여줍니다. 자세한 제한은 Threads API 사용 제한과 User 엔드포인트 레퍼런스를 함께 확인하세요.
Keyword Search API는 사용자 기준 연속 24시간 동안 최대 2,200개의 쿼리를 허용합니다. 이 한도는 여러 앱에서 같은 사용자를 사용해도 합산되며, 같은 키워드를 반복해도 차감됩니다. 공개 게시물 검색에는 threads_keyword_search 권한 승인도 필요합니다.
8. 개발과 운영을 구분하는 체크리스트
개발 단계
- Threads Tester 초대를 보내고 Threads에서 수락했는지 확인합니다.
- Redirect URI가 등록값과 정확히 같은지 확인합니다.
threads_basic과 필요한 최소 권한만 요청합니다.- Graph API Explorer와 본인·테스터 계정으로 호출을 검증합니다.
- 토큰의
is_valid,expires_at,scopes를 확인합니다.
운영 단계
- 일반 사용자가 필요하면 App Review와 Advanced Access 범위를 확인합니다.
- App Secret과 토큰 교환 코드는 서버에서만 실행합니다.
- 장기 토큰을 암호화해 저장하고 만료 전 갱신 작업을 둡니다.
- OAuth
state를 생성하고 콜백에서 일치 여부를 검증합니다. - 게시 재시도에는 지수 백오프를 적용하고 중복 게시를 막는 키를 둡니다.
- 게시·검색 사용량과 API 오류 응답을 모니터링합니다.
- 개인정보처리방침, 데이터 삭제 요청 URL, 승인 취소 콜백을 준비합니다.
자주 발생하는 오류
| 증상 | 확인할 항목 |
|---|---|
OAuth 후 redirect_uri 오류 | 등록 URI와 요청 URI의 프로토콜·경로·끝 슬래시가 완전히 같은지 확인 |
Matching code was not found or was already used | 인증 코드가 만료됐거나 이미 한 번 사용됐는지 확인 |
| 권한 오류 | 토큰의 scopes, 테스터 역할, App Review·Advanced Access 상태 확인 |
| 이미지·동영상 컨테이너 실패 | 미디어 URL이 로그인 없이 공개 접근 가능한지 확인 |
| 장기 토큰 갱신 실패 | 발급 후 24시간이 지났는지, 아직 만료되지 않았는지 확인 |
| 게시 한도 오류 | threads_publishing_limit의 quota_usage와 config 확인 |
마무리
Threads API 통합의 핵심은 API 호출 코드보다 앱·사용자·권한·토큰의 관계를 분리해서 이해하는 것입니다. App Dashboard에서 Threads Use Case를 설정하고, OAuth로 사용자 동의를 얻고, 서버에서 코드를 장기 토큰으로 교환한 뒤, 컨테이너 생성과 게시의 두 단계를 호출하면 기본 게시 자동화가 완성됩니다.
처음에는 본인과 테스터 계정으로 최소 권한만 검증하세요. 이후 일반 사용자 지원, 토큰 갱신, 안전한 저장, 사용량 모니터링을 단계적으로 추가하면 운영 가능한 구조로 확장할 수 있습니다.
When you open Meta for Developers to automate Threads publishing, the first confusing point is the authentication model. Threads API does not work like a typical service where you copy a single API key. You need a Threads App ID and App Secret to identify the app, a Threads User Access Token to act on behalf of a user, and feature-specific permission scopes.
This guide follows the official Meta Threads API documentation and walks through app creation, OAuth, long-lived tokens, text publishing, token inspection, and quota checks in implementation order. The examples use a Next.js server, but the rule that secrets and tokens belong on the server applies to other frameworks as well.
Corrections and clarifications first
The overall flow in the original draft was correct. Compared with the current official documentation, however, these details should be clarified.
- Meta for Developers App Dashboard is the central management console for Threads API.
- Authentication uses a combination of Threads App ID + Threads App Secret + user access token, not a single API key.
- Current official examples use
graph.threads.com. The overview also states thatgraph.threads.netis supported, but using the.comhost keeps a new implementation aligned with the documentation. - Short-lived access tokens are valid for one hour, while long-lived access tokens are valid for 60 days. A long-lived token can be refreshed after it is at least 24 hours old and before it expires.
- Graph API Explorer can help test tokens and permissions during development. It does not replace a production OAuth flow or secure token storage.
- Accessing data for users without an app role requires the relevant permissions to pass App Review and the app to be live. Development with your own account and Threads tester accounts has a different scope.
The three authentication values used by Threads API
| Item | Purpose | Where to find or issue it |
|---|---|---|
| Threads App ID | Identifies which app is making an OAuth or API request | Threads settings in App Dashboard or App settings → Basic |
| Threads App Secret | Authenticates the server when exchanging a code or issuing a long-lived token | Threads settings in App Dashboard or App settings → Basic |
| Threads User Access Token | Authorizes API calls on behalf of a specific Threads user | OAuth flow or development tools |
The App Secret is the app's confidential credential, while the User Access Token represents the permission relationship between an app and a user. They are not interchangeable. Getting Started with Threads API also directs implementations to use the Threads-specific App ID and App Secret.
1. Create a Meta app and Threads Use Case
- Sign in to Meta for Developers.
- Go to My Apps → Create App.
- Select the Threads API Use Case during app creation.
- Add the Threads permissions your app actually needs under Use cases.
- In Settings, register the OAuth redirect URI, deauthorization callback URL, and data deletion request URL.
- Add the development account as a Threads Tester and accept the invitation in Threads.
Menu labels may change slightly as the dashboard evolves. Check the current steps in the Threads API use case setup guide.
Meta for Developers
└─ My Apps
   └─ My app
      ├─ Use cases
      │  └─ Threads API
      │     ├─ Permissions
      │     └─ Settings
      ├─ App settings
      │  └─ Basic
      └─ App roles
         └─ Threads Testers
2. Request only the permissions you need
Every Threads API call requires threads_basic. Add other permissions according to the features you implement.
| Task | Required permissions |
|---|---|
| Read a basic profile | threads_basic |
| Publish a post | threads_basic, threads_content_publish |
| Read replies | threads_basic, threads_read_replies |
| Manage replies | threads_basic, threads_manage_replies |
| Read insights | threads_basic, threads_manage_insights |
| Search by keyword | threads_basic, threads_keyword_search |
Do not request every permission from the start. Choose only the scopes needed for real features. You can develop with your own account and tester accounts, but providing features to users without app roles may require Advanced Access approval and App Review for the relevant permissions.
3. Issue a user token with OAuth
The complete authorization flow looks like this.
Threads App ID + Redirect URI + Scope
                ↓
         Threads user consent
                ↓
       Authorization Code
                ↓ exchange on server
    Short-lived Access Token (1 hour)
                ↓ exchange on server
     Long-lived Access Token (60 days)
                ↓ refresh before expiry
          Valid for another 60 days
Send the user to the authorization window
Redirect the user to the following URL. Generate and validate state to bind the login request to the callback and protect against CSRF attacks.
https://threads.com/oauth/authorize
  ?client_id=<THREADS_APP_ID>
  &redirect_uri=<REDIRECT_URI>
  &scope=threads_basic,threads_content_publish
  &response_type=code
  &state=<RANDOM_STATE>
The registered Redirect URI must exactly match the requested redirect_uri, including any trailing slash. After successful authorization, Meta returns code as a query parameter. This authorization code is valid for one hour and can be used only once.
Exchange the authorization code for a short-lived token
Because this request contains the App Secret, run it on the server rather than in the browser.
curl -X POST \
  https://graph.threads.com/oauth/access_token \
  -F client_id="$THREADS_APP_ID" \
  -F client_secret="$THREADS_APP_SECRET" \
  -F grant_type=authorization_code \
  -F redirect_uri="$THREADS_REDIRECT_URI" \
  -F code="$AUTHORIZATION_CODE"
On success, the response contains a short-lived access_token and app-scoped user_id. See Get Access Tokens and Permissions for all request parameters.
Exchange the short-lived token for a long-lived token
Exchange an unexpired short-lived token for a token that is valid for 60 days.
curl -G https://graph.threads.com/access_token \
  --data-urlencode grant_type=th_exchange_token \
  --data-urlencode client_secret="$THREADS_APP_SECRET" \
  --data-urlencode access_token="$SHORT_LIVED_ACCESS_TOKEN"
A long-lived token can be refreshed after it is at least 24 hours old and before it expires.
curl -G https://graph.threads.com/refresh_access_token \
  --data-urlencode grant_type=th_refresh_token \
  --data-urlencode access_token="$LONG_LIVED_ACCESS_TOKEN"
Refreshing makes the token valid for another 60 days from the refresh date. An expired token cannot be refreshed, so schedule renewal before expiration. Implement the exact conditions from the official long-lived access token guide.
4. Keep secrets on the Next.js server
THREADS_APP_ID=...
THREADS_APP_SECRET=...
THREADS_REDIRECT_URI=https://example.com/api/auth/threads/callback
Never add the NEXT_PUBLIC_ prefix to THREADS_APP_SECRET or a long-lived access token. Do not place them in React components, browser bundles, or mobile app binaries.
A recommended structure looks like this.
Browser
  └─ OAuth consent and callback
       ↓
Next.js Route Handler
  ├─ validate state
  ├─ exchange code → short-lived token
  ├─ exchange short-lived → long-lived token
  └─ store encrypted token
       ↓
Database / Secret Storage
       ↓
https://graph.threads.com
For multiple users, associate each token with its user record, encrypt it at rest, and store its expiration time and granted scopes. Never write a full token to application logs.
5. Publish a text post
Publishing a single Threads post has two stages: create a container and publish it. This is the standard flow in the official Threads post creation documentation.
const THREADS_API = 'https://graph.threads.com/v1.0';

type ThreadsContainerResponse = { id: string };

export async function publishThreadsText({
  userId,
  accessToken,
  text,
}: {
  userId: string;
  accessToken: string;
  text: string;
}) {
  const createBody = new URLSearchParams({
    media_type: 'TEXT',
    text,
    access_token: accessToken,
  });

  const createResponse = await fetch(`${THREADS_API}/${userId}/threads`, {
    method: 'POST',
    body: createBody,
  });

  if (!createResponse.ok) {
    throw new Error(`Threads container creation failed: ${createResponse.status}`);
  }

  const container = (await createResponse.json()) as ThreadsContainerResponse;

  const publishBody = new URLSearchParams({
    creation_id: container.id,
    access_token: accessToken,
  });

  const publishResponse = await fetch(
    `${THREADS_API}/${userId}/threads_publish`,
    { method: 'POST', body: publishBody },
  );

  if (!publishResponse.ok) {
    throw new Error(`Threads publishing failed: ${publishResponse.status}`);
  }

  return publishResponse.json() as Promise<{ id: string }>;
}
Text posts are limited to 500 characters. Image and video posts use media_type with image_url or video_url, and the URL must be publicly reachable so Meta's servers can fetch the media. Media processing takes time, so checking container status before publishing is safer.
6. Debug token status
Use the Access Token Debugger or call the /debug_token endpoint.
curl -G https://graph.threads.com/v1.0/debug_token \
  --data-urlencode access_token="$THREADS_TESTER_ACCESS_TOKEN" \
  --data-urlencode input_token="$TOKEN_TO_INSPECT"
The response lets you inspect these values.
is_valid
issued_at
expires_at
data_access_expires_at
user_id
scopes
application
The access_token and inspected input_token must be associated with the same app. See the Threads token debugging guide for the exact requirements.
7. Check publishing and search limits
A profile can publish up to 250 posts through the API in a rolling 24-hour period, and a carousel counts as one post. Query the following endpoint to check current usage.
curl -G \
  "https://graph.threads.com/v1.0/$THREADS_USER_ID/threads_publishing_limit" \
  --data-urlencode fields=quota_usage,config \
  --data-urlencode access_token="$THREADS_ACCESS_TOKEN"
quota_usage reports the number of posts during the last 24 hours, while config contains the total quota and duration. Consult both the Threads API rate limits and the User endpoint reference.
The Keyword Search API allows up to 2,200 queries per user in a rolling 24-hour period. The limit is shared across apps for the same user, and repeated queries for the same keyword still count. Searching public posts also requires approval for threads_keyword_search.
8. Separate development and production requirements
Development
- Send the Threads Tester invitation and accept it in Threads.
- Confirm that the Redirect URI exactly matches the registered value.
- Request
threads_basicand only the additional scopes you need. - Test calls with Graph API Explorer and your own or tester accounts.
- Inspect token
is_valid,expires_at, andscopes.
Production
- If general users are involved, verify the required App Review and Advanced Access scope.
- Run App Secret and token exchange operations on the server only.
- Encrypt long-lived tokens and refresh them before expiration.
- Generate an OAuth
statevalue and validate it in the callback. - Use exponential backoff for retries and idempotency keys to prevent duplicate posts.
- Monitor publishing and search quotas as well as API error responses.
- Prepare a privacy policy, data deletion request URL, and deauthorization callback.
Common errors
| Symptom | What to check |
|---|---|
redirect_uri error after OAuth |
Ensure the protocol, path, and trailing slash exactly match the registered URI |
Matching code was not found or was already used |
Check whether the authorization code expired or was already used once |
| Permission error | Inspect token scopes, tester role, and App Review or Advanced Access status |
| Image or video container failure | Ensure the media URL is publicly accessible without authentication |
| Long-lived token refresh failure | Check that the token is at least 24 hours old and has not expired |
| Publishing limit error | Inspect quota_usage and config from threads_publishing_limit |
Conclusion
The key to a Threads API integration is understanding the separate relationships among the app, user, permissions, and token, not merely writing API calls. Configure the Threads Use Case in App Dashboard, obtain user consent through OAuth, exchange the code for a long-lived token on the server, and call the two container creation and publishing stages to complete basic publishing automation.
Start by validating the smallest set of permissions with your own and tester accounts. Then add support for general users, token renewal, secure storage, and quota monitoring in stages to build a production-ready integration.
当你为了自动发布 Threads 内容而打开 Meta for Developers 时,最容易混淆的是认证模型。Threads API 并不像常见服务那样只复制一个 API Key 就能调用。你需要用于识别应用的 Threads App ID 与 App Secret、代表用户发起请求的 Threads User Access Token,以及按功能划分的 权限范围(scope)。
本文以 Meta Threads API 官方文档为准,按照实际实现顺序说明应用创建、OAuth、长期令牌、文本发布、令牌检查和配额查询。示例基于 Next.js 服务器,但“机密信息和令牌必须由服务器管理”这一原则同样适用于其他框架。
先更正和补充几个要点
原始草稿的整体流程是正确的,但对照当前官方文档,以下细节需要补充说明。
- Meta for Developers App Dashboard 确实是 Threads API 的核心管理控制台。
- 认证并非单一 API Key,而是 Threads App ID + Threads App Secret + 用户访问令牌 的组合。
- 最新官方示例使用
graph.threads.com。官方概览也说明支持graph.threads.net,但新项目使用.com主机更容易与文档保持一致。 - 短期访问令牌有效期为 1 小时,长期访问令牌有效期为 60 天。长期令牌在签发满 24 小时后、到期之前可以刷新。
- Graph API Explorer 可用于开发阶段测试令牌和权限,但不能替代生产环境的 OAuth 流程与安全令牌存储。
- 若要访问没有应用角色的普通用户数据,相关权限必须通过 App Review,并且应用需要处于公开状态。只使用本人和 Threads 测试者账号进行开发时,适用范围不同。
Threads API 使用的三种认证值
| 项目 | 用途 | 查看或签发位置 |
|---|---|---|
| Threads App ID | 标识 OAuth 或 API 请求来自哪个应用 | App Dashboard 的 Threads 设置,或 App settings → Basic |
| Threads App Secret | 在服务器交换授权码或签发长期令牌时认证应用 | App Dashboard 的 Threads 设置,或 App settings → Basic |
| Threads User Access Token | 代表特定 Threads 用户调用 API | OAuth 流程或开发工具 |
App Secret 是应用本身的机密凭据,User Access Token 则表示应用与用户之间的授权关系,两者不能相互替代。Threads API 入门文档也要求实现时使用 Threads 专用 App ID 与 App Secret。
1. 创建 Meta 应用与 Threads Use Case
- 登录 Meta for Developers。
- 前往 My Apps → Create App。
- 创建应用时选择 Threads API Use Case。
- 在 Use cases 中添加应用实际需要的 Threads 权限。
- 在 Settings 中注册 OAuth 重定向 URI、取消授权回调 URL 和数据删除请求 URL。
- 将开发账号添加为 Threads Tester,并在 Threads 中接受邀请。
随着 Dashboard 更新,菜单名称可能略有变化。请在 Threads API 使用场景设置指南中确认最新步骤。
Meta for Developers
└─ My Apps
   └─ 我的应用
      ├─ Use cases
      │  └─ Threads API
      │     ├─ Permissions
      │     └─ Settings
      ├─ App settings
      │  └─ Basic
      └─ App roles
         └─ Threads Testers
2. 只选择必要权限
所有 Threads API 调用都需要 threads_basic。其他权限应根据功能按需添加。
| 目标功能 | 所需权限 |
|---|---|
| 读取基本资料 | threads_basic |
| 发布帖子 | threads_basic, threads_content_publish |
| 读取回复 | threads_basic, threads_read_replies |
| 管理回复 | threads_basic, threads_manage_replies |
| 读取洞察 | threads_basic, threads_manage_insights |
| 关键词搜索 | threads_basic, threads_keyword_search |
不要一开始就申请所有权限,只选择实际功能所需的 scope。你可以用本人账号和测试者账号进行开发,但向没有应用角色的普通用户提供功能时,可能需要相关权限的 Advanced Access 批准与 App Review。
3. 通过 OAuth 签发用户令牌
完整认证流程如下。
Threads App ID + Redirect URI + Scope
                ↓
          Threads 用户同意
                ↓
       Authorization Code
                ↓ 在服务器交换
    Short-lived Access Token(1小时)
                ↓ 在服务器交换
     Long-lived Access Token(60天)
                ↓ 到期前刷新
           再次有效60天
将用户引导至授权窗口
将用户重定向到以下 URL。建议生成并验证 state,用于绑定登录请求与回调并防止 CSRF 攻击。
https://threads.com/oauth/authorize
  ?client_id=<THREADS_APP_ID>
  &redirect_uri=<REDIRECT_URI>
  &scope=threads_basic,threads_content_publish
  &response_type=code
  &state=<RANDOM_STATE>
已注册的 Redirect URI 必须与请求中的 redirect_uri 完全一致,包括末尾斜杠。授权成功后,Meta 会通过查询参数返回 code。该授权码有效期为 1 小时,并且只能使用一次。
将授权码交换为短期令牌
此请求包含 App Secret,因此必须在服务器而不是浏览器中执行。
curl -X POST \
  https://graph.threads.com/oauth/access_token \
  -F client_id="$THREADS_APP_ID" \
  -F client_secret="$THREADS_APP_SECRET" \
  -F grant_type=authorization_code \
  -F redirect_uri="$THREADS_REDIRECT_URI" \
  -F code="$AUTHORIZATION_CODE"
成功后,响应会返回短期 access_token 和应用范围的 user_id。完整请求参数请参阅获取访问令牌与权限。
将短期令牌交换为长期令牌
把尚未过期的短期令牌交换为有效期 60 天的长期令牌。
curl -G https://graph.threads.com/access_token \
  --data-urlencode grant_type=th_exchange_token \
  --data-urlencode client_secret="$THREADS_APP_SECRET" \
  --data-urlencode access_token="$SHORT_LIVED_ACCESS_TOKEN"
长期令牌在签发满 24 小时后、到期之前可以刷新。
curl -G https://graph.threads.com/refresh_access_token \
  --data-urlencode grant_type=th_refresh_token \
  --data-urlencode access_token="$LONG_LIVED_ACCESS_TOKEN"
刷新后,令牌从刷新日期起重新获得 60 天有效期。已过期令牌无法刷新,因此应在到期前安排续期任务。实现时请以长期访问令牌官方指南中的条件为准。
4. 在 Next.js 服务器保存机密信息
THREADS_APP_ID=...
THREADS_APP_SECRET=...
THREADS_REDIRECT_URI=https://example.com/api/auth/threads/callback
不要为 THREADS_APP_SECRET 或长期 Access Token 添加 NEXT_PUBLIC_ 前缀,也不要将其放入 React 组件、浏览器构建产物或移动应用二进制文件中。
推荐结构如下。
Browser
  └─ OAuth 同意与回调
       ↓
Next.js Route Handler
  ├─ 验证 state
  ├─ 交换 code → short-lived token
  ├─ 交换 short-lived → long-lived token
  └─ 加密保存令牌
       ↓
Database / Secret Storage
       ↓
https://graph.threads.com
如果支持多个用户,应把令牌关联到用户记录,静态加密保存,并同时记录到期时间和已授权 scope。不要在日志中输出完整令牌。
5. 发布文本帖子
Threads 单条帖子发布分为两个阶段:创建容器和发布容器。这是 Threads 帖子创建官方文档中的标准流程。
const THREADS_API = 'https://graph.threads.com/v1.0';

type ThreadsContainerResponse = { id: string };

export async function publishThreadsText({
  userId,
  accessToken,
  text,
}: {
  userId: string;
  accessToken: string;
  text: string;
}) {
  const createBody = new URLSearchParams({
    media_type: 'TEXT',
    text,
    access_token: accessToken,
  });

  const createResponse = await fetch(`${THREADS_API}/${userId}/threads`, {
    method: 'POST',
    body: createBody,
  });

  if (!createResponse.ok) {
    throw new Error(`Threads container creation failed: ${createResponse.status}`);
  }

  const container = (await createResponse.json()) as ThreadsContainerResponse;

  const publishBody = new URLSearchParams({
    creation_id: container.id,
    access_token: accessToken,
  });

  const publishResponse = await fetch(
    `${THREADS_API}/${userId}/threads_publish`,
    { method: 'POST', body: publishBody },
  );

  if (!publishResponse.ok) {
    throw new Error(`Threads publishing failed: ${publishResponse.status}`);
  }

  return publishResponse.json() as Promise<{ id: string }>;
}
文本帖子限制为 500 个字符。图片和视频帖子使用 media_type 配合 image_url 或 video_url,URL 必须可公开访问,以便 Meta 服务器抓取媒体。媒体处理需要时间,因此在发布前检查容器状态更安全。
6. 调试令牌状态
可以使用 Access Token Debugger,也可以调用 /debug_token 端点。
curl -G https://graph.threads.com/v1.0/debug_token \
  --data-urlencode access_token="$THREADS_TESTER_ACCESS_TOKEN" \
  --data-urlencode input_token="$TOKEN_TO_INSPECT"
响应中可以检查以下信息。
is_valid
issued_at
expires_at
data_access_expires_at
user_id
scopes
application
access_token 与被检查的 input_token 必须关联到同一个应用。具体条件请参阅 Threads 令牌调试指南。
7. 检查发布与搜索限制
每个资料可通过 API 在连续 24 小时内最多发布 250 个帖子,一个轮播帖按一个帖子计算。可通过以下端点查询当前使用量。
curl -G \
  "https://graph.threads.com/v1.0/$THREADS_USER_ID/threads_publishing_limit" \
  --data-urlencode fields=quota_usage,config \
  --data-urlencode access_token="$THREADS_ACCESS_TOKEN"
quota_usage 表示最近 24 小时的发帖数量,config 包含总配额和周期。请同时查阅 Threads API 使用限制与 User 端点参考。
Keyword Search API允许每位用户在连续 24 小时内最多发送 2,200 次查询。同一用户的限制会跨多个应用合并,相同关键词的重复查询也会计数。搜索公开帖子还需要 threads_keyword_search 权限获得批准。
8. 区分开发与生产要求
开发阶段
- 发送 Threads Tester 邀请,并在 Threads 中接受。
- 确认 Redirect URI 与注册值完全一致。
- 申请
threads_basic以及实际需要的最少附加权限。 - 使用 Graph API Explorer 和本人或测试者账号验证调用。
- 检查令牌的
is_valid、expires_at与scopes。
生产阶段
- 如果涉及普通用户,确认所需的 App Review 与 Advanced Access 范围。
- App Secret 与令牌交换操作只能在服务器执行。
- 加密保存长期令牌,并在到期前刷新。
- 生成 OAuth
state,并在回调中验证。 - 重试时使用指数退避,并设置幂等键防止重复发布。
- 监控发布与搜索配额以及 API 错误响应。
- 准备隐私政策、数据删除请求 URL 与取消授权回调。
常见错误
| 现象 | 检查项目 |
|---|---|
OAuth 后出现 redirect_uri 错误 |
协议、路径和末尾斜杠是否与注册 URI 完全一致 |
Matching code was not found or was already used |
授权码是否已过期或已经使用过一次 |
| 权限错误 | 检查令牌 scopes、测试者角色、App Review 或 Advanced Access 状态 |
| 图片或视频容器失败 | 媒体 URL 是否无需登录即可公开访问 |
| 长期令牌刷新失败 | 令牌是否已签发满 24 小时且尚未过期 |
| 发布配额错误 | 检查 threads_publishing_limit 的 quota_usage 与 config |
总结
Threads API 集成的核心并不只是编写 API 调用,而是理解应用、用户、权限和令牌之间彼此分离的关系。在 App Dashboard 配置 Threads Use Case,通过 OAuth 获取用户同意,在服务器将授权码交换为长期令牌,然后依次调用容器创建和发布两个阶段,即可完成基础发布自动化。
建议先使用本人和测试者账号验证最少权限集,再逐步加入普通用户支持、令牌续期、安全存储和配额监控,从而扩展为可投入生产的结构。
Threadsへの投稿を自動化するためにMeta for Developersを開くと、最初に迷いやすいのが認証モデルです。Threads APIは、一般的なサービスのようにAPI Keyを1つコピーするだけで呼び出せる仕組みではありません。アプリを識別する Threads App IDとApp Secret、ユーザーの代わりにリクエストするための Threads User Access Token、そして機能ごとの 権限スコープが必要です。
この記事では、Meta Threads API公式ドキュメントを基準に、アプリ作成、OAuth、長期トークン、テキスト投稿、トークン確認、利用上限の確認までを実装順に整理します。例はNext.jsサーバーを基準にしていますが、秘密情報とトークンをサーバーで管理する原則は他のフレームワークでも同じです。
最初に修正・補足するポイント
元の草案の大きな流れは正しいものでした。ただし、現在の公式ドキュメントと比較すると、次の点を補足する必要があります。
- Threads APIの中心的な管理画面は Meta for Developers App Dashboard です。
- 認証は単一のAPI Keyではなく、Threads App ID + Threads App Secret + ユーザーアクセストークンの組み合わせです。
- 最新の公式例では
graph.threads.comを使用しています。公式概要ではgraph.threads.netもサポートされていますが、新規実装ではドキュメントと同じ.comホストを使うと理解しやすくなります。 - 短期アクセストークンは1時間、長期アクセストークンは60日間有効です。長期トークンは発行から24時間が経過した後、期限切れになる前まで更新できます。
- Graph API Explorerは開発時にトークンと権限を試すために利用できますが、本番のOAuthフローや安全なトークン保存の代わりにはなりません。
- アプリロールを持たない一般ユーザーのデータにアクセスするには、必要な権限のApp Reviewとアプリの公開が必要です。自分のアカウントとThreadsテスターだけを使う開発段階とは範囲が異なります。
Threads APIで使う3つの認証情報
| 項目 | 用途 | 確認・発行場所 |
|---|---|---|
| Threads App ID | OAuthやAPIリクエストを行うアプリを識別 | App DashboardのThreads設定、またはApp settings → Basic |
| Threads App Secret | 認証コード交換や長期トークン発行時のサーバー認証 | App DashboardのThreads設定、またはApp settings → Basic |
| Threads User Access Token | 特定のThreadsユーザーに代わってAPIを呼び出す | OAuthフローまたは開発ツール |
App Secretはアプリ自体の秘密情報で、User Access Tokenはアプリとユーザーの権限関係を表します。互いに代用することはできません。Threads APIスタートガイドでも、Threads専用のApp IDとApp Secretを使うよう案内されています。
1. MetaアプリとThreads Use Caseを作成する
- Meta for Developersにログインします。
- My Apps → Create Appへ移動します。
- アプリ作成時に Threads API Use Caseを選択します。
- Use casesで実際に必要なThreads権限を追加します。
- SettingsでOAuthリダイレクトURI、認証解除コールバックURL、データ削除リクエストURLを登録します。
- 開発用アカウントを Threads Testerに追加し、Threads側で招待を承認します。
Dashboardの更新によりメニュー名が多少変わる場合があります。最新手順はThreads APIユースケース設定ガイドで確認してください。
Meta for Developers
└─ My Apps
   └─ 自分のアプリ
      ├─ Use cases
      │  └─ Threads API
      │     ├─ Permissions
      │     └─ Settings
      ├─ App settings
      │  └─ Basic
      └─ App roles
         └─ Threads Testers
2. 必要最小限の権限を選ぶ
すべてのThreads API呼び出しには threads_basic が必要です。その他の権限は機能に応じて追加します。
| 実現したいこと | 必要な権限 |
|---|---|
| 基本プロフィールの取得 | threads_basic |
| 投稿の公開 | threads_basic, threads_content_publish |
| 返信の取得 | threads_basic, threads_read_replies |
| 返信の管理 | threads_basic, threads_manage_replies |
| インサイトの取得 | threads_basic, threads_manage_insights |
| キーワード検索 | threads_basic, threads_keyword_search |
最初からすべての権限を要求せず、実際の機能に必要なscopeだけを選びます。自分とテスターのアカウントでは開発できますが、アプリロールを持たない一般ユーザーへ機能を提供する場合は、関連権限のAdvanced Access承認とApp Reviewが必要になることがあります。
3. OAuthでユーザートークンを発行する
認証全体の流れは次のとおりです。
Threads App ID + Redirect URI + Scope
                ↓
         Threadsユーザーの同意
                ↓
       Authorization Code
                ↓ サーバーで交換
    Short-lived Access Token(1時間)
                ↓ サーバーで交換
     Long-lived Access Token(60日)
                ↓ 期限前に更新
            再び60日間有効
ユーザーを認証画面へ送る
ユーザーを次のURLへリダイレクトします。stateを生成・検証し、ログイン要求とコールバックを結び付けてCSRF攻撃を防ぐことを推奨します。
https://threads.com/oauth/authorize
  ?client_id=<THREADS_APP_ID>
  &redirect_uri=<REDIRECT_URI>
  &scope=threads_basic,threads_content_publish
  &response_type=code
  &state=<RANDOM_STATE>
登録済みのRedirect URIとリクエストの redirect_uri は、末尾のスラッシュを含めて完全に一致する必要があります。認証が成功するとMetaからクエリパラメーターで code が返ります。この認証コードは1時間有効で、1回だけ使用できます。
認証コードを短期トークンに交換する
このリクエストにはApp Secretが含まれるため、ブラウザではなくサーバーで実行します。
curl -X POST \
  https://graph.threads.com/oauth/access_token \
  -F client_id="$THREADS_APP_ID" \
  -F client_secret="$THREADS_APP_SECRET" \
  -F grant_type=authorization_code \
  -F redirect_uri="$THREADS_REDIRECT_URI" \
  -F code="$AUTHORIZATION_CODE"
成功すると、短期 access_token とアプリスコープの user_id が返ります。すべてのリクエストパラメーターはアクセストークンと権限の取得で確認できます。
短期トークンを長期トークンに交換する
有効期限内の短期トークンを、60日間有効な長期トークンに交換します。
curl -G https://graph.threads.com/access_token \
  --data-urlencode grant_type=th_exchange_token \
  --data-urlencode client_secret="$THREADS_APP_SECRET" \
  --data-urlencode access_token="$SHORT_LIVED_ACCESS_TOKEN"
長期トークンは発行から24時間が経過した後、期限切れになる前まで更新できます。
curl -G https://graph.threads.com/refresh_access_token \
  --data-urlencode grant_type=th_refresh_token \
  --data-urlencode access_token="$LONG_LIVED_ACCESS_TOKEN"
更新すると、更新日から再び60日間有効になります。期限切れのトークンは更新できないため、期限前の更新処理が必要です。実装条件は長期アクセストークン公式ガイドを基準にしてください。
4. Next.jsサーバーに秘密情報を保存する
THREADS_APP_ID=...
THREADS_APP_SECRET=...
THREADS_REDIRECT_URI=https://example.com/api/auth/threads/callback
THREADS_APP_SECRETや長期Access Tokenに NEXT_PUBLIC_ 接頭辞を付けてはいけません。Reactコンポーネント、ブラウザバンドル、モバイルアプリのバイナリにも含めないでください。
推奨構成は次のとおりです。
Browser
  └─ OAuth同意とコールバック
       ↓
Next.js Route Handler
  ├─ stateを検証
  ├─ code → short-lived tokenを交換
  ├─ short-lived → long-lived tokenを交換
  └─ トークンを暗号化して保存
       ↓
Database / Secret Storage
       ↓
https://graph.threads.com
複数ユーザーを扱う場合は、トークンをユーザーレコードに関連付け、暗号化して保存し、有効期限と付与されたscopeも記録します。ログにトークン全体を残してはいけません。
5. テキスト投稿を公開する
Threadsの単一投稿は、コンテナ作成と公開の2段階で処理します。これはThreads投稿作成の公式ドキュメントにある基本フローです。
const THREADS_API = 'https://graph.threads.com/v1.0';

type ThreadsContainerResponse = { id: string };

export async function publishThreadsText({
  userId,
  accessToken,
  text,
}: {
  userId: string;
  accessToken: string;
  text: string;
}) {
  const createBody = new URLSearchParams({
    media_type: 'TEXT',
    text,
    access_token: accessToken,
  });

  const createResponse = await fetch(`${THREADS_API}/${userId}/threads`, {
    method: 'POST',
    body: createBody,
  });

  if (!createResponse.ok) {
    throw new Error(`Threads container creation failed: ${createResponse.status}`);
  }

  const container = (await createResponse.json()) as ThreadsContainerResponse;

  const publishBody = new URLSearchParams({
    creation_id: container.id,
    access_token: accessToken,
  });

  const publishResponse = await fetch(
    `${THREADS_API}/${userId}/threads_publish`,
    { method: 'POST', body: publishBody },
  );

  if (!publishResponse.ok) {
    throw new Error(`Threads publishing failed: ${publishResponse.status}`);
  }

  return publishResponse.json() as Promise<{ id: string }>;
}
テキスト投稿は500文字までです。画像や動画の投稿では media_type と image_url または video_url を使い、Metaのサーバーがメディアを取得できるようURLを外部公開する必要があります。メディア処理には時間がかかるため、コンテナ状態を確認してから公開する方が安全です。
6. トークン状態をデバッグする
Access Token Debuggerを使うか、/debug_token エンドポイントを呼び出します。
curl -G https://graph.threads.com/v1.0/debug_token \
  --data-urlencode access_token="$THREADS_TESTER_ACCESS_TOKEN" \
  --data-urlencode input_token="$TOKEN_TO_INSPECT"
レスポンスでは次の情報を確認できます。
is_valid
issued_at
expires_at
data_access_expires_at
user_id
scopes
application
access_token と検査対象の input_token は同じアプリに関連付けられている必要があります。詳しい条件はThreadsトークンデバッグガイドで確認できます。
7. 投稿上限と検索上限を確認する
1つのプロフィールは、APIを通じてローリング24時間以内に最大250件を投稿でき、カルーセルは1件として数えられます。現在の使用量は次のエンドポイントで確認します。
curl -G \
  "https://graph.threads.com/v1.0/$THREADS_USER_ID/threads_publishing_limit" \
  --data-urlencode fields=quota_usage,config \
  --data-urlencode access_token="$THREADS_ACCESS_TOKEN"
quota_usage は直近24時間の投稿数、config は総上限と期間を示します。Threads API利用制限とUserエンドポイントリファレンスを併せて確認してください。
Keyword Search APIは、ユーザーごとにローリング24時間以内で最大2,200クエリを許可します。同じユーザーの上限は複数アプリをまたいで合算され、同じキーワードの繰り返し検索もカウントされます。公開投稿の検索には threads_keyword_search 権限の承認も必要です。
8. 開発と本番の要件を分ける
開発段階
- Threads Testerの招待を送り、Threadsで承認します。
- Redirect URIが登録値と完全に一致するか確認します。
threads_basicと必要最小限の追加権限だけを要求します。- Graph API Explorerと自分・テスターのアカウントで呼び出しを検証します。
- トークンの
is_valid、expires_at、scopesを確認します。
本番段階
- 一般ユーザーを扱う場合は、必要なApp ReviewとAdvanced Accessの範囲を確認します。
- App Secretとトークン交換はサーバーだけで実行します。
- 長期トークンを暗号化して保存し、期限前に更新します。
- OAuth
stateを生成し、コールバックで一致を検証します。 - 再試行には指数バックオフを使い、重複投稿を防ぐ冪等キーを用意します。
- 投稿・検索の利用量とAPIエラーレスポンスを監視します。
- プライバシーポリシー、データ削除リクエストURL、認証解除コールバックを準備します。
よくあるエラー
| 症状 | 確認項目 |
|---|---|
OAuth後の redirect_uri エラー |
プロトコル、パス、末尾スラッシュが登録URIと完全に一致するか確認 |
Matching code was not found or was already used |
認証コードが期限切れか、すでに1回使われていないか確認 |
| 権限エラー | トークンの scopes、テスターのロール、App Review・Advanced Accessの状態を確認 |
| 画像・動画コンテナの失敗 | メディアURLがログインなしで公開アクセスできるか確認 |
| 長期トークン更新の失敗 | 発行から24時間が経過し、まだ期限切れでないか確認 |
| 投稿上限エラー | threads_publishing_limit の quota_usage と config を確認 |
まとめ
Threads API統合の要点は、API呼び出しコードそのものよりも、アプリ・ユーザー・権限・トークンの関係を分けて理解することです。App DashboardでThreads Use Caseを設定し、OAuthでユーザーの同意を得て、サーバーでコードを長期トークンへ交換し、コンテナ作成と公開の2段階を呼び出せば、基本的な投稿自動化が完成します。
まず自分とテスターのアカウントで最小限の権限を検証してください。その後、一般ユーザー対応、トークン更新、安全な保存、利用量監視を段階的に追加すれば、本番運用できる構成へ拡張できます。
Al abrir Meta for Developers para automatizar publicaciones en Threads, el primer punto que suele generar dudas es el modelo de autenticación. Threads API no funciona como un servicio convencional en el que basta con copiar una sola API Key. Se necesitan un Threads App ID y App Secret para identificar la aplicación, un Threads User Access Token para actuar en nombre de un usuario y scopes de permisos específicos para cada función.
Esta guía sigue la documentación oficial de Meta Threads API y explica, en orden de implementación, la creación de la aplicación, OAuth, los tokens de larga duración, la publicación de texto, la inspección de tokens y la consulta de cuotas. Los ejemplos usan un servidor Next.js, pero el principio de guardar secretos y tokens en el servidor se aplica también a otros frameworks.
Correcciones y aclaraciones iniciales
El flujo general del borrador original era correcto. Sin embargo, al compararlo con la documentación oficial actual, conviene aclarar estos detalles.
- Meta for Developers App Dashboard es la consola central de administración de Threads API.
- La autenticación combina Threads App ID + Threads App Secret + token de acceso de usuario, no una sola API Key.
- Los ejemplos oficiales actuales usan
graph.threads.com. La introducción también indica quegraph.threads.netes compatible, pero emplear el host.commantiene una nueva implementación alineada con la documentación. - Los tokens de corta duración son válidos durante una hora y los de larga duración durante 60 días. Un token de larga duración puede renovarse cuando han transcurrido al menos 24 horas desde su emisión y antes de que caduque.
- Graph API Explorer sirve para probar tokens y permisos durante el desarrollo. No sustituye el flujo OAuth de producción ni el almacenamiento seguro de tokens.
- Para acceder a datos de usuarios sin un rol en la aplicación, los permisos correspondientes deben superar App Review y la aplicación debe estar publicada. El desarrollo con la cuenta propia y cuentas Threads Tester tiene un alcance diferente.
Los tres valores de autenticación de Threads API
| Elemento | Uso | Dónde encontrarlo o emitirlo |
|---|---|---|
| Threads App ID | Identifica qué aplicación realiza una solicitud OAuth o API | Configuración de Threads en App Dashboard o App settings → Basic |
| Threads App Secret | Autentica el servidor al intercambiar el código o emitir un token de larga duración | Configuración de Threads en App Dashboard o App settings → Basic |
| Threads User Access Token | Autoriza llamadas API en nombre de un usuario concreto de Threads | Flujo OAuth o herramientas de desarrollo |
El App Secret es la credencial confidencial de la aplicación, mientras que el User Access Token representa la relación de permisos entre aplicación y usuario. No son intercambiables. La guía Introducción a Threads API también indica que debe usarse el App ID y App Secret específicos de Threads.
1. Crear una aplicación de Meta y el Threads Use Case
- Inicia sesión en Meta for Developers.
- Ve a My Apps → Create App.
- Selecciona Threads API Use Case durante la creación de la aplicación.
- Añade en Use cases solo los permisos de Threads que realmente necesites.
- Registra en Settings el URI de redirección OAuth, la URL de callback de desautorización y la URL de solicitud de eliminación de datos.
- Añade la cuenta de desarrollo como Threads Tester y acepta la invitación en Threads.
Los nombres de los menús pueden variar ligeramente con las actualizaciones del Dashboard. Consulta los pasos actuales en la guía de configuración del caso de uso de Threads API.
Meta for Developers
└─ My Apps
   └─ Mi aplicación
      ├─ Use cases
      │  └─ Threads API
      │     ├─ Permissions
      │     └─ Settings
      ├─ App settings
      │  └─ Basic
      └─ App roles
         └─ Threads Testers
2. Solicitar solo los permisos necesarios
Todas las llamadas a Threads API requieren threads_basic. Los demás permisos se añaden según las funciones implementadas.
| Tarea | Permisos necesarios |
|---|---|
| Leer el perfil básico | threads_basic |
| Publicar contenido | threads_basic, threads_content_publish |
| Leer respuestas | threads_basic, threads_read_replies |
| Gestionar respuestas | threads_basic, threads_manage_replies |
| Consultar estadísticas | threads_basic, threads_manage_insights |
| Buscar por palabra clave | threads_basic, threads_keyword_search |
No solicites todos los permisos desde el principio. Elige únicamente los scopes necesarios para funciones reales. Puedes desarrollar con tu propia cuenta y cuentas de prueba, pero ofrecer funciones a usuarios sin roles en la aplicación puede requerir la aprobación de Advanced Access y App Review para los permisos correspondientes.
3. Emitir un token de usuario con OAuth
El flujo completo de autorización es el siguiente.
Threads App ID + Redirect URI + Scope
                ↓
       Consentimiento del usuario
                ↓
       Authorization Code
                ↓ intercambio en servidor
    Short-lived Access Token (1 hora)
                ↓ intercambio en servidor
     Long-lived Access Token (60 días)
                ↓ renovación antes de caducar
          Válido otros 60 días
Enviar al usuario a la ventana de autorización
Redirige al usuario a la siguiente URL. Conviene generar y validar state para vincular la solicitud de inicio de sesión con el callback y protegerse frente a ataques CSRF.
https://threads.com/oauth/authorize
  ?client_id=<THREADS_APP_ID>
  &redirect_uri=<REDIRECT_URI>
  &scope=threads_basic,threads_content_publish
  &response_type=code
  &state=<RANDOM_STATE>
El Redirect URI registrado debe coincidir exactamente con el redirect_uri de la solicitud, incluida la barra final. Tras autorizar, Meta devuelve code como parámetro de consulta. Este código de autorización es válido durante una hora y solo puede usarse una vez.
Intercambiar el código por un token de corta duración
Esta solicitud contiene el App Secret, por lo que debe ejecutarse en el servidor y no en el navegador.
curl -X POST \
  https://graph.threads.com/oauth/access_token \
  -F client_id="$THREADS_APP_ID" \
  -F client_secret="$THREADS_APP_SECRET" \
  -F grant_type=authorization_code \
  -F redirect_uri="$THREADS_REDIRECT_URI" \
  -F code="$AUTHORIZATION_CODE"
Si la operación tiene éxito, la respuesta incluye un access_token de corta duración y un user_id con ámbito de aplicación. Consulta todos los parámetros en Obtener tokens de acceso y permisos.
Intercambiar el token corto por uno de larga duración
Intercambia un token de corta duración no caducado por otro válido durante 60 días.
curl -G https://graph.threads.com/access_token \
  --data-urlencode grant_type=th_exchange_token \
  --data-urlencode client_secret="$THREADS_APP_SECRET" \
  --data-urlencode access_token="$SHORT_LIVED_ACCESS_TOKEN"
El token de larga duración puede renovarse después de cumplir 24 horas y antes de caducar.
curl -G https://graph.threads.com/refresh_access_token \
  --data-urlencode grant_type=th_refresh_token \
  --data-urlencode access_token="$LONG_LIVED_ACCESS_TOKEN"
Al renovarlo vuelve a ser válido durante 60 días a partir de la fecha de renovación. Un token caducado no puede renovarse, así que hay que programar el proceso antes de su vencimiento. Implementa las condiciones exactas de la guía oficial de tokens de larga duración.
4. Guardar los secretos en el servidor Next.js
THREADS_APP_ID=...
THREADS_APP_SECRET=...
THREADS_REDIRECT_URI=https://example.com/api/auth/threads/callback
Nunca añadas el prefijo NEXT_PUBLIC_ a THREADS_APP_SECRET ni a un Access Token de larga duración. Tampoco los incluyas en componentes React, bundles del navegador o binarios de aplicaciones móviles.
Una estructura recomendada es la siguiente.
Browser
  └─ Consentimiento OAuth y callback
       ↓
Next.js Route Handler
  ├─ validar state
  ├─ intercambiar code → short-lived token
  ├─ intercambiar short-lived → long-lived token
  └─ almacenar token cifrado
       ↓
Database / Secret Storage
       ↓
https://graph.threads.com
Si admites varios usuarios, relaciona cada token con su registro, cífralo en reposo y guarda también su fecha de caducidad y los scopes concedidos. Nunca registres un token completo en los logs.
5. Publicar un post de texto
La publicación de un post individual en Threads tiene dos etapas: crear un contenedor y publicarlo. Es el flujo estándar de la documentación oficial para crear publicaciones en Threads.
const THREADS_API = 'https://graph.threads.com/v1.0';

type ThreadsContainerResponse = { id: string };

export async function publishThreadsText({
  userId,
  accessToken,
  text,
}: {
  userId: string;
  accessToken: string;
  text: string;
}) {
  const createBody = new URLSearchParams({
    media_type: 'TEXT',
    text,
    access_token: accessToken,
  });

  const createResponse = await fetch(`${THREADS_API}/${userId}/threads`, {
    method: 'POST',
    body: createBody,
  });

  if (!createResponse.ok) {
    throw new Error(`Threads container creation failed: ${createResponse.status}`);
  }

  const container = (await createResponse.json()) as ThreadsContainerResponse;

  const publishBody = new URLSearchParams({
    creation_id: container.id,
    access_token: accessToken,
  });

  const publishResponse = await fetch(
    `${THREADS_API}/${userId}/threads_publish`,
    { method: 'POST', body: publishBody },
  );

  if (!publishResponse.ok) {
    throw new Error(`Threads publishing failed: ${publishResponse.status}`);
  }

  return publishResponse.json() as Promise<{ id: string }>;
}
Los posts de texto están limitados a 500 caracteres. Los posts de imagen o vídeo usan media_type junto con image_url o video_url, y la URL debe ser pública para que los servidores de Meta puedan obtener el archivo. El procesamiento tarda un tiempo, por lo que es más seguro comprobar el estado del contenedor antes de publicarlo.
6. Depurar el estado de un token
Usa Access Token Debugger o llama al endpoint /debug_token.
curl -G https://graph.threads.com/v1.0/debug_token \
  --data-urlencode access_token="$THREADS_TESTER_ACCESS_TOKEN" \
  --data-urlencode input_token="$TOKEN_TO_INSPECT"
La respuesta permite revisar estos valores.
is_valid
issued_at
expires_at
data_access_expires_at
user_id
scopes
application
El access_token y el input_token inspeccionado deben estar asociados a la misma aplicación. Consulta los requisitos exactos en la guía de depuración de tokens de Threads.
7. Comprobar los límites de publicación y búsqueda
Un perfil puede publicar hasta 250 posts mediante la API en un periodo móvil de 24 horas, y un carrusel cuenta como un solo post. Consulta el uso actual con este endpoint.
curl -G \
  "https://graph.threads.com/v1.0/$THREADS_USER_ID/threads_publishing_limit" \
  --data-urlencode fields=quota_usage,config \
  --data-urlencode access_token="$THREADS_ACCESS_TOKEN"
quota_usage muestra el número de publicaciones durante las últimas 24 horas y config contiene la cuota total y su duración. Consulta tanto los límites de uso de Threads API como la referencia del endpoint User.
La Keyword Search API permite hasta 2.200 consultas por usuario en un periodo móvil de 24 horas. El límite se comparte entre aplicaciones para el mismo usuario y las consultas repetidas de una palabra clave también cuentan. Buscar publicaciones públicas requiere además la aprobación del permiso threads_keyword_search.
8. Separar los requisitos de desarrollo y producción
Desarrollo
- Envía la invitación de Threads Tester y acéptala en Threads.
- Confirma que el Redirect URI coincide exactamente con el valor registrado.
- Solicita
threads_basicy solo los scopes adicionales necesarios. - Prueba las llamadas con Graph API Explorer y cuentas propias o de prueba.
- Revisa
is_valid,expires_atyscopesdel token.
Producción
- Si participarán usuarios generales, verifica el alcance necesario de App Review y Advanced Access.
- Ejecuta las operaciones con App Secret y el intercambio de tokens únicamente en el servidor.
- Cifra los tokens de larga duración y renuévalos antes de que caduquen.
- Genera un valor OAuth
statey valídalo en el callback. - Usa backoff exponencial en los reintentos y claves de idempotencia para evitar publicaciones duplicadas.
- Supervisa las cuotas de publicación y búsqueda, además de las respuestas de error de la API.
- Prepara una política de privacidad, una URL de solicitud de eliminación de datos y un callback de desautorización.
Errores frecuentes
| Síntoma | Qué comprobar |
|---|---|
Error de redirect_uri tras OAuth |
Que protocolo, ruta y barra final coincidan exactamente con el URI registrado |
Matching code was not found or was already used |
Si el código de autorización caducó o ya se utilizó una vez |
| Error de permisos | scopes del token, rol de tester y estado de App Review o Advanced Access |
| Fallo del contenedor de imagen o vídeo | Que la URL del archivo sea pública y accesible sin autenticación |
| Fallo al renovar un token largo | Que tenga al menos 24 horas y todavía no haya caducado |
| Error de límite de publicación | quota_usage y config de threads_publishing_limit |
Conclusión
La clave de una integración con Threads API no es solo escribir llamadas API, sino entender las relaciones separadas entre aplicación, usuario, permisos y token. Configura el Threads Use Case en App Dashboard, obtén el consentimiento mediante OAuth, intercambia el código por un token de larga duración en el servidor y llama a las dos etapas de creación y publicación del contenedor para completar la automatización básica.
Empieza validando el conjunto mínimo de permisos con tu cuenta y cuentas de prueba. Después, añade de forma gradual soporte para usuarios generales, renovación de tokens, almacenamiento seguro y supervisión de cuotas hasta obtener una integración preparada para producción.