Self-Hosting Hermes AI Agent on a Mac Mini
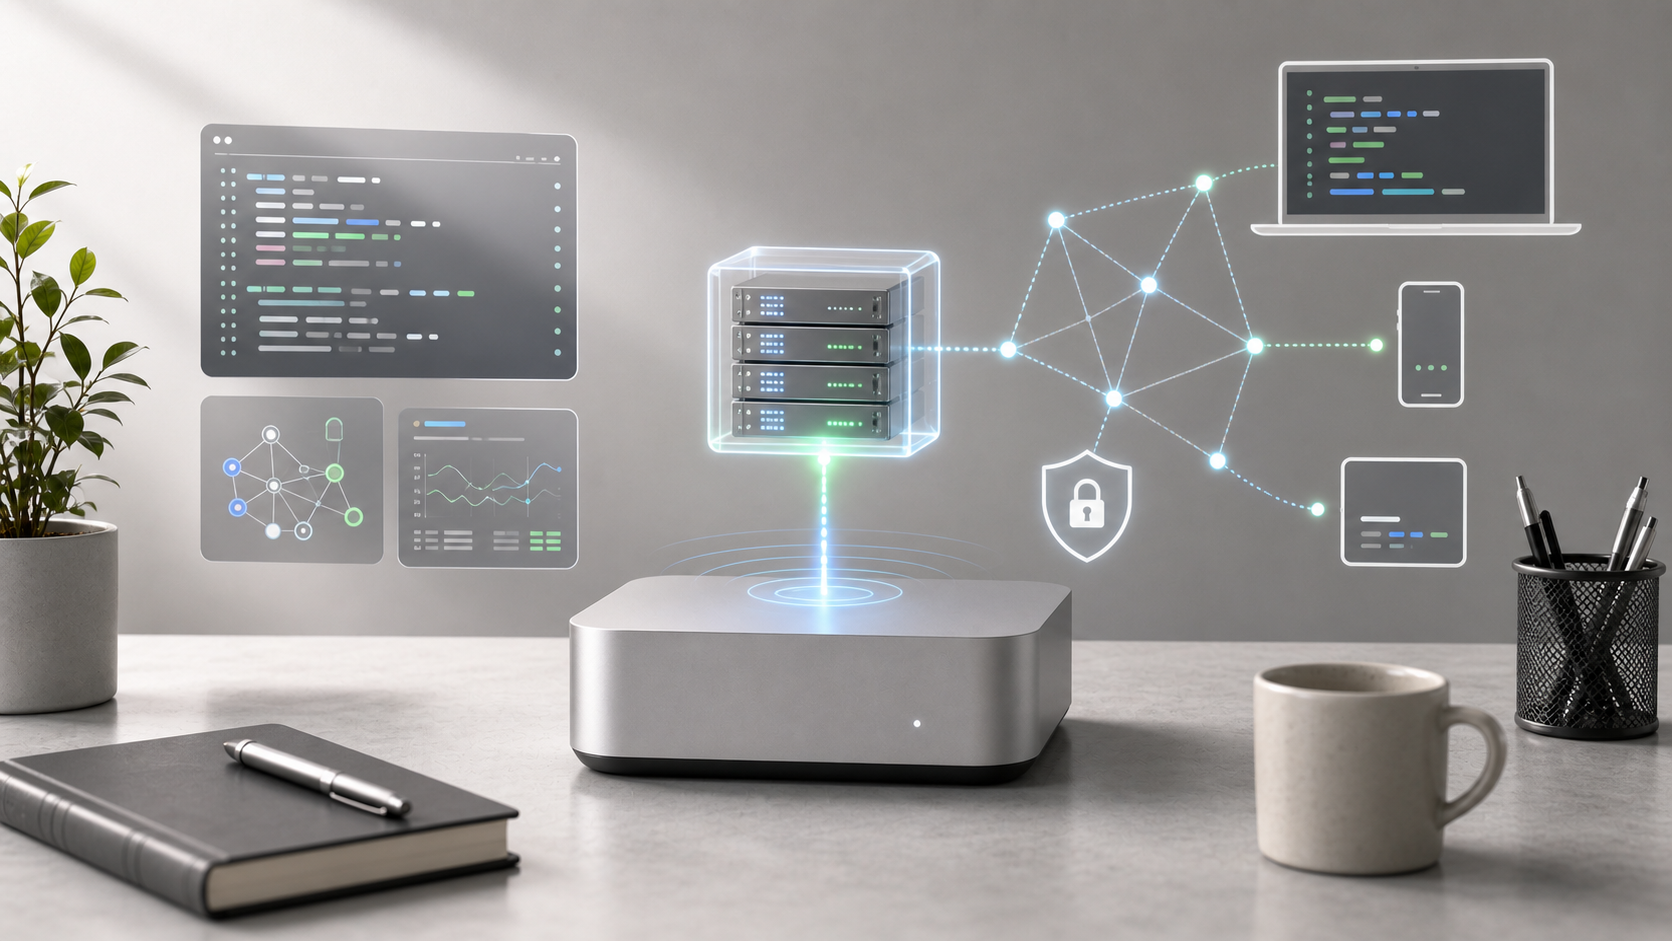
A Mac Mini can be used as a small, always-on local AI server for running an autonomous agent stack. This guide covers a Hermes Agent setup with local Ollama models, a web dashboard, macOS automation permissions, and safer remote access through a private network.
Before running any installer or container command, verify the current official repository, image name, and documentation. Agent frameworks and web dashboard images can change quickly, and a local automation agent may receive broad access to your machine.
Current Reference Points
Check these sources before copying any command:
Why Run Hermes Agent Locally
Running an AI agent locally has a few practical advantages:
- Data stays on the Mac Mini unless you explicitly connect external services.
- Local models avoid per-token API costs.
- The machine can be used for desktop automation, file handling, and background workflows.
- Apple Silicon Mac Minis are quiet, power-efficient, and suitable for long-running local services.
The tradeoff is that local models may be slower or less capable than hosted frontier models. You also become responsible for security, updates, backups, and access control.
Prerequisites
Prepare the following before installation:
- A Mac Mini, preferably Apple Silicon.
- Ollama installed and running.
- Docker Desktop installed if you plan to run a web dashboard.
- Basic familiarity with Terminal and macOS privacy permissions.
- A clean backup or restore point before granting desktop automation permissions.
Step 1: Install Hermes Agent
The setup uses a one-line installer from the Hermes Agent repository. Verify the source before executing remote scripts.
curl -fsSL https://raw.githubusercontent.com/NousResearch/hermes-agent/main/scripts/install.sh | bashAfter installation, refresh your shell profile so the hermes command is available.
source ~/.zshrcCheck that the CLI is installed.
hermes --versionIf the command is not found, confirm that the installer added Hermes to your shell path and that you are using the expected shell profile.
Step 2: Connect Hermes to a Local Ollama Model
To keep inference local, run Hermes through Ollama. For coding and agent workflows, start with a smaller tool-capable model before moving to larger models.
Pull a model:
ollama pull qwen2.5-coder:7bModel sizing guidance:
- 8GB to 16GB RAM: start with 7B or 8B models.
- 24GB+ RAM: try larger models if response speed is acceptable.
- Agent workflows: prioritize reliability, instruction following, and tool-use behavior over raw model size.
Quick Method
If the Hermes CLI supports automated Ollama setup in your installed version, use:
ollama launch hermesThis flow is expected to detect Ollama and prompt you to select a pulled model.
Manual CLI Method
Use the model configuration wizard if you prefer manual configuration.
hermes modelWhen prompted, choose a custom OpenAI-compatible endpoint and use:
Endpoint URL: http://127.0.0.1:11434/v1
API Key: ollama
Model Name: qwen2.5-coder:7b
The Ollama OpenAI-compatible endpoint is typically available at http://127.0.0.1:11434/v1, but verify the endpoint in your current Ollama version. If your installed Hermes version uses an older setup wizard, hermes setup may expose the same configuration prompts.
Step 3: Grant macOS Security Permissions
Desktop automation requires macOS permissions. When Hermes first tries to control the desktop or inspect the screen, macOS may block the action until permissions are granted.
Open System Settings > Privacy & Security and review permissions for the terminal or Hermes application under:
- Accessibility: allows the agent to interact with UI elements and type.
- Screen Recording: allows the agent to inspect the desktop layout.
Then run:
hermes doctorUse this to check whether required paths, dependencies, and permissions are correctly configured.
Step 4: Set Up a Web Dashboard
A web dashboard makes it easier to review tasks, manage sessions, and inspect agent activity. The setup below uses a Docker-based Hermes WebUI container. Verify the image name and Docker options against the current WebUI documentation before running it.
docker run -d --name hermes-webui \
  -e WANTED_UID="$(id -u)" \
  -e WANTED_GID="$(id -g)" \
  -e HERMES_WEBUI_STATE_DIR=/home/hermeswebui/.hermes/webui \
  -v ~/.hermes:/home/hermeswebui/.hermes \
  -v ~/workspace:/workspace \
  -p 127.0.0.1:8787:8787 \
  ghcr.io/nesquena/hermes-webui:latest
Open the dashboard locally:
http://127.0.0.1:8787If the page does not load, check that Docker Desktop is running and that port 8787 is not already in use.
Step 5: Enable Remote Access on Your Local Network
If you need to connect from another device on the same local network, configure the API server carefully.
Open the Hermes environment configuration file:
nano ~/.hermes/.envAdd or update:
API_SERVER_ENABLED=true
API_SERVER_KEY=your-super-secure-password
API_SERVER_HOST=0.0.0.0
API_SERVER_PORT=8642
Restart the gateway:
hermes gateway stop && hermes gatewayFrom another device on the same network, connect with:
URL: http://<YOUR_MAC_MINI_IP_ADDRESS>:8642/v1
Secret Key: your-super-secure-password
Use a strong secret key and avoid reusing credentials from other services.
Secure Remote Access
Do not expose Hermes or dashboard ports directly to the public internet with router port forwarding. An agent that can automate your desktop or access local files should be treated as a high-risk service.
A safer approach is to install Tailscale on both the Mac Mini and the client devices. Tailscale creates an encrypted private network, so you can connect to the Mac Mini through its Tailscale IP instead of exposing local ports publicly.
Recommended approach:
- Install Tailscale on the Mac Mini.
- Install Tailscale on your laptop or phone.
- Sign in to the same Tailscale network.
- Access the Hermes API or dashboard through the Mac Mini’s Tailscale IP.
- Keep API keys enabled even inside the private network.
For the dashboard, prefer keeping Docker bound to 127.0.0.1 and using an authenticated tunnel or a private network path instead of publishing it broadly on your LAN.
Operational Best Practices
For a local agent server, security and maintenance matter as much as installation.
- Keep Hermes, Ollama, Docker images, and macOS updated.
- Use strong API keys and avoid hardcoding them in public notes or repositories.
- Keep the dashboard bound to local or private network access unless there is a specific reason to expose it.
- Review automation permissions regularly in macOS settings.
- Start with low-risk tasks before letting the agent perform file or desktop actions.
- Keep logs enabled so you can audit what the agent attempted.
- Back up important local files before testing autonomous workflows.
Troubleshooting Checklist
Use this checklist when the setup does not work as expected.
hermes --version
ollama list
curl http://127.0.0.1:11434/v1/models
hermes doctor
docker ps
lsof -i :8787
lsof -i :8642
Common issues:
hermescommand not found: shell profile was not reloaded orPATHwas not updated.- Ollama endpoint not reachable: Ollama is not running or the endpoint differs.
- Desktop automation fails: Accessibility or Screen Recording permission is missing.
- Dashboard fails to start: Docker is not running or the port is already occupied.
- Remote client cannot connect: firewall, API host binding, or network routing is blocking access.
Summary
The overall setup is:
- Install Hermes Agent.
- Run a local model through Ollama.
- Grant macOS permissions for desktop automation.
- Run a web dashboard with Docker.
- Enable API access only on trusted networks.
- Use Tailscale for secure remote access.
With this structure, a Mac Mini can function as a private local AI agent server for experimentation, automation, and remote access without depending entirely on hosted AI services.
맥 미니는 자율 에이전트 스택을 실행하는 작고 상시 켜져 있는 로컬 AI 서버로 활용할 수 있습니다. 이 글에서는 로컬 Ollama 모델, 웹 대시보드, macOS 자동화 권한, 프라이빗 네트워크를 통한 더 안전한 원격 접속을 포함한 Hermes Agent 설정을 다룹니다.
설치 스크립트나 컨테이너 명령을 실행하기 전에는 현재 공식 저장소, 이미지 이름, 문서를 반드시 확인하세요. 에이전트 프레임워크와 웹 대시보드 이미지는 빠르게 바뀔 수 있고, 로컬 자동화 에이전트는 사용자의 컴퓨터에 넓은 접근 권한을 받을 수 있습니다.
현재 참고할 곳
명령을 복사하기 전에 아래 출처를 확인하세요.
왜 Hermes Agent를 로컬에서 실행할까
AI 에이전트를 로컬에서 실행하면 몇 가지 실용적인 장점이 있습니다.
- 외부 서비스를 명시적으로 연결하지 않는 한 데이터가 맥 미니 안에 머뭅니다.
- 로컬 모델을 쓰면 토큰당 API 비용을 피할 수 있습니다.
- 이 기기를 데스크톱 자동화, 파일 처리, 백그라운드 워크플로에 사용할 수 있습니다.
- Apple Silicon 맥 미니는 조용하고 전력 효율이 좋아 장시간 실행되는 로컬 서비스에 적합합니다.
대신 로컬 모델은 호스팅된 프런티어 모델보다 느리거나 성능이 낮을 수 있습니다. 보안, 업데이트, 백업, 접근 제어도 직접 책임져야 합니다.
준비물
설치 전에 아래 항목을 준비합니다.
- 가능하면 Apple Silicon 맥 미니.
- 설치되어 실행 중인 Ollama.
- 웹 대시보드를 실행하려면 Docker Desktop.
- 터미널과 macOS 개인정보 보호 권한에 대한 기본 이해.
- 데스크톱 자동화 권한을 부여하기 전의 백업 또는 복원 지점.
1단계: Hermes Agent 설치
이 설정은 Hermes Agent 저장소의 한 줄 설치 스크립트를 사용합니다. 원격 스크립트를 실행하기 전에 출처를 확인하세요.
curl -fsSL https://raw.githubusercontent.com/NousResearch/hermes-agent/main/scripts/install.sh | bash
설치 후에는 hermes 명령을 사용할 수 있도록 셸 프로필을 새로고침합니다.
source ~/.zshrc
CLI가 설치되었는지 확인합니다.
hermes --version
명령을 찾을 수 없다면 설치 스크립트가 Hermes를 셸 경로에 추가했는지, 그리고 예상한 셸 프로필을 사용하고 있는지 확인하세요.
2단계: Hermes를 로컬 Ollama 모델에 연결하기
추론을 로컬에 유지하려면 Hermes를 Ollama를 통해 실행합니다. 코딩과 에이전트 워크플로에서는 큰 모델로 옮기기 전에 작은 도구 사용 가능 모델부터 시작하는 편이 좋습니다.
모델을 내려받습니다.
ollama pull qwen2.5-coder:7b
모델 크기 가이드:
- RAM 8GB~16GB: 7B 또는 8B 모델부터 시작합니다.
- RAM 24GB 이상: 응답 속도가 괜찮다면 더 큰 모델을 시도합니다.
- 에이전트 워크플로: 단순한 모델 크기보다 안정성, 지시 따르기, 도구 사용 동작을 우선합니다.
빠른 방법
설치한 Hermes CLI 버전이 Ollama 자동 설정을 지원한다면 다음을 사용합니다.
ollama launch hermes
이 흐름은 Ollama를 감지하고 내려받은 모델을 선택하라는 프롬프트를 보여줄 것으로 예상됩니다.
수동 CLI 방법
직접 설정하고 싶다면 모델 설정 마법사를 사용합니다.
hermes model
프롬프트가 나오면 사용자 지정 OpenAI 호환 엔드포인트를 선택하고 다음 값을 사용합니다.
Endpoint URL: http://127.0.0.1:11434/v1
API Key: ollama
Model Name: qwen2.5-coder:7b
Ollama의 OpenAI 호환 엔드포인트는 일반적으로 http://127.0.0.1:11434/v1에서 사용할 수 있지만, 현재 Ollama 버전의 엔드포인트를 확인하세요. 설치한 Hermes 버전이 이전 설정 마법사를 사용한다면 hermes setup에서 같은 설정 프롬프트가 나타날 수 있습니다.
3단계: macOS 보안 권한 부여
데스크톱 자동화에는 macOS 권한이 필요합니다. Hermes가 처음으로 데스크톱을 제어하거나 화면을 검사하려고 할 때, 권한을 부여하기 전까지 macOS가 작업을 차단할 수 있습니다.
System Settings > Privacy & Security를 열고 터미널 또는 Hermes 애플리케이션에 대해 다음 권한을 확인합니다.
- Accessibility: 에이전트가 UI 요소와 입력을 조작할 수 있게 합니다.
- Screen Recording: 에이전트가 데스크톱 레이아웃을 검사할 수 있게 합니다.
그다음 실행합니다.
hermes doctor
필요한 경로, 의존성, 권한이 올바르게 설정되었는지 확인하는 데 사용합니다.
4단계: 웹 대시보드 설정
웹 대시보드를 사용하면 작업, 세션, 에이전트 활동을 더 쉽게 검토할 수 있습니다. 아래 설정은 Docker 기반 Hermes WebUI 컨테이너를 사용합니다. 실행하기 전에 현재 WebUI 문서에서 이미지 이름과 Docker 옵션을 확인하세요.
docker run -d --name hermes-webui \
  -e WANTED_UID="$(id -u)" \
  -e WANTED_GID="$(id -g)" \
  -e HERMES_WEBUI_STATE_DIR=/home/hermeswebui/.hermes/webui \
  -v ~/.hermes:/home/hermeswebui/.hermes \
  -v ~/workspace:/workspace \
  -p 127.0.0.1:8787:8787 \
  ghcr.io/nesquena/hermes-webui:latest
대시보드를 로컬에서 엽니다.
http://127.0.0.1:8787
페이지가 열리지 않는다면 Docker Desktop이 실행 중인지, 8787 포트가 이미 사용 중인지 확인하세요.
5단계: 로컬 네트워크에서 원격 접속 활성화
같은 로컬 네트워크의 다른 기기에서 접속해야 한다면 API 서버를 신중하게 설정합니다.
Hermes 환경 설정 파일을 엽니다.
nano ~/.hermes/.env
다음을 추가하거나 수정합니다.
API_SERVER_ENABLED=true
API_SERVER_KEY=your-super-secure-password
API_SERVER_HOST=0.0.0.0
API_SERVER_PORT=8642
게이트웨이를 다시 시작합니다.
hermes gateway stop && hermes gateway
같은 네트워크의 다른 기기에서는 다음 정보로 연결합니다.
URL: http://<YOUR_MAC_MINI_IP_ADDRESS>:8642/v1
Secret Key: your-super-secure-password
강력한 비밀 키를 사용하고 다른 서비스의 자격 증명을 재사용하지 마세요.
안전한 원격 접속
라우터 포트 포워딩으로 Hermes나 대시보드 포트를 공용 인터넷에 직접 노출하지 마세요. 데스크톱을 자동화하거나 로컬 파일에 접근할 수 있는 에이전트는 고위험 서비스로 취급해야 합니다.
더 안전한 방법은 맥 미니와 클라이언트 기기 모두에 Tailscale을 설치하는 것입니다. Tailscale은 암호화된 프라이빗 네트워크를 만들기 때문에 로컬 포트를 공개하지 않고도 맥 미니의 Tailscale IP를 통해 접속할 수 있습니다.
권장 흐름:
- 맥 미니에 Tailscale을 설치합니다.
- 노트북이나 휴대폰에 Tailscale을 설치합니다.
- 같은 Tailscale 네트워크에 로그인합니다.
- 맥 미니의 Tailscale IP를 통해 Hermes API나 대시보드에 접속합니다.
- 프라이빗 네트워크 안에서도 API 키를 계속 사용합니다.
대시보드는 LAN 전체에 넓게 공개하기보다 Docker를 127.0.0.1에 바인딩하고, 인증된 터널이나 프라이빗 네트워크 경로를 사용하는 편이 좋습니다.
운영 모범 사례
로컬 에이전트 서버에서는 설치만큼 보안과 유지보수가 중요합니다.
- Hermes, Ollama, Docker 이미지, macOS를 최신 상태로 유지합니다.
- 강력한 API 키를 사용하고 공개 노트나 저장소에 하드코딩하지 않습니다.
- 명확한 이유가 없다면 대시보드는 로컬 또는 프라이빗 네트워크 접근으로 제한합니다.
- macOS 설정에서 자동화 권한을 정기적으로 검토합니다.
- 에이전트가 파일이나 데스크톱 작업을 수행하게 하기 전에 낮은 위험의 작업부터 시작합니다.
- 에이전트가 시도한 작업을 감사할 수 있도록 로그를 유지합니다.
- 자율 워크플로를 테스트하기 전에 중요한 로컬 파일을 백업합니다.
문제 해결 체크리스트
설정이 예상대로 동작하지 않을 때 아래 체크리스트를 사용합니다.
hermes --version
ollama list
curl http://127.0.0.1:11434/v1/models
hermes doctor
docker ps
lsof -i :8787
lsof -i :8642
자주 발생하는 문제:
hermes명령을 찾을 수 없음: 셸 프로필을 새로고침하지 않았거나PATH가 업데이트되지 않았습니다.- Ollama 엔드포인트에 접속할 수 없음: Ollama가 실행 중이 아니거나 엔드포인트가 다릅니다.
- 데스크톱 자동화 실패: Accessibility 또는 Screen Recording 권한이 없습니다.
- 대시보드 시작 실패: Docker가 실행 중이 아니거나 포트가 이미 사용 중입니다.
- 원격 클라이언트 연결 실패: 방화벽, API 호스트 바인딩, 네트워크 라우팅이 접속을 막고 있습니다.
요약
전체 설정 흐름은 다음과 같습니다.
- Hermes Agent를 설치합니다.
- Ollama를 통해 로컬 모델을 실행합니다.
- 데스크톱 자동화를 위한 macOS 권한을 부여합니다.
- Docker로 웹 대시보드를 실행합니다.
- 신뢰할 수 있는 네트워크에서만 API 접근을 활성화합니다.
- 안전한 원격 접속에는 Tailscale을 사용합니다.
이 구조를 사용하면 맥 미니를 호스팅 AI 서비스에 전적으로 의존하지 않는 비공개 로컬 AI 에이전트 서버로 활용할 수 있습니다.
Mac Mini 可以作为一台小型、常驻运行的本地 AI 服务器,用来运行自主代理栈。本文介绍一套 Hermes Agent 配置,包括本地 Ollama 模型、Web 仪表板、macOS 自动化权限,以及通过私有网络实现更安全的远程访问。
在运行任何安装脚本或容器命令之前,请先确认当前的官方仓库、镜像名称和文档。代理框架和 Web 仪表板镜像变化很快,而本地自动化代理可能会获得对你机器的较大访问权限。
当前参考来源
复制任何命令之前,先检查这些来源:
为什么在本地运行 Hermes Agent
在本地运行 AI 代理有几个实际优势:
- 除非你明确连接外部服务,否则数据会留在 Mac Mini 上。
- 本地模型可以避免按 token 计费的 API 成本。
- 这台机器可以用于桌面自动化、文件处理和后台工作流。
- Apple Silicon Mac Mini 安静、省电,适合长期运行本地服务。
代价是本地模型可能比托管的前沿模型更慢或能力更弱。你也需要自己负责安全、更新、备份和访问控制。
准备条件
安装前请准备以下内容:
- 一台 Mac Mini,最好是 Apple Silicon。
- 已安装并运行的 Ollama。
- 如果计划运行 Web 仪表板,需要安装 Docker Desktop。
- 对 Terminal 和 macOS 隐私权限有基本了解。
- 在授予桌面自动化权限前,准备干净的备份或还原点。
第 1 步:安装 Hermes Agent
此设置使用 Hermes Agent 仓库中的一行安装脚本。执行远程脚本之前,请先确认来源。
curl -fsSL https://raw.githubusercontent.com/NousResearch/hermes-agent/main/scripts/install.sh | bash
安装完成后,刷新 shell 配置文件,让 hermes 命令可用。
source ~/.zshrc
检查 CLI 是否已安装。
hermes --version
如果找不到命令,请确认安装程序是否已将 Hermes 加入 shell 路径,并确认你正在使用预期的 shell 配置文件。
第 2 步:将 Hermes 连接到本地 Ollama 模型
为了让推理保持在本地,通过 Ollama 运行 Hermes。对于编码和代理工作流,建议先从较小且支持工具调用的模型开始,再尝试更大的模型。
拉取一个模型:
ollama pull qwen2.5-coder:7b
模型大小建议:
- 8GB 到 16GB 内存:先从 7B 或 8B 模型开始。
- 24GB 以上内存:如果响应速度可以接受,再尝试更大的模型。
- 代理工作流:优先考虑可靠性、指令跟随能力和工具使用行为,而不是单纯追求模型规模。
快速方法
如果你安装的 Hermes CLI 版本支持自动 Ollama 设置,可以使用:
ollama launch hermes
这个流程通常会检测 Ollama,并提示你选择已经拉取的模型。
手动 CLI 方法
如果你更喜欢手动配置,可以使用模型配置向导。
hermes model
出现提示时,选择自定义 OpenAI 兼容端点,并使用:
Endpoint URL: http://127.0.0.1:11434/v1
API Key: ollama
Model Name: qwen2.5-coder:7b
Ollama 的 OpenAI 兼容端点通常位于 http://127.0.0.1:11434/v1,但请在当前 Ollama 版本中确认。如果你安装的 Hermes 版本使用较旧的设置向导,hermes setup 可能会提供相同的配置提示。
第 3 步:授予 macOS 安全权限
桌面自动化需要 macOS 权限。当 Hermes 第一次尝试控制桌面或检查屏幕时,macOS 可能会阻止该操作,直到你授予权限。
打开 System Settings > Privacy & Security,并为终端或 Hermes 应用检查以下权限:
- Accessibility:允许代理与 UI 元素交互并输入内容。
- Screen Recording:允许代理检查桌面布局。
然后运行:
hermes doctor
用它检查所需路径、依赖项和权限是否配置正确。
第 4 步:设置 Web 仪表板
Web 仪表板可以更方便地查看任务、管理会话和检查代理活动。下面的设置使用基于 Docker 的 Hermes WebUI 容器。运行前,请根据当前 WebUI 文档确认镜像名称和 Docker 选项。
docker run -d --name hermes-webui \
  -e WANTED_UID="$(id -u)" \
  -e WANTED_GID="$(id -g)" \
  -e HERMES_WEBUI_STATE_DIR=/home/hermeswebui/.hermes/webui \
  -v ~/.hermes:/home/hermeswebui/.hermes \
  -v ~/workspace:/workspace \
  -p 127.0.0.1:8787:8787 \
  ghcr.io/nesquena/hermes-webui:latest
在本机打开仪表板:
http://127.0.0.1:8787
如果页面无法加载,请检查 Docker Desktop 是否正在运行,以及端口 8787 是否已被占用。
第 5 步:在本地网络中启用远程访问
如果需要从同一本地网络中的另一台设备连接,请谨慎配置 API 服务器。
打开 Hermes 环境配置文件:
nano ~/.hermes/.env
添加或更新:
API_SERVER_ENABLED=true
API_SERVER_KEY=your-super-secure-password
API_SERVER_HOST=0.0.0.0
API_SERVER_PORT=8642
重启网关:
hermes gateway stop && hermes gateway
从同一网络中的另一台设备连接:
URL: http://<YOUR_MAC_MINI_IP_ADDRESS>:8642/v1
Secret Key: your-super-secure-password
请使用强密钥,并避免复用其他服务的凭据。
安全的远程访问
不要通过路由器端口转发,将 Hermes 或仪表板端口直接暴露到公网。能够自动化桌面或访问本地文件的代理,应被视为高风险服务。
更安全的做法是在 Mac Mini 和客户端设备上都安装 Tailscale。Tailscale 会创建加密的私有网络,因此你可以通过 Mac Mini 的 Tailscale IP 连接,而不是把本地端口公开到互联网。
推荐做法:
- 在 Mac Mini 上安装 Tailscale。
- 在笔记本或手机上安装 Tailscale。
- 登录同一个 Tailscale 网络。
- 通过 Mac Mini 的 Tailscale IP 访问 Hermes API 或仪表板。
- 即使在私有网络内,也保持 API key 启用。
对于仪表板,优先让 Docker 绑定到 127.0.0.1,并使用带认证的隧道或私有网络路径,而不是在整个局域网中广泛发布。
运维最佳实践
对于本地代理服务器,安全和维护与安装同样重要。
- 保持 Hermes、Ollama、Docker 镜像和 macOS 更新。
- 使用强 API key,避免将其硬编码到公开笔记或仓库中。
- 除非有明确理由,否则将仪表板限制在本机或私有网络访问范围内。
- 定期在 macOS 设置中检查自动化权限。
- 在允许代理执行文件或桌面操作之前,先从低风险任务开始。
- 保持日志开启,以便审计代理尝试过的操作。
- 测试自主工作流前,备份重要的本地文件。
故障排查清单
当设置未按预期工作时,使用下面的清单。
hermes --version
ollama list
curl http://127.0.0.1:11434/v1/models
hermes doctor
docker ps
lsof -i :8787
lsof -i :8642
常见问题:
- 找不到
hermes命令:shell 配置文件没有刷新,或PATH没有更新。 - 无法访问 Ollama 端点:Ollama 未运行,或端点不同。
- 桌面自动化失败:缺少 Accessibility 或 Screen Recording 权限。
- 仪表板无法启动:Docker 未运行,或端口已被占用。
- 远程客户端无法连接:防火墙、API host 绑定或网络路由阻止了访问。
总结
整体设置流程是:
- 安装 Hermes Agent。
- 通过 Ollama 运行本地模型。
- 授予桌面自动化所需的 macOS 权限。
- 使用 Docker 运行 Web 仪表板。
- 仅在可信网络中启用 API 访问。
- 使用 Tailscale 实现安全远程访问。
采用这种结构,Mac Mini 可以成为一个私有的本地 AI 代理服务器,用于实验、自动化和远程访问,而不必完全依赖托管 AI 服务。
Mac Mini は、自律型エージェントスタックを動かすための小型で常時稼働するローカル AI サーバーとして使えます。この記事では、ローカル Ollama モデル、Web ダッシュボード、macOS の自動化権限、プライベートネットワークによるより安全なリモートアクセスを含む Hermes Agent の構成を扱います。
インストーラーやコンテナコマンドを実行する前に、現在の公式リポジトリ、イメージ名、ドキュメントを確認してください。エージェントフレームワークや Web ダッシュボードのイメージは変化が速く、ローカル自動化エージェントにはマシンへの広いアクセス権が与えられる可能性があります。
現在の参照先
コマンドをコピーする前に、次の情報源を確認します。
Hermes Agent をローカルで動かす理由
AI エージェントをローカルで動かすことには、いくつか実用的な利点があります。
- 外部サービスを明示的に接続しない限り、データは Mac Mini に残ります。
- ローカルモデルを使うことで、トークン単位の API コストを避けられます。
- デスクトップ自動化、ファイル処理、バックグラウンドワークフローに使えます。
- Apple Silicon Mac Mini は静かで省電力なので、長時間稼働するローカルサービスに向いています。
一方で、ローカルモデルはホスト型のフロンティアモデルより遅い、または能力が低い場合があります。セキュリティ、更新、バックアップ、アクセス制御も自分で管理する必要があります。
前提条件
インストール前に次を用意します。
- Mac Mini。できれば Apple Silicon。
- インストール済みで実行中の Ollama。
- Web ダッシュボードを使う場合は Docker Desktop。
- Terminal と macOS のプライバシー権限に関する基本的な理解。
- デスクトップ自動化権限を付与する前のバックアップまたは復元ポイント。
ステップ 1: Hermes Agent をインストールする
このセットアップでは、Hermes Agent リポジトリのワンラインインストーラーを使います。リモートスクリプトを実行する前に、必ずソースを確認してください。
curl -fsSL https://raw.githubusercontent.com/NousResearch/hermes-agent/main/scripts/install.sh | bash
インストール後、hermes コマンドを使えるようにシェルプロファイルを再読み込みします。
source ~/.zshrc
CLI がインストールされていることを確認します。
hermes --version
コマンドが見つからない場合は、インストーラーが Hermes をシェルのパスに追加したか、想定したシェルプロファイルを使っているか確認してください。
ステップ 2: Hermes をローカル Ollama モデルに接続する
推論をローカルに保つには、Hermes を Ollama 経由で実行します。コーディングやエージェントワークフローでは、大きなモデルに進む前に、小さめでツール利用に向いたモデルから始めるのが現実的です。
モデルを取得します。
ollama pull qwen2.5-coder:7b
モデルサイズの目安:
- RAM 8GB から 16GB: 7B または 8B モデルから始めます。
- RAM 24GB 以上: 応答速度が許容できる場合は、より大きなモデルを試します。
- エージェントワークフロー: 単純なモデルサイズより、信頼性、指示追従、ツール利用の挙動を優先します。
クイック方法
インストールした Hermes CLI が Ollama の自動セットアップをサポートしている場合は、次を使います。
ollama launch hermes
この流れでは Ollama が検出され、取得済みのモデルを選択するプロンプトが表示される想定です。
手動 CLI 方法
手動で構成したい場合は、モデル設定ウィザードを使います。
hermes model
プロンプトが表示されたら、カスタムの OpenAI 互換エンドポイントを選び、次の値を使います。
Endpoint URL: http://127.0.0.1:11434/v1
API Key: ollama
Model Name: qwen2.5-coder:7b
Ollama の OpenAI 互換エンドポイントは通常 http://127.0.0.1:11434/v1 で利用できますが、現在の Ollama バージョンで確認してください。インストールした Hermes のバージョンが古いセットアップウィザードを使う場合、hermes setup で同じ設定プロンプトが表示されることがあります。
ステップ 3: macOS のセキュリティ権限を付与する
デスクトップ自動化には macOS の権限が必要です。Hermes が初めてデスクトップを操作したり画面を検査したりするとき、権限が付与されるまで macOS が動作をブロックする場合があります。
System Settings > Privacy & Security を開き、ターミナルまたは Hermes アプリケーションに対して次の権限を確認します。
- Accessibility: エージェントが UI 要素を操作し、入力できるようにします。
- Screen Recording: エージェントがデスクトップのレイアウトを検査できるようにします。
次に実行します。
hermes doctor
必要なパス、依存関係、権限が正しく構成されているか確認するために使います。
ステップ 4: Web ダッシュボードを設定する
Web ダッシュボードがあると、タスクの確認、セッション管理、エージェント活動の確認がしやすくなります。以下の設定では Docker ベースの Hermes WebUI コンテナを使います。実行する前に、現在の WebUI ドキュメントでイメージ名と Docker オプションを確認してください。
docker run -d --name hermes-webui \
  -e WANTED_UID="$(id -u)" \
  -e WANTED_GID="$(id -g)" \
  -e HERMES_WEBUI_STATE_DIR=/home/hermeswebui/.hermes/webui \
  -v ~/.hermes:/home/hermeswebui/.hermes \
  -v ~/workspace:/workspace \
  -p 127.0.0.1:8787:8787 \
  ghcr.io/nesquena/hermes-webui:latest
ローカルでダッシュボードを開きます。
http://127.0.0.1:8787
ページが読み込まれない場合は、Docker Desktop が起動しているか、ポート 8787 がすでに使われていないか確認してください。
ステップ 5: ローカルネットワークでリモートアクセスを有効にする
同じローカルネットワーク上の別デバイスから接続する必要がある場合は、API サーバーを慎重に構成します。
Hermes の環境設定ファイルを開きます。
nano ~/.hermes/.env
次を追加または更新します。
API_SERVER_ENABLED=true
API_SERVER_KEY=your-super-secure-password
API_SERVER_HOST=0.0.0.0
API_SERVER_PORT=8642
ゲートウェイを再起動します。
hermes gateway stop && hermes gateway
同じネットワーク上の別デバイスから、次のように接続します。
URL: http://<YOUR_MAC_MINI_IP_ADDRESS>:8642/v1
Secret Key: your-super-secure-password
強力なシークレットキーを使い、他のサービスの認証情報を使い回さないでください。
安全なリモートアクセス
ルーターのポートフォワーディングで Hermes やダッシュボードのポートをパブリックインターネットに直接公開しないでください。デスクトップを自動化したりローカルファイルにアクセスしたりできるエージェントは、高リスクのサービスとして扱うべきです。
より安全な方法は、Mac Mini とクライアントデバイスの両方に Tailscale をインストールすることです。Tailscale は暗号化されたプライベートネットワークを作るため、ローカルポートを公開せずに Mac Mini の Tailscale IP 経由で接続できます。
推奨手順:
- Mac Mini に Tailscale をインストールします。
- ノートパソコンまたはスマートフォンに Tailscale をインストールします。
- 同じ Tailscale ネットワークにサインインします。
- Mac Mini の Tailscale IP 経由で Hermes API またはダッシュボードにアクセスします。
- プライベートネットワーク内でも API key は有効にしておきます。
ダッシュボードについては、LAN 全体に広く公開するより、Docker を 127.0.0.1 にバインドし、認証付きトンネルまたはプライベートネットワーク経路を使うことを優先します。
運用のベストプラクティス
ローカルエージェントサーバーでは、インストールと同じくらいセキュリティと保守が重要です。
- Hermes、Ollama、Docker イメージ、macOS を最新に保ちます。
- 強力な API key を使い、公開ノートやリポジトリにハードコードしないようにします。
- 明確な理由がない限り、ダッシュボードはローカルまたはプライベートネットワークへのアクセスに限定します。
- macOS 設定で自動化権限を定期的に見直します。
- エージェントにファイル操作やデスクトップ操作を任せる前に、低リスクのタスクから始めます。
- エージェントが試みた操作を監査できるよう、ログを有効にしておきます。
- 自律ワークフローを試す前に、重要なローカルファイルをバックアップします。
トラブルシューティングチェックリスト
設定が期待どおりに動かない場合は、次のチェックリストを使います。
hermes --version
ollama list
curl http://127.0.0.1:11434/v1/models
hermes doctor
docker ps
lsof -i :8787
lsof -i :8642
よくある問題:
hermesコマンドが見つからない: シェルプロファイルが再読み込みされていない、またはPATHが更新されていません。- Ollama エンドポイントに到達できない: Ollama が実行されていない、またはエンドポイントが異なります。
- デスクトップ自動化に失敗する: Accessibility または Screen Recording 権限がありません。
- ダッシュボードが起動しない: Docker が実行されていない、またはポートがすでに使われています。
- リモートクライアントが接続できない: ファイアウォール、API ホストバインディング、ネットワークルーティングがアクセスを妨げています。
まとめ
全体の構成は次のとおりです。
- Hermes Agent をインストールします。
- Ollama 経由でローカルモデルを実行します。
- デスクトップ自動化のために macOS 権限を付与します。
- Docker で Web ダッシュボードを実行します。
- API アクセスは信頼できるネットワークでのみ有効にします。
- 安全なリモートアクセスには Tailscale を使います。
この構成により、Mac Mini は実験、自動化、リモートアクセスのためのプライベートなローカル AI エージェントサーバーとして機能し、ホスト型 AI サービスに完全には依存しない運用ができます。
Un Mac Mini puede funcionar como un servidor local de IA pequeño y siempre encendido para ejecutar una pila de agentes autónomos. Esta guía cubre una configuración de Hermes Agent con modelos locales de Ollama, un panel web, permisos de automatización de macOS y acceso remoto más seguro mediante una red privada.
Antes de ejecutar cualquier instalador o comando de contenedor, verifica el repositorio oficial actual, el nombre de la imagen y la documentación. Los frameworks de agentes y las imágenes de paneles web pueden cambiar rápido, y un agente de automatización local puede recibir acceso amplio a tu máquina.
Referencias actuales
Revisa estas fuentes antes de copiar cualquier comando:
Por qué ejecutar Hermes Agent localmente
Ejecutar un agente de IA en local tiene algunas ventajas prácticas:
- Los datos se quedan en el Mac Mini salvo que conectes servicios externos explícitamente.
- Los modelos locales evitan costes de API por token.
- La máquina puede usarse para automatización de escritorio, manejo de archivos y flujos de trabajo en segundo plano.
- Los Mac Mini con Apple Silicon son silenciosos, eficientes y adecuados para servicios locales de larga duración.
La contrapartida es que los modelos locales pueden ser más lentos o menos capaces que los modelos frontera alojados. También pasas a ser responsable de la seguridad, las actualizaciones, las copias de seguridad y el control de acceso.
Requisitos previos
Prepara lo siguiente antes de la instalación:
- Un Mac Mini, preferiblemente Apple Silicon.
- Ollama instalado y en ejecución.
- Docker Desktop instalado si planeas ejecutar un panel web.
- Familiaridad básica con Terminal y los permisos de privacidad de macOS.
- Una copia de seguridad limpia o un punto de restauración antes de conceder permisos de automatización de escritorio.
Paso 1: instalar Hermes Agent
La configuración usa un instalador de una línea desde el repositorio de Hermes Agent. Verifica la fuente antes de ejecutar scripts remotos.
curl -fsSL https://raw.githubusercontent.com/NousResearch/hermes-agent/main/scripts/install.sh | bash
Después de la instalación, recarga tu perfil de shell para que el comando hermes esté disponible.
source ~/.zshrc
Comprueba que la CLI esté instalada.
hermes --version
Si no se encuentra el comando, confirma que el instalador añadió Hermes a la ruta del shell y que estás usando el perfil de shell esperado.
Paso 2: conectar Hermes a un modelo local de Ollama
Para mantener la inferencia en local, ejecuta Hermes a través de Ollama. Para flujos de trabajo de código y agentes, empieza con un modelo más pequeño y capaz de usar herramientas antes de pasar a modelos más grandes.
Descarga un modelo:
ollama pull qwen2.5-coder:7b
Guía de tamaño de modelo:
- 8GB a 16GB de RAM: empieza con modelos 7B u 8B.
- 24GB o más de RAM: prueba modelos más grandes si la velocidad de respuesta es aceptable.
- Flujos de trabajo de agentes: prioriza la fiabilidad, el seguimiento de instrucciones y el comportamiento con herramientas por encima del tamaño bruto del modelo.
Método rápido
Si la versión instalada de Hermes CLI admite configuración automática con Ollama, usa:
ollama launch hermes
Se espera que este flujo detecte Ollama y te pida seleccionar un modelo descargado.
Método manual con CLI
Usa el asistente de configuración de modelos si prefieres configurarlo manualmente.
hermes model
Cuando se solicite, elige un endpoint personalizado compatible con OpenAI y usa:
Endpoint URL: http://127.0.0.1:11434/v1
API Key: ollama
Model Name: qwen2.5-coder:7b
El endpoint compatible con OpenAI de Ollama suele estar disponible en http://127.0.0.1:11434/v1, pero verifica el endpoint en tu versión actual de Ollama. Si tu versión instalada de Hermes usa un asistente más antiguo, hermes setup puede mostrar las mismas opciones de configuración.
Paso 3: conceder permisos de seguridad de macOS
La automatización de escritorio requiere permisos de macOS. Cuando Hermes intenta controlar el escritorio o inspeccionar la pantalla por primera vez, macOS puede bloquear la acción hasta que se concedan los permisos.
Abre System Settings > Privacy & Security y revisa los permisos del terminal o de la aplicación Hermes en:
- Accessibility: permite al agente interactuar con elementos de la interfaz y escribir.
- Screen Recording: permite al agente inspeccionar la disposición del escritorio.
Luego ejecuta:
hermes doctor
Úsalo para comprobar si las rutas, dependencias y permisos necesarios están configurados correctamente.
Paso 4: configurar un panel web
Un panel web facilita revisar tareas, gestionar sesiones e inspeccionar la actividad del agente. La configuración siguiente usa un contenedor Hermes WebUI basado en Docker. Verifica el nombre de la imagen y las opciones de Docker en la documentación actual de WebUI antes de ejecutarlo.
docker run -d --name hermes-webui \
  -e WANTED_UID="$(id -u)" \
  -e WANTED_GID="$(id -g)" \
  -e HERMES_WEBUI_STATE_DIR=/home/hermeswebui/.hermes/webui \
  -v ~/.hermes:/home/hermeswebui/.hermes \
  -v ~/workspace:/workspace \
  -p 127.0.0.1:8787:8787 \
  ghcr.io/nesquena/hermes-webui:latest
Abre el panel localmente:
http://127.0.0.1:8787
Si la página no carga, comprueba que Docker Desktop esté en ejecución y que el puerto 8787 no esté ocupado.
Paso 5: habilitar acceso remoto en tu red local
Si necesitas conectarte desde otro dispositivo en la misma red local, configura el servidor API con cuidado.
Abre el archivo de configuración de entorno de Hermes:
nano ~/.hermes/.env
Añade o actualiza:
API_SERVER_ENABLED=true
API_SERVER_KEY=your-super-secure-password
API_SERVER_HOST=0.0.0.0
API_SERVER_PORT=8642
Reinicia el gateway:
hermes gateway stop && hermes gateway
Desde otro dispositivo en la misma red, conéctate con:
URL: http://<YOUR_MAC_MINI_IP_ADDRESS>:8642/v1
Secret Key: your-super-secure-password
Usa una clave secreta fuerte y evita reutilizar credenciales de otros servicios.
Acceso remoto seguro
No expongas los puertos de Hermes o del panel directamente a internet público mediante port forwarding del router. Un agente que puede automatizar tu escritorio o acceder a archivos locales debe tratarse como un servicio de alto riesgo.
Un enfoque más seguro es instalar Tailscale tanto en el Mac Mini como en los dispositivos cliente. Tailscale crea una red privada cifrada, de modo que puedes conectarte al Mac Mini mediante su IP de Tailscale en lugar de exponer puertos locales públicamente.
Enfoque recomendado:
- Instala Tailscale en el Mac Mini.
- Instala Tailscale en tu portátil o teléfono.
- Inicia sesión en la misma red de Tailscale.
- Accede a la API de Hermes o al panel mediante la IP de Tailscale del Mac Mini.
- Mantén las claves de API habilitadas incluso dentro de la red privada.
Para el panel, es preferible mantener Docker enlazado a 127.0.0.1 y usar un túnel autenticado o una ruta de red privada, en lugar de publicarlo ampliamente en la LAN.
Buenas prácticas operativas
Para un servidor local de agentes, la seguridad y el mantenimiento importan tanto como la instalación.
- Mantén actualizados Hermes, Ollama, las imágenes de Docker y macOS.
- Usa claves de API fuertes y evita incrustarlas en notas o repositorios públicos.
- Mantén el panel limitado al acceso local o de red privada salvo que haya una razón específica para exponerlo.
- Revisa periódicamente los permisos de automatización en los ajustes de macOS.
- Empieza con tareas de bajo riesgo antes de permitir que el agente realice acciones sobre archivos o el escritorio.
- Mantén los logs habilitados para auditar lo que el agente intentó hacer.
- Haz copia de seguridad de los archivos locales importantes antes de probar flujos de trabajo autónomos.
Lista de comprobación para solucionar problemas
Usa esta lista cuando la configuración no funcione como se esperaba.
hermes --version
ollama list
curl http://127.0.0.1:11434/v1/models
hermes doctor
docker ps
lsof -i :8787
lsof -i :8642
Problemas comunes:
- No se encuentra el comando
hermes: el perfil de shell no se recargó oPATHno se actualizó. - No se puede alcanzar el endpoint de Ollama: Ollama no está en ejecución o el endpoint es distinto.
- Falla la automatización del escritorio: falta el permiso de Accessibility o Screen Recording.
- El panel no arranca: Docker no está en ejecución o el puerto ya está ocupado.
- El cliente remoto no puede conectarse: el firewall, el enlace del host de API o el enrutamiento de red bloquean el acceso.
Resumen
La configuración general es:
- Instalar Hermes Agent.
- Ejecutar un modelo local mediante Ollama.
- Conceder permisos de macOS para automatización de escritorio.
- Ejecutar un panel web con Docker.
- Habilitar acceso API solo en redes de confianza.
- Usar Tailscale para acceso remoto seguro.
Con esta estructura, un Mac Mini puede funcionar como un servidor privado local de agentes de IA para experimentación, automatización y acceso remoto sin depender por completo de servicios de IA alojados.