바이브코딩은 프롬프트가 아니라 루프로 한다: 실제 사용 방법 정리
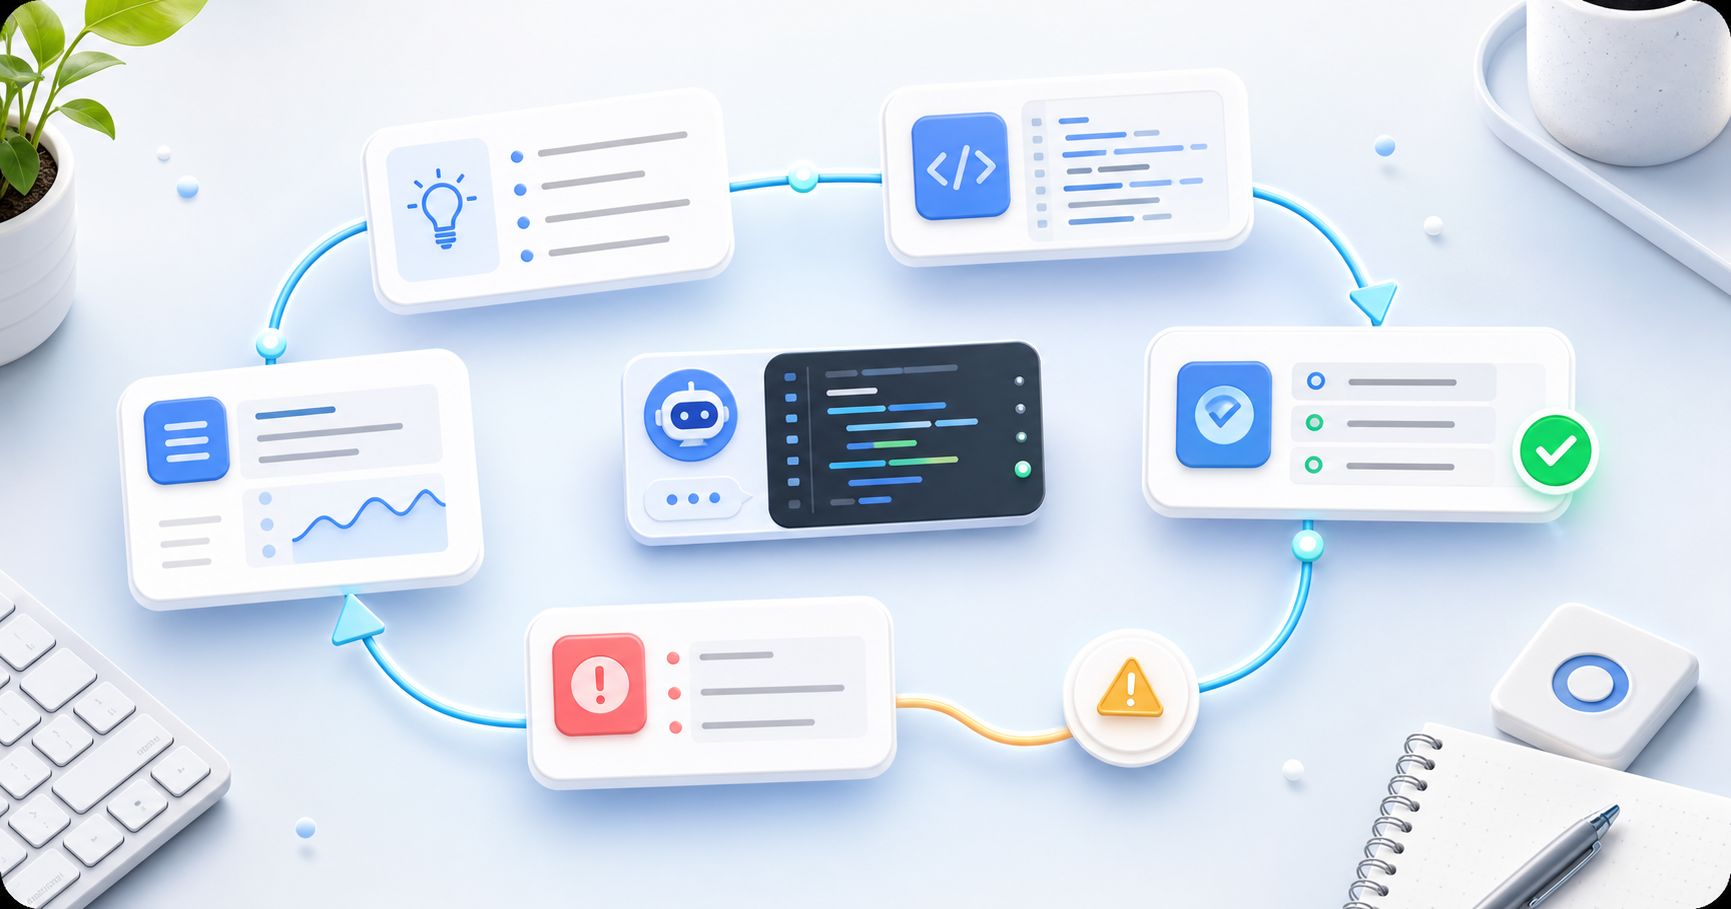
바이브코딩을 처음 접하면 대부분 “프롬프트를 어떻게 잘 쓰는가”에 집중합니다. 물론 프롬프트도 중요합니다. 하지만 실제 개발 작업에서는 좋은 프롬프트 하나보다 반복 가능한 작업 루프가 훨씬 중요합니다.
한 줄로 정리하면 다음과 같습니다.
바이브코딩의 핵심은 AI에게 한 번에 정답을 요구하는 것이 아니라, 계획 → 구현 → 검증 → 수정 → 재검증을 반복하게 만드는 것이다.
즉, AI에게 “이 기능 만들어줘”라고 한 번 지시하고 끝내는 방식은 위험합니다. 실제 프로젝트에서는 타입 에러, 빌드 실패, 스타일 충돌, 브라우저 이슈, 접근성 문제, 사이드 이펙트가 계속 발생하기 때문입니다.
따라서 바이브코딩을 제대로 하려면 AI에게 단순 작업을 맡기는 것이 아니라, 작업 절차 자체를 설계해서 맡겨야 합니다.
프롬프트 방식과 루프 방식의 차이
일반적인 프롬프트 방식은 다음과 같습니다.
이 React 컴포넌트의 버그를 고쳐줘.AI는 코드를 제안합니다. 하지만 이 코드가 실제로 동작하는지는 별개입니다. 빌드가 깨질 수도 있고, 모바일에서만 문제가 생길 수도 있으며, 기존 코드 스타일과 맞지 않을 수도 있습니다.
반면 루프 방식은 이렇게 지시합니다.
이 버그를 다음 절차에 따라 수정하세요.
1. 관련 파일을 찾는다.
2. 현재 동작 구조를 설명한다.
3. 원인 후보를 정리한다.
4. 가장 가능성 높은 원인부터 최소 수정한다.
5. npm run lint, npm run typecheck, npm run build를 실행한다.
6. 실패하면 에러 메시지를 기준으로 다시 수정한다.
7. 검증이 통과하면 변경 사항과 남은 리스크를 요약한다.
차이는 명확합니다.
| 방식 | 요구하는 것 | 약점 |
|---|---|---|
| 프롬프트 방식 | 결과물 | 실제 검증이 빠질 수 있음 |
| 루프 방식 | 작업 과정과 검증 기준 | 처음에 절차를 설계해야 함 |
바이브코딩에서 실무 품질을 가르는 지점은 바로 여기에 있습니다.
왜 루프가 필요한가?
AI가 처음 작성한 코드는 “그럴듯한 초안”인 경우가 많습니다. 문제는 실제 개발에서는 그럴듯함보다 검증 가능성이 중요하다는 점입니다.
예를 들어 프론트엔드 개발에서는 다음 문제가 자주 발생합니다.
- 타입 에러
- 빌드 실패
- 모바일 레이아웃 깨짐
- Safari 전용 이슈
- 접근성 문제
- 기존 상태 관리 구조와 충돌
- 불필요한 리팩터링
- CSS 사이드 이펙트
- 테스트 누락
- 패키지 버전 충돌
AI가 “수정했습니다”라고 말해도, 실제로 npm run build가 실패하면 수정된 것이 아닙니다.
따라서 바이브코딩에서 중요한 질문은 다음이 아닙니다.
AI가 코드를 잘 짜는가?
더 중요한 질문은 이것입니다.
AI가 자기 결과물을 검증하고, 실패했을 때 다시 고치도록 설계되어 있는가?
Claude Code 공식 문서는 Claude Code를 코드베이스를 읽고, 파일을 수정하고, 명령을 실행하며, 개발 도구와 통합되는 agentic coding tool로 설명합니다. 이런 도구를 제대로 쓰려면 단순히 질문을 잘하는 수준을 넘어, 반복 가능한 작업 구조를 만들어야 합니다.
기본 루프 구조
실무에서 가장 기본이 되는 루프는 다음과 같습니다.
목표 정의
→ 현재 구조 파악
→ 계획 수립
→ 최소 구현
→ 검증 실행
→ 실패 원인 분석
→ 수정
→ 재검증
→ 결과 요약
이를 개발 작업에 맞게 바꾸면 다음과 같습니다.
| 단계 | 내용 |
|---|---|
| 1단계 | 요구사항을 명확히 정리한다 |
| 2단계 | 관련 파일과 현재 구조를 먼저 확인한다 |
| 3단계 | 수정 계획을 짧게 세운다 |
| 4단계 | 최소 변경으로 구현한다 |
| 5단계 | 린트, 타입 체크, 테스트, 빌드를 실행한다 |
| 6단계 | 실패하면 에러 메시지를 기준으로 다시 수정한다 |
| 7단계 | 검증이 통과하면 변경 사항을 요약한다 |
| 8단계 | 남은 리스크를 보고한다 |
핵심은 구현 자체가 아니라 구현 후 검증입니다.
바로 사용할 수 있는 기본 프롬프트 템플릿
아래 템플릿은 Claude Code, Cursor, ChatGPT, Codex류 도구에서 모두 응용할 수 있습니다.
이 작업을 단발성 프롬프트가 아니라 루프 방식으로 수행하세요.

목표:
- [원하는 결과를 여기에 작성]

작업 절차:
1. 요구사항을 먼저 재정리합니다.
2. 관련 파일과 현재 구조를 확인합니다.
3. 수정 계획을 짧게 작성합니다.
4. 최소 변경으로 구현합니다.
5. 관련 검증 명령을 실행합니다.
6. 실패하면 에러 메시지를 기준으로 원인을 분석하고 다시 수정합니다.
7. 검증이 통과할 때까지 반복합니다.
8. 완료 후 변경 파일, 수정 이유, 검증 결과, 남은 리스크를 요약합니다.

검증 명령:
- npm run lint
- npm run typecheck
- npm run test
- npm run build

제약조건:
- 불필요한 리팩터링은 하지 마세요.
- 기존 동작을 임의로 바꾸지 마세요.
- 패키지 설치 전에는 먼저 확인하세요.
- 보안상 위험한 명령은 실행하지 마세요.
- 한 번에 하나의 원인만 수정하세요.

종료 조건:
- 모든 검증 명령 통과
- 요구사항 충족
- 변경 사항 요약 완료

중단 조건:
- 같은 오류가 3회 이상 반복됨
- 요구사항이 충돌함
- 검증할 방법이 없음
- 대규모 구조 변경이 필요함
이 템플릿의 목적은 AI에게 “작업을 해라”가 아니라, 작업을 어떻게 끝낼지까지 정의해 주는 것입니다.
버그 수정 루프
버그 수정은 루프 방식이 가장 효과적인 작업 중 하나입니다.
나쁜 요청은 다음과 같습니다.
이 버그 고쳐줘.좋은 요청은 다음과 같습니다.
아래 버그를 루프 방식으로 수정하세요.

증상:
- iPhone Safari에서 페이지 오른쪽에 가로 스크롤이 생깁니다.
- body에 overflow-x: hidden을 줬지만 여전히 발생합니다.

작업 루프:
1. viewport를 초과하는 요소 후보를 찾습니다.
2. CSS, fixed 요소, Swiper, GSAP ScrollTrigger 관련 코드를 우선 확인합니다.
3. 원인 후보를 정리합니다.
4. 가장 가능성 높은 원인부터 하나씩 수정합니다.
5. npm run build를 실행합니다.
6. 실패하거나 문제가 남아 있으면 다시 원인을 좁힙니다.
7. 최종적으로 원인, 수정 파일, 검증 결과를 요약합니다.

제약조건:
- 전체 레이아웃 구조를 크게 바꾸지 마세요.
- 임시방편으로 모든 요소에 overflow hidden을 남발하지 마세요.
- 모바일 Safari 기준으로 우선 검토하세요.
이렇게 쓰면 AI는 단순히 코드를 찍어내는 것이 아니라, 원인을 좁혀가며 작업하게 됩니다.
버그 수정에서 중요한 것은 많이 고치는 것이 아니라 원인을 정확히 좁히는 것입니다.
기능 구현 루프
기능 구현에서는 요구사항과 검증 기준을 명확히 줘야 합니다.
예를 들어 모바일 메뉴 기능을 구현한다고 하면 다음처럼 요청할 수 있습니다.
다음 기능을 루프 방식으로 구현하세요.

목표:
- 모바일 메뉴에서 메뉴 항목을 클릭하면 메뉴가 닫혀야 합니다.
- 라우트 변경 후 body scroll lock이 해제되어야 합니다.

작업 루프:
1. 현재 모바일 메뉴 컴포넌트와 상태 관리 방식을 확인합니다.
2. 라우팅 변경을 감지하는 기존 방식이 있는지 확인합니다.
3. 최소 수정 계획을 작성합니다.
4. 코드를 수정합니다.
5. npm run lint, npm run typecheck, npm run build를 실행합니다.
6. 실패하면 에러 메시지를 기준으로 다시 수정합니다.
7. 완료 후 변경 파일과 검증 결과를 요약합니다.

제약조건:
- 기존 UI 구조를 크게 바꾸지 마세요.
- 스타일 리팩터링은 하지 마세요.
- 접근성을 해치지 마세요.
- 모바일 동작을 우선 고려하세요.
이 요청의 장점은 작업 범위가 분명하다는 것입니다.
AI에게 “모바일 메뉴 개선해줘”라고 하면 너무 넓습니다. 반면 “라우트 변경 후 메뉴 닫힘과 body scroll lock 해제”라고 하면 훨씬 정확합니다.
리팩터링 루프
리팩터링은 AI에게 맡길 때 특히 조심해야 합니다. AI는 종종 “좋아 보이는 구조”를 만들기 위해 기존 동작을 바꿔버립니다.
따라서 리팩터링 요청에는 반드시 “동작 변경 금지”를 넣어야 합니다.
이 컴포넌트를 리팩터링하되, 기존 동작은 변경하지 마세요.

작업 루프:
1. 현재 컴포넌트의 역할과 문제점을 분석합니다.
2. 리팩터링 범위를 작게 나눕니다.
3. 변경 전 동작을 정리합니다.
4. 한 번에 하나의 변경만 적용합니다.
5. 각 변경 후 타입 체크와 빌드를 실행합니다.
6. 실패하면 해당 변경을 수정하거나 되돌립니다.
7. 최종적으로 변경 전후 차이와 남은 리스크를 요약합니다.

제약조건:
- 기능 변경 금지
- 스타일 변경 금지
- API 인터페이스 변경 금지
- 불필요한 파일 분리 금지
- 테스트 없이 대규모 구조 변경 금지
리팩터링 루프의 핵심은 작게 바꾸고 자주 검증하는 것입니다.
Claude Code에서 루프를 고정하는 방법: CLAUDE.md
Claude Code를 사용한다면 매번 긴 프롬프트를 입력하는 대신, 프로젝트 루트에 CLAUDE.md 파일을 두는 방식이 유용합니다.
CLAUDE.md는 프로젝트의 작업 규칙, 명령어, 코드 스타일, 검증 절차를 AI에게 알려주는 역할을 합니다. Anthropic 문서의 memory 설명에서도 CLAUDE.md를 프로젝트 규칙, 빌드 명령, 테스트 절차, 컨벤션을 담는 파일로 다룹니다.
예시는 다음과 같습니다.
Project Rules

Default Coding Loop
For every coding task:
1. Understand the requirement.
2. Inspect relevant files before editing.
3. Explain the current structure briefly.
4. Propose a short implementation plan.
5. Make the smallest safe change.
6. Run the relevant verification commands.
7. If verification fails, diagnose and fix.
8. Repeat until verification passes or the task is blocked.
9. Summarize the result.

Verification Commands
Use these commands when relevant:
- npm run lint
- npm run typecheck
- npm run test
- npm run build

Constraints
- Do not perform unnecessary refactoring.
- Do not change public APIs without approval.
- Do not install packages without approval.
- Do not expose secrets or environment variables.
- Do not run destructive commands.
- Prefer small, reversible changes.

Final Report Format
At the end of each task, report:
- Files changed
- What changed
- Why it changed
- Verification result
- Remaining risks
이렇게 해두면 매번 같은 규칙을 반복해서 설명할 필요가 줄어듭니다.
즉, CLAUDE.md는 단순한 메모 파일이 아니라 프로젝트의 AI 작업 규칙서에 가깝습니다.
자주 쓰는 루프는 커스텀 명령어로 만든다
매번 같은 프롬프트를 입력하는 것도 비효율적입니다. 그래서 자주 쓰는 루프는 커스텀 명령어처럼 만들어두는 것이 좋습니다.
예를 들어 다음과 같은 작업 단위를 만들 수 있습니다.
/fix-bug
/implement-feature
/refactor-safely
/review-pr
/test-and-fix
/a11y-check
Anthropic 문서는 Claude Code의 확장 지점으로 skills와 slash command, subagents, MCP, hooks 등을 설명합니다. 자주 쓰는 반복 절차는 이런 확장 지점으로 옮겨두면 매번 긴 프롬프트를 다시 붙여넣을 필요가 줄어듭니다.
예를 들어 /fix-bug 명령은 다음처럼 정의할 수 있습니다.
You are fixing a bug in this repository.

Loop:
1. Reproduce or locate the bug.
2. Identify the smallest relevant code area.
3. Explain the likely root cause.
4. Apply a minimal fix.
5. Run lint, typecheck, test, and build when relevant.
6. If verification fails, diagnose and fix again.
7. Stop only when verification passes or when blocked.

Constraints:
- Do not refactor unrelated code.
- Do not install packages without approval.
- Do not run destructive commands.
- Make one logical change at a time.

Final response:
- Root cause
- Files changed
- Verification result
- Remaining risk
이렇게 해두면 다음처럼 짧게 요청할 수 있습니다.
/fix-bug

증상:
모바일 Safari에서 특정 섹션 진입 시 화면이 중간 위치에서 시작됩니다.
AI에게 매번 긴 설명을 하지 않아도, 동일한 방식으로 버그 수정 루프가 실행됩니다.
검증 명령을 루프의 중심에 둔다
루프 방식의 핵심은 검증입니다. 검증이 없으면 루프는 그냥 반복되는 추측이 됩니다.
프론트엔드 프로젝트에서는 보통 다음 명령을 사용합니다.
npm run lint
npm run typecheck
npm run test
npm run build
프로젝트에 따라 다음도 추가할 수 있습니다.
npm run test:e2e
npm run test:unit
npm run storybook
npm run chromatic
npm run preview
검증 기준도 명확히 써야 합니다.
검증 기준:
- npm run build 통과
- TypeScript 에러 없음
- ESLint 에러 없음
- 기존 테스트 실패 없음
- 모바일 메뉴 동작 요구사항 충족
- 콘솔 에러 없음
AI가 스스로 “완료”라고 말하는 것보다, 검증 명령이 통과하는 것이 더 중요합니다.
루프에는 중단 조건도 필요하다
많은 사람이 종료 조건은 쓰지만, 중단 조건은 잘 쓰지 않습니다. 하지만 중단 조건이 없으면 AI가 같은 문제를 계속 반복해서 수정할 수 있습니다.
예를 들어 다음 조건을 넣는 것이 좋습니다.
다음 상황에서는 작업을 중단하고 보고하세요.
- 같은 오류가 3회 이상 반복되는 경우
- 요구사항이 서로 충돌하는 경우
- 테스트나 빌드로 검증할 수 없는 경우
- 보안상 위험한 명령 실행이 필요한 경우
- 대규모 구조 변경이 필요한 경우
- 외부 패키지 설치가 필요한 경우
이 조건은 AI의 무리한 자동 수정을 막는 안전장치입니다.
바이브코딩에서 중요한 것은 AI를 최대한 자동화하는 것이 아니라, 위험한 자동화를 통제 가능한 구조로 만드는 것입니다.
실제 작업 흐름 예시
실제 사용 흐름은 다음과 같이 가져갈 수 있습니다.
1단계: 작업을 작게 나눈다
나쁜 예시는 다음과 같습니다.
전체 사이트를 개선해줘.좋은 예시는 다음과 같습니다.
모바일 Safari에서 발생하는 가로 스크롤 문제만 분석하고 수정해줘.작업 단위가 작을수록 AI 루프의 성공률이 높아집니다.
2단계: 루프 템플릿을 붙인다
이 작업을 루프 방식으로 진행하세요.
1. 원인 후보를 찾습니다.
2. 관련 파일을 확인합니다.
3. 최소 수정합니다.
4. 빌드합니다.
5. 실패하면 다시 수정합니다.
6. 성공하면 변경 사항을 요약합니다.
3단계: 검증 명령을 지정한다
검증 명령:
- npm run lint
- npm run typecheck
- npm run build
검증 명령을 지정하지 않으면 AI가 실제 프로젝트 기준이 아니라 자기 판단 기준으로 완료 처리할 가능성이 커집니다.
4단계: AI의 변경 사항을 diff로 확인한다
AI가 작업을 끝냈다면 바로 믿지 말고 변경 사항을 확인해야 합니다.
확인할 항목은 다음과 같습니다.
- 관련 없는 파일을 수정했는가?
- 불필요한 리팩터링이 들어갔는가?
- 임시방편 코드가 들어갔는가?
- 기존 기능을 바꿨는가?
- 테스트나 빌드 결과가 실제로 통과했는가?
- 보안상 위험한 코드가 생겼는가?
AI가 빠르게 코드를 바꿔주는 만큼, 사람은 더 철저히 검수해야 합니다.
프론트엔드 개발자용 추천 루프
프론트엔드 작업에서는 아래 루프를 기본값으로 쓰는 것이 좋습니다.
Frontend Coding Loop
1. 요구사항을 user story 형태로 정리한다.
2. 관련 컴포넌트, 상태, 스타일 파일을 찾는다.
3. 현재 동작과 변경 필요 지점을 설명한다.
4. 최소 수정 계획을 세운다.
5. 구현한다.
6. 타입 체크를 실행한다.
7. 린트를 실행한다.
8. 빌드를 실행한다.
9. 모바일, 접근성, 브라우저 영향도를 점검한다.
10. 실패하면 원인을 분석하고 다시 수정한다.
11. 성공하면 변경 사항과 남은 리스크를 요약한다.
실제 프롬프트는 다음처럼 쓸 수 있습니다.
다음 작업을 Frontend Coding Loop에 따라 진행하세요.

목표:
- PC에서는 기존 동작을 유지합니다.
- 모바일에서는 메뉴 항목 클릭 시 메뉴가 닫히도록 수정합니다.
- 라우트 변경 후 body scroll lock이 해제되어야 합니다.

검증:
- npm run typecheck
- npm run lint
- npm run build

주의:
- 스타일 구조를 크게 바꾸지 마세요.
- 새 패키지를 설치하지 마세요.
- 접근성을 해치지 마세요.
- 관련 없는 리팩터링은 하지 마세요.

완료 보고:
- 원인
- 수정 파일
- 수정 내용
- 검증 결과
- 남은 리스크
이 정도만 써도 일반적인 “고쳐줘” 프롬프트보다 훨씬 안정적인 결과를 얻을 수 있습니다.
루프 방식에서 사람의 역할
루프 방식은 AI에게 모든 것을 맡기는 방식이 아닙니다. 오히려 사람의 역할이 더 명확해집니다.
사람이 해야 할 일은 다음과 같습니다.
| 역할 | 내용 |
|---|---|
| 목표 설정 | 무엇을 해결할지 정한다 |
| 범위 제한 | 어디까지 수정할지 정한다 |
| 검증 기준 설정 | 무엇이 통과되어야 완료인지 정한다 |
| 위험 통제 | 하면 안 되는 작업을 정한다 |
| 최종 승인 | diff와 결과를 검토한다 |
AI가 해야 할 일은 다음과 같습니다.
| 역할 | 내용 |
|---|---|
| 코드 탐색 | 관련 파일을 찾는다 |
| 원인 분석 | 문제 후보를 정리한다 |
| 구현 | 코드를 수정한다 |
| 검증 | 테스트와 빌드를 실행한다 |
| 반복 수정 | 실패 시 다시 고친다 |
| 보고 | 결과와 리스크를 정리한다 |
정리하면 사람은 작업 관리자이자 검수자이고, AI는 실행자이자 1차 분석자입니다.
주의할 점
루프 방식이 항상 좋은 것은 아닙니다. 잘못 설계된 루프는 오히려 위험합니다.
특히 다음 요청은 피해야 합니다.
알아서 다 고쳐줘.
전체 코드를 최적화해줘.
필요하면 아무 패키지나 설치해도 돼.
테스트 실패해도 일단 진행해.
이런 요청은 작업 범위가 넓고, 통제 기준이 약하며, 사이드 이펙트가 커질 가능성이 높습니다.
대신 다음처럼 지시해야 합니다.
관련 파일만 수정하세요.
패키지 설치 전에는 확인하세요.
한 번에 하나의 원인만 수정하세요.
검증 실패 시 에러 메시지를 기준으로 다시 수정하세요.
3회 이상 실패하면 중단하고 보고하세요.
AI 코딩 도구는 생산성을 높일 수 있지만, 파일 수정과 명령 실행 권한을 갖는 순간 위험도 함께 커집니다. 따라서 루프를 설계할 때는 항상 권한, 검증, 중단 조건을 함께 넣어야 합니다.
결론: 바이브코딩의 실력은 루프 설계 능력이다
바이브코딩을 잘한다는 것은 단순히 프롬프트 문장을 멋지게 쓰는 것이 아닙니다.
진짜 핵심은 다음입니다.
AI가 계획하고, 구현하고, 검증하고, 실패하면 수정하고, 검증이 끝나면 보고하도록 만드는 반복 구조를 설계하는 것.
즉, 바이브코딩은 프롬프트 기술에서 작업 시스템 설계로 넘어가고 있습니다.
실무에서는 아래 네 가지만 기억하면 됩니다.
- 작업을 작게 나눈다.
- 루프 절차를 명시한다.
- 검증 명령을 포함한다.
- 종료 조건과 중단 조건을 정한다.
좋은 바이브코딩은 AI에게 “알아서 해줘”라고 말하는 것이 아닙니다.
좋은 바이브코딩은 AI가 어디까지 하고, 어떻게 확인하고, 언제 멈춰야 하는지를 명확히 설계하는 것입니다.
When people first encounter vibe coding, they usually focus on how to write a better prompt. Prompts matter, of course. But in real development work, a repeatable work loop matters much more than one clever prompt.
In one sentence:
The core of vibe coding is not asking AI for the right answer in one shot. It is making AI repeat planning → implementation → verification → fixing → re-verification.
In other words, telling AI "build this feature" once and stopping there is risky. Real projects keep producing type errors, failed builds, style conflicts, browser issues, accessibility problems, and side effects.
To use vibe coding properly, you should not merely delegate a task to AI. You should design the work procedure itself and delegate that procedure.
Prompt-Based Work vs Loop-Based Work
A typical prompt-based request looks like this:
Fix the bug in this React component.
AI proposes code. But whether that code actually works is a separate question. The build may fail, the issue may appear only on mobile, or the code may not match the existing style.
A loop-based request looks like this:
Fix this bug using the following procedure.
1. Find the relevant files.
2. Explain the current behavior structure.
3. List possible causes.
4. Apply the smallest fix, starting with the most likely cause.
5. Run npm run lint, npm run typecheck, and npm run build.
6. If verification fails, fix again based on the error message.
7. When verification passes, summarize the changes and remaining risks.
The difference is clear.
| Approach | What it asks for | Weakness |
|---|---|---|
| Prompt-based | Output | Real verification may be missing |
| Loop-based | Process and verification criteria | Requires designing the procedure first |
This is where real-world vibe coding quality starts to diverge.
Why a Loop Is Necessary
The first code AI writes is often a plausible draft. The problem is that real development values verifiability more than plausibility.
In frontend development, these issues happen often:
- Type errors
- Build failures
- Broken mobile layouts
- Safari-only issues
- Accessibility problems
- Conflicts with existing state management
- Unnecessary refactoring
- CSS side effects
- Missing tests
- Package version conflicts
Even if AI says "I fixed it," the work is not fixed if npm run build fails.
So the important vibe coding question is not this:
Can AI write code well?
The more important question is this:
Is AI set up to verify its own output and fix it again when it fails?
The Claude Code documentation describes Claude Code as an agentic coding tool that reads codebases, edits files, runs commands, and integrates with development tools. To use this kind of tool well, you need a repeatable work structure, not just better questions.
The Basic Loop Structure
The most basic practical loop looks like this:
Define the goal
→ Inspect the current structure
→ Create a plan
→ Implement the smallest change
→ Run verification
→ Analyze failure cause
→ Fix
→ Verify again
→ Summarize the result
For development tasks, that becomes:
| Step | Content |
|---|---|
| Step 1 | Clarify the requirement |
| Step 2 | Inspect relevant files and current structure first |
| Step 3 | Write a short modification plan |
| Step 4 | Implement with minimal changes |
| Step 5 | Run lint, type checks, tests, and build |
| Step 6 | If it fails, fix again based on the error message |
| Step 7 | When verification passes, summarize the changes |
| Step 8 | Report remaining risks |
The key is not implementation itself. The key is verification after implementation.
A Basic Prompt Template You Can Use Immediately
You can adapt the following template in Claude Code, Cursor, ChatGPT, Codex-style tools, or similar coding agents.
Perform this task as a loop, not as a one-shot prompt.

Goal:
- [Write the desired result here]

Work procedure:
1. Restate the requirement first.
2. Inspect the relevant files and current structure.
3. Write a short implementation plan.
4. Implement with the smallest safe change.
5. Run the relevant verification commands.
6. If verification fails, analyze the cause from the error message and fix again.
7. Repeat until verification passes.
8. When done, summarize changed files, why they changed, verification results, and remaining risks.

Verification commands:
- npm run lint
- npm run typecheck
- npm run test
- npm run build

Constraints:
- Do not perform unnecessary refactoring.
- Do not change existing behavior arbitrarily.
- Ask before installing packages.
- Do not run commands that are risky for security.
- Fix one cause at a time.

Exit conditions:
- All verification commands pass
- Requirement is satisfied
- Change summary is complete

Stop conditions:
- The same error repeats 3 or more times
- Requirements conflict
- There is no way to verify the result
- A large structural change is required
The purpose of this template is not just to tell AI to do the work. It defines how the work should be finished.
Bug-Fixing Loop
Bug fixing is one of the best tasks for a loop-based workflow.
A weak request looks like this:
Fix this bug.
A better request looks like this:
Fix the bug below using a loop.

Symptoms:
- On iPhone Safari, horizontal scrolling appears on the right side of the page.
- body has overflow-x: hidden, but the issue still happens.

Work loop:
1. Find candidates that exceed the viewport.
2. Prioritize CSS, fixed elements, Swiper, and GSAP ScrollTrigger code.
3. List possible causes.
4. Fix one likely cause at a time, starting from the most likely.
5. Run npm run build.
6. If it fails or the issue remains, narrow the cause again.
7. Finally summarize the root cause, changed files, and verification result.

Constraints:
- Do not greatly change the overall layout structure.
- Do not overuse overflow hidden everywhere as a workaround.
- Review mobile Safari first.
This makes AI narrow down causes instead of simply producing code.
In bug fixing, the important thing is not changing a lot of code. It is narrowing down the cause accurately.
Feature Implementation Loop
For feature work, requirements and verification criteria need to be explicit.
For example, if you are implementing a mobile menu behavior, you can ask like this:
Implement the following feature using a loop.

Goal:
- When a menu item is clicked in the mobile menu, the menu should close.
- After route changes, body scroll lock should be released.

Work loop:
1. Inspect the current mobile menu component and state management.
2. Check whether an existing route-change detection pattern exists.
3. Write a minimal implementation plan.
4. Modify the code.
5. Run npm run lint, npm run typecheck, and npm run build.
6. If it fails, fix again based on the error message.
7. When done, summarize changed files and verification results.

Constraints:
- Do not greatly change the existing UI structure.
- Do not refactor styles.
- Do not harm accessibility.
- Prioritize mobile behavior.
The benefit is that the scope is clear.
"Improve the mobile menu" is too broad. "Close the menu after route changes and release body scroll lock" is much more precise.
Refactoring Loop
You need to be especially careful when assigning refactoring to AI. AI often changes existing behavior while trying to create a structure that looks cleaner.
So refactoring requests should always include "do not change behavior."
Refactor this component, but do not change existing behavior.

Work loop:
1. Analyze the component's role and problems.
2. Split the refactoring scope into small parts.
3. Summarize the current behavior before changes.
4. Apply one change at a time.
5. Run type checks and build after each change.
6. If verification fails, fix or revert that change.
7. Finally summarize before/after differences and remaining risks.

Constraints:
- No behavior changes
- No style changes
- No API interface changes
- No unnecessary file splitting
- No large structural changes without tests
The core of a refactoring loop is making small changes and verifying frequently.
Fixing the Loop in Claude Code with CLAUDE.md
If you use Claude Code, it is useful to put a CLAUDE.md file in the project root instead of typing a long prompt every time.
CLAUDE.md tells AI the project's work rules, commands, code style, and verification process. Anthropic's memory documentation treats CLAUDE.md as a place for project rules, build commands, test instructions, and conventions.
Example:
Project Rules

Default Coding Loop
For every coding task:
1. Understand the requirement.
2. Inspect relevant files before editing.
3. Explain the current structure briefly.
4. Propose a short implementation plan.
5. Make the smallest safe change.
6. Run the relevant verification commands.
7. If verification fails, diagnose and fix.
8. Repeat until verification passes or the task is blocked.
9. Summarize the result.

Verification Commands
Use these commands when relevant:
- npm run lint
- npm run typecheck
- npm run test
- npm run build

Constraints
- Do not perform unnecessary refactoring.
- Do not change public APIs without approval.
- Do not install packages without approval.
- Do not expose secrets or environment variables.
- Do not run destructive commands.
- Prefer small, reversible changes.

Final Report Format
At the end of each task, report:
- Files changed
- What changed
- Why it changed
- Verification result
- Remaining risks
This reduces the need to repeat the same rules every time.
In that sense, CLAUDE.md is closer to an AI work rulebook for the project than a simple memo file.
Turn Common Loops into Custom Commands
Typing the same prompt repeatedly is inefficient. It is better to turn common loops into custom command-like workflows.
For example:
/fix-bug
/implement-feature
/refactor-safely
/review-pr
/test-and-fix
/a11y-check
Anthropic documents Claude Code extension points such as skills and slash commands, subagents, MCP, and hooks. Moving repeated procedures into these extension points reduces the need to paste long prompts every time.
For example, a /fix-bug command could be defined like this:
You are fixing a bug in this repository.

Loop:
1. Reproduce or locate the bug.
2. Identify the smallest relevant code area.
3. Explain the likely root cause.
4. Apply a minimal fix.
5. Run lint, typecheck, test, and build when relevant.
6. If verification fails, diagnose and fix again.
7. Stop only when verification passes or when blocked.

Constraints:
- Do not refactor unrelated code.
- Do not install packages without approval.
- Do not run destructive commands.
- Make one logical change at a time.

Final response:
- Root cause
- Files changed
- Verification result
- Remaining risk
Then you can make a short request like this:
/fix-bug

Symptoms:
On mobile Safari, the page starts from the middle position when entering a specific section.
You do not need to explain the full procedure every time. The same bug-fixing loop runs consistently.
Put Verification Commands at the Center of the Loop
The core of loop-based work is verification. Without verification, a loop becomes repeated guessing.
Frontend projects commonly use:
npm run lint
npm run typecheck
npm run test
npm run build
Depending on the project, you can also add:
npm run test:e2e
npm run test:unit
npm run storybook
npm run chromatic
npm run preview
Verification criteria should also be explicit.
Verification criteria:
- npm run build passes
- No TypeScript errors
- No ESLint errors
- Existing tests do not fail
- Mobile menu behavior satisfies the requirement
- No console errors
Verification commands passing matters more than AI saying "done."
A Loop Also Needs Stop Conditions
Many people write exit conditions, but not enough people write stop conditions. Without stop conditions, AI may keep editing the same issue repeatedly.
It is useful to include conditions like these:
Stop and report in the following situations:
- The same error repeats 3 or more times
- Requirements conflict with each other
- The result cannot be verified by tests or build
- A security-risky command is required
- A large structural change is required
- An external package installation is required
These conditions act as guardrails against uncontrolled automatic fixes.
In vibe coding, the goal is not to automate AI as much as possible. The goal is to turn risky automation into a controllable structure.
A Practical Work Flow Example
You can use the following flow in real work.
Step 1: Split the Work Small
A bad request:
Improve the entire site.
A better request:
Analyze and fix only the horizontal scroll issue on mobile Safari.
The smaller the work unit, the higher the success rate of the AI loop.
Step 2: Attach the Loop Template
Proceed with this task using a loop.
1. Find possible causes.
2. Inspect relevant files.
3. Make the smallest fix.
4. Build.
5. If it fails, fix again.
6. If it succeeds, summarize the changes.
Step 3: Specify Verification Commands
Verification commands:
- npm run lint
- npm run typecheck
- npm run build
If you do not specify verification commands, AI may mark the task complete according to its own judgment instead of the project's actual standards.
Step 4: Review the AI's Changes with Diff
When AI finishes, do not trust it immediately. Review the changes.
Check the following:
- Did it modify unrelated files?
- Did it add unnecessary refactoring?
- Did it add workaround code?
- Did it change existing behavior?
- Did tests or build actually pass?
- Did it introduce security-risky code?
Because AI can change code quickly, the human needs to review more carefully.
Recommended Loop for Frontend Developers
For frontend work, the following loop works well as a default.
Frontend Coding Loop
1. Restate the requirement as a user story.
2. Find relevant components, state, and style files.
3. Explain current behavior and where changes are needed.
4. Write a minimal implementation plan.
5. Implement.
6. Run type checks.
7. Run lint.
8. Run build.
9. Check mobile, accessibility, and browser impact.
10. If it fails, analyze the cause and fix again.
11. If it succeeds, summarize changes and remaining risks.
A practical prompt could look like this:
Proceed with the following task using the Frontend Coding Loop.

Goal:
- Keep existing behavior on desktop.
- On mobile, close the menu when a menu item is clicked.
- Release body scroll lock after route changes.

Verification:
- npm run typecheck
- npm run lint
- npm run build

Cautions:
- Do not greatly change the style structure.
- Do not install a new package.
- Do not harm accessibility.
- Do not refactor unrelated code.

Completion report:
- Cause
- Changed files
- Changes made
- Verification result
- Remaining risks
Even this is much more stable than a generic "fix it" prompt.
The Human Role in Loop-Based Work
Loop-based work does not mean handing everything to AI. It actually makes the human role clearer.
The human should handle:
| Role | Content |
|---|---|
| Goal setting | Decide what to solve |
| Scope limiting | Decide how far changes can go |
| Verification criteria | Decide what must pass for completion |
| Risk control | Define what must not be done |
| Final approval | Review diff and results |
AI should handle:
| Role | Content |
|---|---|
| Code exploration | Find relevant files |
| Cause analysis | List possible causes |
| Implementation | Modify code |
| Verification | Run tests and builds |
| Iterative fixing | Fix again when verification fails |
| Reporting | Summarize results and risks |
In short, the human is the work manager and reviewer. AI is the executor and first-pass analyst.
Cautions
Loop-based work is not always good. A poorly designed loop can be dangerous.
Avoid requests like these:
Fix everything however you want.
Optimize the entire codebase.
Install any package if needed.
Keep going even if tests fail.
These requests are broad, weakly controlled, and likely to create side effects.
Instead, use instructions like these:
Modify only relevant files.
Ask before installing packages.
Fix one cause at a time.
If verification fails, fix again based on the error message.
If the same failure repeats 3 or more times, stop and report.
AI coding tools can improve productivity, but once they have permission to edit files and run commands, they also introduce risk. A good loop should always include permissions, verification, and stop conditions.
Conclusion: Vibe Coding Skill Is Loop Design Skill
Being good at vibe coding is not about writing fancy prompt sentences.
The real core is this:
Design a repeatable structure where AI plans, implements, verifies, fixes failures, and reports when verification is complete.
Vibe coding is moving from prompt technique to work-system design.
In practice, remember these four things:
- Split work into small tasks.
- State the loop procedure.
- Include verification commands.
- Define exit conditions and stop conditions.
Good vibe coding is not telling AI "do it however you want."
Good vibe coding is clearly designing what AI should do, how it should verify the result, and when it should stop.
刚接触 Vibe Coding 时,很多人会先关注“怎样写出更好的提示词”。提示词当然重要。但在真实开发工作中,比一个漂亮提示词更重要的是可重复的工作循环。
用一句话概括:
Vibe Coding 的核心不是一次性向 AI 要正确答案,而是让 AI 反复执行计划 → 实现 → 验证 → 修正 → 重新验证。
也就是说,只对 AI 说一次“帮我做这个功能”然后结束,是有风险的。真实项目中会不断出现类型错误、构建失败、样式冲突、浏览器问题、无障碍问题和副作用。
所以,要真正用好 Vibe Coding,不应该只是把一个任务交给 AI,而是要先设计工作流程本身,再把这个流程交给 AI 执行。
提示词方式与循环方式的区别
一般的提示词方式是这样的:
修复这个 React 组件的 bug。
AI 会给出代码。但这些代码是否真的能运行,是另一回事。构建可能失败,问题可能只在移动端出现,也可能不符合现有代码风格。
而循环方式会这样要求:
按照下面的流程修复这个 bug。
1. 找到相关文件。
2. 说明当前行为结构。
3. 整理可能原因。
4. 从最可能的原因开始做最小修改。
5. 运行 npm run lint, npm run typecheck, npm run build。
6. 如果验证失败,根据错误信息再次修复。
7. 验证通过后,总结修改内容和剩余风险。
区别很明确。
| 方式 | 要求的内容 | 弱点 |
|---|---|---|
| 提示词方式 | 结果物 | 可能缺少真实验证 |
| 循环方式 | 工作过程和验证标准 | 一开始需要设计流程 |
Vibe Coding 的实际质量差异,正是在这里拉开的。
为什么需要循环?
AI 第一次写出来的代码,很多时候只是“看起来合理的初稿”。问题在于,真实开发中比“看起来合理”更重要的是“可以验证”。
例如,前端开发中经常会遇到这些问题:
- 类型错误
- 构建失败
- 移动端布局破裂
- Safari 专属问题
- 无障碍问题
- 与现有状态管理结构冲突
- 不必要的重构
- CSS 副作用
- 测试缺失
- 包版本冲突
即使 AI 说“已经修好了”,如果 npm run build 失败,那就还没有修好。
因此,Vibe Coding 中重要的问题不是:
AI 会不会写好代码?
更重要的问题是:
有没有把 AI 设计成会验证自己的结果,并在失败时继续修正?
Claude Code 官方文档把 Claude Code 描述为可以读取代码库、编辑文件、运行命令并与开发工具集成的 agentic coding tool。要用好这类工具,不能只停留在“提问技巧”,而要建立可重复的工作结构。
基本循环结构
实践中最基础的循环如下:
定义目标
→ 理解当前结构
→ 制定计划
→ 最小实现
→ 执行验证
→ 分析失败原因
→ 修正
→ 重新验证
→ 总结结果
换成开发任务,可以整理为:
| 步骤 | 内容 |
|---|---|
| 第 1 步 | 明确整理需求 |
| 第 2 步 | 先检查相关文件和当前结构 |
| 第 3 步 | 简短制定修改计划 |
| 第 4 步 | 以最小改动实现 |
| 第 5 步 | 执行 lint、类型检查、测试和构建 |
| 第 6 步 | 如果失败,根据错误信息再次修正 |
| 第 7 步 | 验证通过后总结修改内容 |
| 第 8 步 | 报告剩余风险 |
重点不是实现本身,而是实现后的验证。
可以直接使用的基础提示词模板
下面的模板可以应用到 Claude Code、Cursor、ChatGPT、Codex 类工具和类似的编码代理中。
请不要把这个任务当成一次性提示词处理,而是按循环方式执行。

目标:
- [在这里写入想要的结果]

工作流程:
1. 先重新整理需求。
2. 检查相关文件和当前结构。
3. 简短写出实现计划。
4. 用最小安全改动实现。
5. 执行相关验证命令。
6. 如果验证失败,根据错误信息分析原因并再次修正。
7. 重复直到验证通过。
8. 完成后总结修改文件、修改原因、验证结果和剩余风险。

验证命令:
- npm run lint
- npm run typecheck
- npm run test
- npm run build

约束条件:
- 不要做不必要的重构。
- 不要随意改变现有行为。
- 安装包之前先确认。
- 不要执行有安全风险的命令。
- 一次只修正一个原因。

结束条件:
- 所有验证命令通过
- 需求已满足
- 修改总结完成

中断条件:
- 同一个错误重复 3 次以上
- 需求互相冲突
- 没有验证方法
- 需要大规模结构变更
这个模板的目的不是简单地让 AI “去做”,而是定义这项工作应该怎样结束。
Bug 修复循环
Bug 修复是最适合循环方式的工作之一。
不好的请求是:
修复这个 bug。
更好的请求是:
用循环方式修复下面的 bug。

现象:
- 在 iPhone Safari 中,页面右侧出现横向滚动。
- 已经给 body 设置 overflow-x: hidden,但问题仍然存在。

工作循环:
1. 找出超过 viewport 的元素候选。
2. 优先检查 CSS、fixed 元素、Swiper、GSAP ScrollTrigger 相关代码。
3. 整理可能原因。
4. 从最可能的原因开始逐个修复。
5. 运行 npm run build。
6. 如果失败或问题仍存在,继续缩小原因范围。
7. 最后总结原因、修改文件和验证结果。

约束条件:
- 不要大幅改变整体布局结构。
- 不要把 overflow hidden 到处乱加作为临时方案。
- 优先以移动端 Safari 为标准检查。
这样写时,AI 不只是生成代码,而是会逐步缩小原因范围。
Bug 修复的重点不是改很多代码,而是准确缩小原因。
功能实现循环
功能实现时,要明确需求和验证标准。
例如要实现移动菜单功能,可以这样请求:
用循环方式实现下面的功能。

目标:
- 在移动菜单中点击菜单项后,菜单应该关闭。
- 路由变化后,body scroll lock 应该被解除。

工作循环:
1. 检查当前移动菜单组件和状态管理方式。
2. 检查是否已有监听路由变化的方式。
3. 写出最小修改计划。
4. 修改代码。
5. 运行 npm run lint, npm run typecheck, npm run build。
6. 如果失败,根据错误信息再次修正。
7. 完成后总结修改文件和验证结果。

约束条件:
- 不要大幅改变现有 UI 结构。
- 不要重构样式。
- 不要破坏无障碍。
- 优先考虑移动端行为。
这个请求的优点是工作范围很明确。
如果只说“优化移动菜单”,范围太大。而“路由变化后关闭菜单并解除 body scroll lock”就准确得多。
重构循环
把重构交给 AI 时尤其需要谨慎。AI 常常为了做出“看起来更好”的结构而改变现有行为。
所以重构请求里必须写清楚“禁止改变行为”。
请重构这个组件,但不要改变现有行为。

工作循环:
1. 分析当前组件的角色和问题。
2. 把重构范围拆小。
3. 整理修改前的行为。
4. 一次只应用一个改动。
5. 每次改动后运行类型检查和构建。
6. 如果失败,修正或回退该改动。
7. 最后总结修改前后差异和剩余风险。

约束条件:
- 禁止功能变更
- 禁止样式变更
- 禁止 API 接口变更
- 禁止不必要的文件拆分
- 没有测试时禁止大规模结构变更
重构循环的核心是小步修改、频繁验证。
在 Claude Code 中用 CLAUDE.md 固定循环
如果使用 Claude Code,与其每次输入很长的提示词,不如在项目根目录放一个 CLAUDE.md 文件。
CLAUDE.md 的作用是告诉 AI 项目的工作规则、命令、代码风格和验证流程。Anthropic 的 memory 文档也把 CLAUDE.md 作为记录项目规则、构建命令、测试说明和约定的文件来说明。
示例:
Project Rules

Default Coding Loop
For every coding task:
1. Understand the requirement.
2. Inspect relevant files before editing.
3. Explain the current structure briefly.
4. Propose a short implementation plan.
5. Make the smallest safe change.
6. Run the relevant verification commands.
7. If verification fails, diagnose and fix.
8. Repeat until verification passes or the task is blocked.
9. Summarize the result.

Verification Commands
Use these commands when relevant:
- npm run lint
- npm run typecheck
- npm run test
- npm run build

Constraints
- Do not perform unnecessary refactoring.
- Do not change public APIs without approval.
- Do not install packages without approval.
- Do not expose secrets or environment variables.
- Do not run destructive commands.
- Prefer small, reversible changes.

Final Report Format
At the end of each task, report:
- Files changed
- What changed
- Why it changed
- Verification result
- Remaining risks
这样就不需要每次都重复说明同样的规则。
也就是说,CLAUDE.md 不只是备忘录,更像是项目的 AI 工作规则书。
把常用循环做成自定义命令
每次都输入同样的提示词也很低效。因此,常用循环最好做成类似自定义命令的工作流。
例如:
/fix-bug
/implement-feature
/refactor-safely
/review-pr
/test-and-fix
/a11y-check
Anthropic 文档说明了 Claude Code 的扩展点,包括 skills 与 slash command、subagents、MCP、hooks。把重复流程转移到这些扩展点中,可以减少每次粘贴长提示词的成本。
例如 /fix-bug 命令可以这样定义:
You are fixing a bug in this repository.

Loop:
1. Reproduce or locate the bug.
2. Identify the smallest relevant code area.
3. Explain the likely root cause.
4. Apply a minimal fix.
5. Run lint, typecheck, test, and build when relevant.
6. If verification fails, diagnose and fix again.
7. Stop only when verification passes or when blocked.

Constraints:
- Do not refactor unrelated code.
- Do not install packages without approval.
- Do not run destructive commands.
- Make one logical change at a time.

Final response:
- Root cause
- Files changed
- Verification result
- Remaining risk
之后就可以这样短请求:
/fix-bug

现象:
移动端 Safari 中进入某个 section 时,页面会从中间位置开始。
不需要每次都对 AI 解释完整流程,也能以同样方式执行 bug 修复循环。
把验证命令放在循环中心
循环方式的核心是验证。没有验证,循环只是反复猜测。
前端项目通常使用这些命令:
npm run lint
npm run typecheck
npm run test
npm run build
根据项目情况,也可以追加:
npm run test:e2e
npm run test:unit
npm run storybook
npm run chromatic
npm run preview
验证标准也要写清楚。
验证标准:
- npm run build 通过
- 没有 TypeScript 错误
- 没有 ESLint 错误
- 现有测试没有失败
- 移动菜单行为满足需求
- 没有 console 错误
比起 AI 自己说“完成了”,验证命令通过更重要。
循环也需要中断条件
很多人会写结束条件,但很少写中断条件。没有中断条件时,AI 可能会围绕同一个问题反复修改。
可以加入这样的条件:
出现以下情况时,请中断并报告。
- 同一个错误重复 3 次以上
- 需求互相冲突
- 无法通过测试或构建验证
- 需要执行有安全风险的命令
- 需要大规模结构变更
- 需要安装外部包
这些条件是防止 AI 过度自动修改的安全装置。
Vibe Coding 的重点不是让 AI 尽可能自动化,而是把危险的自动化变成可控制的结构。
实际工作流程示例
实际使用时,可以采用下面的流程。
第 1 步:把任务拆小
不好的例子:
优化整个网站。
更好的例子:
只分析并修复移动端 Safari 中出现的横向滚动问题。
任务单位越小,AI 循环的成功率越高。
第 2 步:附上循环模板
用循环方式处理这个任务。
1. 找出可能原因。
2. 检查相关文件。
3. 做最小修改。
4. 构建。
5. 如果失败,再次修正。
6. 如果成功,总结修改内容。
第 3 步:指定验证命令
验证命令:
- npm run lint
- npm run typecheck
- npm run build
如果不指定验证命令,AI 可能会按照自己的判断,而不是项目的真实标准来标记完成。
第 4 步:用 diff 检查 AI 的修改
AI 完成后,不要立刻相信结果。应该检查变更内容。
检查项目包括:
- 是否修改了无关文件?
- 是否加入了不必要的重构?
- 是否加入了临时方案代码?
- 是否改变了现有功能?
- 测试或构建是否真的通过?
- 是否产生了安全风险代码?
AI 修改代码越快,人就越需要仔细审查。
前端开发者推荐循环
前端工作中,下面这个循环适合作为默认值。
Frontend Coding Loop
1. 用 user story 形式整理需求。
2. 找到相关组件、状态和样式文件。
3. 说明当前行为和需要修改的位置。
4. 制定最小修改计划。
5. 实现。
6. 执行类型检查。
7. 执行 lint。
8. 执行构建。
9. 检查移动端、无障碍和浏览器影响。
10. 如果失败,分析原因并再次修正。
11. 如果成功,总结修改内容和剩余风险。
实际提示词可以这样写:
请按照 Frontend Coding Loop 处理下面的任务。

目标:
- PC 上保持现有行为。
- 移动端点击菜单项时关闭菜单。
- 路由变化后解除 body scroll lock。

验证:
- npm run typecheck
- npm run lint
- npm run build

注意:
- 不要大幅改变样式结构。
- 不要安装新包。
- 不要破坏无障碍。
- 不要做无关重构。

完成报告:
- 原因
- 修改文件
- 修改内容
- 验证结果
- 剩余风险
仅仅这样写,也比普通的“帮我修一下”稳定得多。
循环方式中人的角色
循环方式不是把一切交给 AI。相反,它让人的角色更明确。
人应该负责:
| 角色 | 内容 |
|---|---|
| 目标设定 | 决定要解决什么 |
| 范围限制 | 决定修改到哪里为止 |
| 验证标准设定 | 决定什么通过才算完成 |
| 风险控制 | 定义不能做什么 |
| 最终批准 | 检查 diff 和结果 |
AI 应该负责:
| 角色 | 内容 |
|---|---|
| 代码探索 | 找到相关文件 |
| 原因分析 | 整理问题候选 |
| 实现 | 修改代码 |
| 验证 | 运行测试和构建 |
| 反复修正 | 失败时再次修复 |
| 报告 | 总结结果和风险 |
总结来说,人是工作管理者和审查者,AI 是执行者和第一轮分析者。
注意事项
循环方式并不总是好的。设计不好的循环反而危险。
尤其要避免这些请求:
你自己看着全都修好。
优化整个代码库。
需要的话可以随便安装包。
测试失败也先继续。
这类请求范围太宽,控制标准太弱,副作用风险很高。
应该改成这样:
只修改相关文件。
安装包之前先确认。
一次只修正一个原因。
验证失败时,根据错误信息再次修正。
同一失败重复 3 次以上时,中断并报告。
AI 编码工具可以提高生产力,但一旦拥有文件修改和命令执行权限,风险也会增加。因此设计循环时,必须同时加入权限、验证和中断条件。
结论:Vibe Coding 的能力就是循环设计能力
擅长 Vibe Coding,并不是写出漂亮提示词句子。
真正的核心是:
设计一种重复结构,让 AI 计划、实现、验证、失败后修正,并在验证完成后报告。
也就是说,Vibe Coding 正在从提示词技巧转向工作系统设计。
实践中只要记住四件事:
- 把任务拆小。
- 明确循环流程。
- 包含验证命令。
- 定义结束条件和中断条件。
好的 Vibe Coding 不是对 AI 说“你自己看着办”。
好的 Vibe Coding 是清楚设计 AI 应该做到哪里、如何确认结果、什么时候停止。
バイブコーディングに初めて触れると、多くの人は「どうすれば良いプロンプトを書けるか」に注目します。もちろんプロンプトも重要です。しかし実際の開発作業では、優れたプロンプト1つよりも、再現可能な作業ループの方がはるかに重要です。
一言でまとめると次の通りです。
バイブコーディングの核心は、AIに一度で正解を求めることではなく、計画 → 実装 → 検証 → 修正 → 再検証を繰り返させることです。
つまり、AIに「この機能を作って」と一度だけ指示して終わるやり方は危険です。実際のプロジェクトでは、型エラー、ビルド失敗、スタイル衝突、ブラウザ固有の問題、アクセシビリティ問題、副作用が継続的に発生するからです。
そのため、バイブコーディングを適切に行うには、AIに単純な作業を任せるのではなく、作業手順そのものを設計して任せる必要があります。
プロンプト方式とループ方式の違い
一般的なプロンプト方式は次のようなものです。
この React コンポーネントのバグを直して。
AIはコードを提案します。しかし、そのコードが実際に動くかどうかは別問題です。ビルドが壊れるかもしれませんし、モバイルだけで問題が出るかもしれません。既存のコードスタイルと合わない可能性もあります。
一方、ループ方式では次のように指示します。
このバグを次の手順に従って修正してください。
1. 関連ファイルを探す。
2. 現在の動作構造を説明する。
3. 原因候補を整理する。
4. 最も可能性の高い原因から最小修正する。
5. npm run lint, npm run typecheck, npm run build を実行する。
6. 失敗したらエラーメッセージを基準に再度修正する。
7. 検証が通ったら変更内容と残りリスクを要約する。
違いは明確です。
| 方式 | 求めるもの | 弱点 |
|---|---|---|
| プロンプト方式 | 成果物 | 実際の検証が抜けることがある |
| ループ方式 | 作業過程と検証基準 | 最初に手順を設計する必要がある |
バイブコーディングで実務品質を分けるポイントはここにあります。
なぜループが必要なのか?
AIが最初に書いたコードは「それらしい初稿」であることが多いです。問題は、実際の開発ではそれらしさよりも検証可能性が重要だという点です。
たとえばフロントエンド開発では、次の問題がよく起こります。
- 型エラー
- ビルド失敗
- モバイルレイアウト崩れ
- Safari固有の問題
- アクセシビリティ問題
- 既存の状態管理構造との衝突
- 不要なリファクタリング
- CSSの副作用
- テスト漏れ
- パッケージバージョンの衝突
AIが「修正しました」と言っても、実際に npm run build が失敗するなら修正済みではありません。
したがって、バイブコーディングで重要な問いは次ではありません。
AIはうまくコードを書けるか?
より重要なのは次です。
AIが自分の結果を検証し、失敗したときに再修正するよう設計されているか?
Claude Code公式ドキュメントでは、Claude Codeをコードベースを読み、ファイルを編集し、コマンドを実行し、開発ツールと統合される agentic coding tool と説明しています。このようなツールをうまく使うには、質問の仕方だけでなく、反復可能な作業構造が必要です。
基本ループ構造
実務で基本になるループは次の通りです。
目標定義
→ 現在構造の把握
→ 計画作成
→ 最小実装
→ 検証実行
→ 失敗原因の分析
→ 修正
→ 再検証
→ 結果要約
開発作業に置き換えると次のようになります。
| 段階 | 内容 |
|---|---|
| 1段階 | 要件を明確に整理する |
| 2段階 | 関連ファイルと現在構造を先に確認する |
| 3段階 | 修正計画を短く立てる |
| 4段階 | 最小変更で実装する |
| 5段階 | lint、型チェック、テスト、ビルドを実行する |
| 6段階 | 失敗したらエラーメッセージを基準に再修正する |
| 7段階 | 検証が通ったら変更内容を要約する |
| 8段階 | 残りリスクを報告する |
重要なのは実装そのものではなく、実装後の検証です。
すぐ使える基本プロンプトテンプレート
次のテンプレートは Claude Code、Cursor、ChatGPT、Codex 系ツールなどで応用できます。
この作業を単発のプロンプトではなく、ループ方式で実行してください。

目標:
- [望む結果をここに書く]

作業手順:
1. まず要件を再整理します。
2. 関連ファイルと現在構造を確認します。
3. 短い修正計画を書きます。
4. 最小変更で実装します。
5. 関連する検証コマンドを実行します。
6. 検証に失敗したら、エラーメッセージを基準に原因を分析して再修正します。
7. 検証が通るまで繰り返します。
8. 完了後、変更ファイル、変更理由、検証結果、残りリスクを要約します。

検証コマンド:
- npm run lint
- npm run typecheck
- npm run test
- npm run build

制約条件:
- 不要なリファクタリングはしないでください。
- 既存動作を勝手に変えないでください。
- パッケージをインストールする前に確認してください。
- セキュリティ上危険なコマンドは実行しないでください。
- 一度に1つの原因だけ修正してください。

終了条件:
- すべての検証コマンドが通る
- 要件を満たす
- 変更内容の要約が完了している

中断条件:
- 同じエラーが3回以上繰り返される
- 要件が衝突する
- 検証方法がない
- 大規模な構造変更が必要になる
このテンプレートの目的は、AIに「作業しろ」と言うだけでなく、作業をどう終えるかまで定義することです。
バグ修正ループ
バグ修正は、ループ方式が特に効果を発揮する作業です。
悪い依頼は次のようなものです。
このバグを直して。
良い依頼は次のようになります。
以下のバグをループ方式で修正してください。

症状:
- iPhone Safariでページ右側に横スクロールが発生します。
- bodyに overflow-x: hidden を指定してもまだ発生します。

作業ループ:
1. viewportを超える要素候補を探します。
2. CSS、fixed要素、Swiper、GSAP ScrollTrigger関連コードを優先確認します。
3. 原因候補を整理します。
4. 最も可能性の高い原因から1つずつ修正します。
5. npm run build を実行します。
6. 失敗する、または問題が残る場合は再度原因を絞ります。
7. 最終的に原因、修正ファイル、検証結果を要約します。

制約条件:
- 全体レイアウト構造を大きく変えないでください。
- 応急処置としてすべての要素に overflow hidden を乱用しないでください。
- モバイルSafari基準で優先確認してください。
こう書くと、AIは単にコードを出すのではなく、原因を絞りながら作業します。
バグ修正で重要なのは、たくさん直すことではなく、原因を正確に絞ることです。
機能実装ループ
機能実装では、要件と検証基準を明確に渡す必要があります。
たとえばモバイルメニュー機能を実装するなら、次のように依頼できます。
次の機能をループ方式で実装してください。

目標:
- モバイルメニューでメニュー項目をクリックしたらメニューが閉じる。
- ルート変更後に body scroll lock が解除される。

作業ループ:
1. 現在のモバイルメニューコンポーネントと状態管理方式を確認します。
2. ルーティング変更を検知する既存方式があるか確認します。
3. 最小修正計画を書きます。
4. コードを修正します。
5. npm run lint, npm run typecheck, npm run build を実行します。
6. 失敗したらエラーメッセージを基準に再修正します。
7. 完了後、変更ファイルと検証結果を要約します。

制約条件:
- 既存UI構造を大きく変えないでください。
- スタイルのリファクタリングはしないでください。
- アクセシビリティを損なわないでください。
- モバイル動作を優先してください。
この依頼の良い点は、作業範囲が明確なことです。
AIに「モバイルメニューを改善して」と言うと広すぎます。一方で「ルート変更後にメニューを閉じ、body scroll lockを解除する」と言えば、かなり正確になります。
リファクタリングループ
リファクタリングをAIに任せるときは特に注意が必要です。AIはしばしば「良さそうな構造」を作るために既存動作を変えてしまいます。
そのため、リファクタリング依頼には必ず「動作変更禁止」を入れるべきです。
このコンポーネントをリファクタリングしてください。ただし既存動作は変更しないでください。

作業ループ:
1. 現在のコンポーネントの役割と問題点を分析します。
2. リファクタリング範囲を小さく分けます。
3. 変更前の動作を整理します。
4. 一度に1つの変更だけ適用します。
5. 各変更後に型チェックとビルドを実行します。
6. 失敗したらその変更を修正または戻します。
7. 最終的に変更前後の差分と残りリスクを要約します。

制約条件:
- 機能変更禁止
- スタイル変更禁止
- APIインターフェース変更禁止
- 不要なファイル分割禁止
- テストなしの大規模構造変更禁止
リファクタリングループの核心は、小さく変えて頻繁に検証することです。
Claude Codeでループを固定する方法: CLAUDE.md
Claude Codeを使うなら、毎回長いプロンプトを入力する代わりに、プロジェクトルートに CLAUDE.md を置く方法が有効です。
CLAUDE.md は、プロジェクトの作業ルール、コマンド、コードスタイル、検証手順をAIに伝える役割を持ちます。Anthropicの memoryドキュメント でも、CLAUDE.md はプロジェクトルール、ビルドコマンド、テスト手順、慣例を記録するファイルとして扱われています。
例は次の通りです。
Project Rules

Default Coding Loop
For every coding task:
1. Understand the requirement.
2. Inspect relevant files before editing.
3. Explain the current structure briefly.
4. Propose a short implementation plan.
5. Make the smallest safe change.
6. Run the relevant verification commands.
7. If verification fails, diagnose and fix.
8. Repeat until verification passes or the task is blocked.
9. Summarize the result.

Verification Commands
Use these commands when relevant:
- npm run lint
- npm run typecheck
- npm run test
- npm run build

Constraints
- Do not perform unnecessary refactoring.
- Do not change public APIs without approval.
- Do not install packages without approval.
- Do not expose secrets or environment variables.
- Do not run destructive commands.
- Prefer small, reversible changes.

Final Report Format
At the end of each task, report:
- Files changed
- What changed
- Why it changed
- Verification result
- Remaining risks
こうしておくと、毎回同じルールを繰り返し説明する必要が減ります。
つまり CLAUDE.md は単なるメモではなく、プロジェクトのAI作業ルールブックに近いものです。
よく使うループはカスタムコマンドにする
毎回同じプロンプトを入力するのも非効率です。よく使うループはカスタムコマンドのようにしておくと便利です。
たとえば次のような作業単位を作れます。
/fix-bug
/implement-feature
/refactor-safely
/review-pr
/test-and-fix
/a11y-check
Anthropicのドキュメントでは、Claude Codeの拡張ポイントとして skillsとslash command、subagents、MCP、hooks が説明されています。繰り返し使う手順をこうした拡張ポイントに移すと、長いプロンプトを毎回貼り付ける必要が減ります。
たとえば /fix-bug コマンドは次のように定義できます。
You are fixing a bug in this repository.

Loop:
1. Reproduce or locate the bug.
2. Identify the smallest relevant code area.
3. Explain the likely root cause.
4. Apply a minimal fix.
5. Run lint, typecheck, test, and build when relevant.
6. If verification fails, diagnose and fix again.
7. Stop only when verification passes or when blocked.

Constraints:
- Do not refactor unrelated code.
- Do not install packages without approval.
- Do not run destructive commands.
- Make one logical change at a time.

Final response:
- Root cause
- Files changed
- Verification result
- Remaining risk
こうしておけば、次のように短く依頼できます。
/fix-bug

症状:
モバイルSafariで特定セクションに入ると、画面が中間位置から始まります。
AIに毎回長い説明をしなくても、同じ方式でバグ修正ループが実行されます。
検証コマンドをループの中心に置く
ループ方式の核心は検証です。検証がなければ、ループは単なる反復する推測になります。
フロントエンドプロジェクトでは通常、次のコマンドを使います。
npm run lint
npm run typecheck
npm run test
npm run build
プロジェクトによっては、次も追加できます。
npm run test:e2e
npm run test:unit
npm run storybook
npm run chromatic
npm run preview
検証基準も明確に書くべきです。
検証基準:
- npm run build が通る
- TypeScriptエラーがない
- ESLintエラーがない
- 既存テストが失敗しない
- モバイルメニュー動作が要件を満たす
- コンソールエラーがない
AIが自分で「完了」と言うことより、検証コマンドが通ることの方が重要です。
ループには中断条件も必要
多くの人は終了条件を書きますが、中断条件はあまり書きません。しかし中断条件がないと、AIが同じ問題を繰り返し修正し続けることがあります。
たとえば次の条件を入れるとよいです。
次の状況では作業を中断して報告してください。
- 同じエラーが3回以上繰り返される場合
- 要件が互いに衝突する場合
- テストやビルドで検証できない場合
- セキュリティ上危険なコマンド実行が必要な場合
- 大規模な構造変更が必要な場合
- 外部パッケージのインストールが必要な場合
この条件は、AIの無理な自動修正を防ぐ安全装置です。
バイブコーディングで重要なのは、AIを最大限自動化することではなく、危険な自動化を制御可能な構造にすることです。
実際の作業フロー例
実際の使用フローは次のようにできます。
1段階: 作業を小さく分ける
悪い例は次の通りです。
サイト全体を改善して。
良い例は次の通りです。
モバイルSafariで発生する横スクロール問題だけを分析して修正して。
作業単位が小さいほど、AIループの成功率は上がります。
2段階: ループテンプレートを付ける
この作業をループ方式で進めてください。
1. 原因候補を探します。
2. 関連ファイルを確認します。
3. 最小修正します。
4. ビルドします。
5. 失敗したら再度修正します。
6. 成功したら変更内容を要約します。
3段階: 検証コマンドを指定する
検証コマンド:
- npm run lint
- npm run typecheck
- npm run build
検証コマンドを指定しないと、AIが実際のプロジェクト基準ではなく自分の判断基準で完了扱いにする可能性が高くなります。
4段階: AIの変更内容をdiffで確認する
AIが作業を終えたら、すぐに信じず変更内容を確認する必要があります。
確認する項目は次の通りです。
- 関係ないファイルを修正していないか?
- 不要なリファクタリングが入っていないか?
- 応急処置コードが入っていないか?
- 既存機能を変えていないか?
- テストやビルド結果が本当に通っているか?
- セキュリティ上危険なコードが入っていないか?
AIが素早くコードを変更できる分、人間はより丁寧に検査する必要があります。
フロントエンド開発者向けおすすめループ
フロントエンド作業では、次のループを基本値にするとよいです。
Frontend Coding Loop
1. 要件を user story 形式で整理する。
2. 関連コンポーネント、状態、スタイルファイルを探す。
3. 現在動作と変更が必要な箇所を説明する。
4. 最小修正計画を立てる。
5. 実装する。
6. 型チェックを実行する。
7. lintを実行する。
8. ビルドを実行する。
9. モバイル、アクセシビリティ、ブラウザ影響を確認する。
10. 失敗したら原因を分析して再修正する。
11. 成功したら変更内容と残りリスクを要約する。
実際のプロンプトは次のように書けます。
次の作業を Frontend Coding Loop に従って進めてください。

目標:
- PCでは既存動作を維持します。
- モバイルではメニュー項目クリック時にメニューを閉じるよう修正します。
- ルート変更後に body scroll lock が解除される必要があります。

検証:
- npm run typecheck
- npm run lint
- npm run build

注意:
- スタイル構造を大きく変えないでください。
- 新しいパッケージをインストールしないでください。
- アクセシビリティを損なわないでください。
- 関係ないリファクタリングはしないでください。

完了報告:
- 原因
- 修正ファイル
- 修正内容
- 検証結果
- 残りリスク
これだけでも、一般的な「直して」プロンプトよりかなり安定した結果を得られます。
ループ方式における人間の役割
ループ方式は、AIにすべてを任せる方法ではありません。むしろ人間の役割がより明確になります。
人間がすべきことは次の通りです。
| 役割 | 内容 |
|---|---|
| 目標設定 | 何を解決するかを決める |
| 範囲制限 | どこまで修正するかを決める |
| 検証基準設定 | 何が通れば完了かを決める |
| リスク制御 | やってはいけない作業を決める |
| 最終承認 | diffと結果を確認する |
AIがすべきことは次の通りです。
| 役割 | 内容 |
|---|---|
| コード探索 | 関連ファイルを探す |
| 原因分析 | 問題候補を整理する |
| 実装 | コードを修正する |
| 検証 | テストとビルドを実行する |
| 反復修正 | 失敗時に再修正する |
| 報告 | 結果とリスクを整理する |
まとめると、人間は作業管理者でありレビュアー、AIは実行者であり一次分析者です。
注意点
ループ方式が常に良いとは限りません。設計の悪いループはむしろ危険です。
特に次のような依頼は避けるべきです。
いい感じに全部直して。
コード全体を最適化して。
必要なら何でもパッケージを入れていい。
テストが失敗してもとりあえず進めて。
こうした依頼は作業範囲が広く、制御基準が弱く、副作用が大きくなりがちです。
代わりに次のように指示します。
関連ファイルだけ修正してください。
パッケージをインストールする前に確認してください。
一度に1つの原因だけ修正してください。
検証失敗時はエラーメッセージを基準に再修正してください。
3回以上失敗が続く場合は中断して報告してください。
AIコーディングツールは生産性を高められますが、ファイル編集とコマンド実行権限を持つ瞬間にリスクも増えます。そのため、ループ設計では常に権限、検証、中断条件を一緒に入れる必要があります。
結論: バイブコーディングの実力はループ設計能力
バイブコーディングが上手いということは、単にプロンプト文を上手く書くことではありません。
本当の核心は次です。
AIが計画し、実装し、検証し、失敗したら修正し、検証が終わったら報告する反復構造を設計すること。
つまり、バイブコーディングはプロンプト技術から作業システム設計へ移っています。
実務では次の4つだけ覚えておけば十分です。
- 作業を小さく分ける。
- ループ手順を明示する。
- 検証コマンドを含める。
- 終了条件と中断条件を決める。
良いバイブコーディングは、AIに「いい感じにやって」と言うことではありません。
良いバイブコーディングとは、AIがどこまで行い、どう確認し、いつ止まるべきかを明確に設計することです。
Cuando alguien empieza con vibe coding, normalmente se concentra en “cómo escribir mejores prompts”. Los prompts importan, claro. Pero en el trabajo real de desarrollo, un bucle de trabajo repetible importa mucho más que un solo prompt brillante.
En una frase:
La esencia del vibe coding no es pedirle a la IA una respuesta correcta de una sola vez, sino hacer que repita planificación → implementación → verificación → corrección → nueva verificación.
En otras palabras, decirle a la IA “haz esta funcionalidad” una vez y detenerse ahí es peligroso. En proyectos reales aparecen constantemente errores de tipos, fallos de build, conflictos de estilos, problemas de navegador, problemas de accesibilidad y efectos secundarios.
Para usar bien el vibe coding, no basta con delegar una tarea simple a la IA. Hay que diseñar el procedimiento de trabajo y delegar ese procedimiento.
Diferencia Entre Trabajar con Prompts y Trabajar con Bucles
Una petición típica basada en prompt se ve así:
Arregla el bug de este componente React.
La IA propone código. Pero que ese código funcione de verdad es otra cuestión. El build puede fallar, el problema puede aparecer solo en móvil o el código puede no encajar con el estilo existente.
Una petición basada en bucle se ve así:
Corrige este bug siguiendo el siguiente procedimiento.
1. Encuentra los archivos relevantes.
2. Explica la estructura actual de comportamiento.
3. Enumera posibles causas.
4. Aplica la corrección mínima empezando por la causa más probable.
5. Ejecuta npm run lint, npm run typecheck y npm run build.
6. Si la verificación falla, corrige de nuevo según el mensaje de error.
7. Cuando la verificación pase, resume los cambios y los riesgos restantes.
La diferencia es clara.
| Enfoque | Qué pide | Debilidad |
|---|---|---|
| Basado en prompt | Resultado | Puede faltar verificación real |
| Basado en bucle | Proceso y criterios de verificación | Requiere diseñar el procedimiento al inicio |
Aquí es donde empieza a separarse la calidad real del vibe coding.
Por Qué Hace Falta un Bucle
El primer código que escribe la IA suele ser un borrador plausible. El problema es que en desarrollo real la verificabilidad importa más que la plausibilidad.
En frontend, por ejemplo, estos problemas son frecuentes:
- Errores de tipos
- Fallos de build
- Layouts rotos en móvil
- Problemas específicos de Safari
- Problemas de accesibilidad
- Conflictos con la gestión de estado existente
- Refactorizaciones innecesarias
- Efectos secundarios de CSS
- Tests ausentes
- Conflictos de versiones de paquetes
Aunque la IA diga “lo corregí”, no está corregido si npm run build falla.
Por eso, la pregunta importante en vibe coding no es esta:
¿La IA escribe buen código?
La pregunta más importante es esta:
¿La IA está configurada para verificar su propio resultado y corregirlo de nuevo cuando falla?
La documentación de Claude Code describe Claude Code como una herramienta de codificación agéntica que lee bases de código, edita archivos, ejecuta comandos e integra herramientas de desarrollo. Para usar bien este tipo de herramienta, hace falta una estructura de trabajo repetible, no solo mejores preguntas.
Estructura Básica del Bucle
El bucle práctico más básico es el siguiente:
Definir el objetivo
→ Revisar la estructura actual
→ Crear un plan
→ Implementar el cambio mínimo
→ Ejecutar verificación
→ Analizar la causa del fallo
→ Corregir
→ Verificar de nuevo
→ Resumir el resultado
En tareas de desarrollo, esto se convierte en:
| Paso | Contenido |
|---|---|
| Paso 1 | Aclarar el requisito |
| Paso 2 | Revisar primero los archivos relevantes y la estructura actual |
| Paso 3 | Escribir un plan corto de modificación |
| Paso 4 | Implementar con cambios mínimos |
| Paso 5 | Ejecutar lint, typecheck, tests y build |
| Paso 6 | Si falla, corregir de nuevo según el mensaje de error |
| Paso 7 | Cuando la verificación pase, resumir los cambios |
| Paso 8 | Informar los riesgos restantes |
La clave no es la implementación en sí. La clave es la verificación después de implementar.
Plantilla Básica de Prompt para Usar de Inmediato
Puedes adaptar esta plantilla en Claude Code, Cursor, ChatGPT, herramientas tipo Codex o agentes de codificación similares.
Realiza esta tarea como un bucle, no como un prompt de una sola vez.

Objetivo:
- [Escribe aquí el resultado deseado]

Procedimiento de trabajo:
1. Replantea primero el requisito.
2. Revisa los archivos relevantes y la estructura actual.
3. Escribe un plan corto de implementación.
4. Implementa con el cambio seguro más pequeño.
5. Ejecuta los comandos de verificación relevantes.
6. Si la verificación falla, analiza la causa desde el mensaje de error y corrige de nuevo.
7. Repite hasta que la verificación pase.
8. Al terminar, resume archivos modificados, motivo del cambio, resultado de verificación y riesgos restantes.

Comandos de verificación:
- npm run lint
- npm run typecheck
- npm run test
- npm run build

Restricciones:
- No hagas refactorizaciones innecesarias.
- No cambies arbitrariamente el comportamiento existente.
- Pregunta antes de instalar paquetes.
- No ejecutes comandos riesgosos para la seguridad.
- Corrige una causa a la vez.

Condiciones de salida:
- Todos los comandos de verificación pasan
- El requisito está satisfecho
- El resumen de cambios está completo

Condiciones de detención:
- El mismo error se repite 3 veces o más
- Los requisitos entran en conflicto
- No hay forma de verificar el resultado
- Se requiere un cambio estructural grande
El objetivo de esta plantilla no es solo decirle a la IA que trabaje. Define cómo debe terminar el trabajo.
Bucle para Corregir Bugs
La corrección de bugs es una de las tareas donde el enfoque por bucles funciona mejor.
Una mala petición:
Arregla este bug.
Una mejor petición:
Corrige el siguiente bug usando un bucle.

Síntomas:
- En iPhone Safari aparece scroll horizontal a la derecha de la página.
- body tiene overflow-x: hidden, pero el problema sigue ocurriendo.

Bucle de trabajo:
1. Encuentra elementos candidatos que exceden el viewport.
2. Prioriza CSS, elementos fixed, Swiper y código relacionado con GSAP ScrollTrigger.
3. Enumera posibles causas.
4. Corrige una causa probable a la vez, empezando por la más probable.
5. Ejecuta npm run build.
6. Si falla o el problema queda, vuelve a acotar la causa.
7. Al final, resume la causa raíz, los archivos cambiados y el resultado de verificación.

Restricciones:
- No cambies mucho la estructura general del layout.
- No abuses de overflow hidden en todos los elementos como parche.
- Revisa primero con móvil Safari como referencia.
Así la IA no solo produce código; acota causas de forma gradual.
En corrección de bugs, lo importante no es cambiar mucho código. Es acotar la causa con precisión.
Bucle para Implementar Funcionalidades
Para implementar funcionalidades, los requisitos y criterios de verificación deben ser explícitos.
Por ejemplo, si vas a implementar un comportamiento de menú móvil, puedes pedirlo así:
Implementa la siguiente funcionalidad usando un bucle.

Objetivo:
- Cuando se haga clic en un elemento del menú móvil, el menú debe cerrarse.
- Después de cambios de ruta, body scroll lock debe liberarse.

Bucle de trabajo:
1. Revisa el componente actual del menú móvil y la gestión de estado.
2. Comprueba si existe un patrón para detectar cambios de ruta.
3. Escribe un plan mínimo de implementación.
4. Modifica el código.
5. Ejecuta npm run lint, npm run typecheck y npm run build.
6. Si falla, corrige de nuevo según el mensaje de error.
7. Al terminar, resume archivos modificados y resultados de verificación.

Restricciones:
- No cambies mucho la estructura UI existente.
- No refactorices estilos.
- No dañes la accesibilidad.
- Prioriza el comportamiento móvil.
La ventaja de esta petición es que el alcance queda claro.
"Mejora el menú móvil" es demasiado amplio. "Cerrar el menú después de cambios de ruta y liberar body scroll lock" es mucho más preciso.
Bucle de Refactorización
Hay que tener especial cuidado al delegar refactorizaciones a la IA. A menudo cambia el comportamiento existente para crear una estructura que parece más limpia.
Por eso, las peticiones de refactorización siempre deben incluir “no cambiar el comportamiento”.
Refactoriza este componente, pero no cambies el comportamiento existente.

Bucle de trabajo:
1. Analiza el rol y los problemas del componente actual.
2. Divide el alcance de refactorización en partes pequeñas.
3. Resume el comportamiento antes de los cambios.
4. Aplica un cambio a la vez.
5. Después de cada cambio, ejecuta typecheck y build.
6. Si la verificación falla, corrige o revierte ese cambio.
7. Al final, resume diferencias antes/después y riesgos restantes.

Restricciones:
- Sin cambios de funcionalidad
- Sin cambios de estilos
- Sin cambios de interfaz API
- Sin división innecesaria de archivos
- Sin grandes cambios estructurales sin tests
La clave de un bucle de refactorización es cambiar poco y verificar con frecuencia.
Fijar el Bucle en Claude Code con CLAUDE.md
Si usas Claude Code, conviene poner un archivo CLAUDE.md en la raíz del proyecto en vez de escribir un prompt largo cada vez.
CLAUDE.md comunica a la IA las reglas de trabajo del proyecto, comandos, estilo de código y proceso de verificación. La documentación de memoria de Anthropic trata CLAUDE.md como un lugar para reglas de proyecto, comandos de build, instrucciones de tests y convenciones.
Ejemplo:
Project Rules

Default Coding Loop
For every coding task:
1. Understand the requirement.
2. Inspect relevant files before editing.
3. Explain the current structure briefly.
4. Propose a short implementation plan.
5. Make the smallest safe change.
6. Run the relevant verification commands.
7. If verification fails, diagnose and fix.
8. Repeat until verification passes or the task is blocked.
9. Summarize the result.

Verification Commands
Use these commands when relevant:
- npm run lint
- npm run typecheck
- npm run test
- npm run build

Constraints
- Do not perform unnecessary refactoring.
- Do not change public APIs without approval.
- Do not install packages without approval.
- Do not expose secrets or environment variables.
- Do not run destructive commands.
- Prefer small, reversible changes.

Final Report Format
At the end of each task, report:
- Files changed
- What changed
- Why it changed
- Verification result
- Remaining risks
Esto reduce la necesidad de repetir las mismas reglas cada vez.
En ese sentido, CLAUDE.md se parece más a un reglamento de trabajo con IA para el proyecto que a una simple nota.
Convertir Bucles Comunes en Comandos Personalizados
Escribir el mismo prompt una y otra vez también es ineficiente. Conviene convertir los bucles frecuentes en flujos tipo comando personalizado.
Por ejemplo:
/fix-bug
/implement-feature
/refactor-safely
/review-pr
/test-and-fix
/a11y-check
La documentación de Anthropic describe puntos de extensión de Claude Code como skills y slash commands, subagents, MCP y hooks. Mover procedimientos repetidos a estos puntos de extensión reduce la necesidad de pegar prompts largos cada vez.
Por ejemplo, un comando /fix-bug podría definirse así:
You are fixing a bug in this repository.

Loop:
1. Reproduce or locate the bug.
2. Identify the smallest relevant code area.
3. Explain the likely root cause.
4. Apply a minimal fix.
5. Run lint, typecheck, test, and build when relevant.
6. If verification fails, diagnose and fix again.
7. Stop only when verification passes or when blocked.

Constraints:
- Do not refactor unrelated code.
- Do not install packages without approval.
- Do not run destructive commands.
- Make one logical change at a time.

Final response:
- Root cause
- Files changed
- Verification result
- Remaining risk
Después puedes hacer una petición corta como esta:
/fix-bug

Síntomas:
En mobile Safari, al entrar en una sección específica la página empieza desde una posición intermedia.
No hace falta explicar todo el procedimiento cada vez. El mismo bucle de corrección de bugs se ejecuta de forma consistente.
Poner los Comandos de Verificación en el Centro del Bucle
La esencia del trabajo por bucles es la verificación. Sin verificación, el bucle se convierte en una repetición de conjeturas.
En proyectos frontend se suelen usar estos comandos:
npm run lint
npm run typecheck
npm run test
npm run build
Según el proyecto, también puedes añadir:
npm run test:e2e
npm run test:unit
npm run storybook
npm run chromatic
npm run preview
Los criterios de verificación también deben ser claros.
Criterios de verificación:
- npm run build pasa
- Sin errores de TypeScript
- Sin errores de ESLint
- Los tests existentes no fallan
- El comportamiento del menú móvil cumple el requisito
- Sin errores de consola
Que los comandos de verificación pasen importa más que la IA diga “terminado”.
Un Bucle También Necesita Condiciones de Detención
Mucha gente escribe condiciones de salida, pero no condiciones de detención. Sin condiciones de detención, la IA puede seguir editando el mismo problema repetidamente.
Es útil incluir condiciones como estas:
Detén el trabajo e informa en las siguientes situaciones:
- El mismo error se repite 3 veces o más
- Los requisitos se contradicen
- El resultado no puede verificarse con tests o build
- Se requiere un comando riesgoso para la seguridad
- Se requiere un gran cambio estructural
- Se requiere instalar un paquete externo
Estas condiciones funcionan como barreras contra correcciones automáticas fuera de control.
En vibe coding, el objetivo no es automatizar la IA al máximo. El objetivo es convertir la automatización riesgosa en una estructura controlable.
Ejemplo de Flujo de Trabajo Real
Puedes usar el siguiente flujo en el trabajo real.
Paso 1: Dividir el Trabajo en Partes Pequeñas
Un mal ejemplo:
Mejora todo el sitio.
Un mejor ejemplo:
Analiza y corrige solo el problema de scroll horizontal en mobile Safari.
Cuanto más pequeña es la unidad de trabajo, mayor es la tasa de éxito del bucle con IA.
Paso 2: Adjuntar la Plantilla de Bucle
Procede con esta tarea usando un bucle.
1. Encuentra posibles causas.
2. Revisa archivos relevantes.
3. Haz la corrección mínima.
4. Ejecuta build.
5. Si falla, corrige de nuevo.
6. Si tiene éxito, resume los cambios.
Paso 3: Especificar Comandos de Verificación
Comandos de verificación:
- npm run lint
- npm run typecheck
- npm run build
Si no especificas comandos de verificación, la IA puede dar por terminada la tarea según su propio criterio y no según los estándares reales del proyecto.
Paso 4: Revisar los Cambios de la IA con Diff
Cuando la IA termina, no la creas de inmediato. Revisa los cambios.
Comprueba lo siguiente:
- ¿Modificó archivos no relacionados?
- ¿Agregó refactorización innecesaria?
- ¿Agregó código de parche temporal?
- ¿Cambió comportamiento existente?
- ¿Tests o build pasaron de verdad?
- ¿Introdujo código riesgoso para seguridad?
Como la IA cambia código rápidamente, la persona debe revisar con más cuidado.
Bucle Recomendado para Desarrolladores Frontend
Para trabajo frontend, este bucle funciona bien como valor por defecto.
Frontend Coding Loop
1. Replantea el requisito como user story.
2. Encuentra componentes, estado y archivos de estilo relevantes.
3. Explica el comportamiento actual y dónde se necesitan cambios.
4. Escribe un plan mínimo de implementación.
5. Implementa.
6. Ejecuta typecheck.
7. Ejecuta lint.
8. Ejecuta build.
9. Revisa impacto en móvil, accesibilidad y navegador.
10. Si falla, analiza la causa y corrige de nuevo.
11. Si tiene éxito, resume cambios y riesgos restantes.
Un prompt práctico podría verse así:
Procede con la siguiente tarea usando el Frontend Coding Loop.

Objetivo:
- Mantener el comportamiento existente en escritorio.
- En móvil, cerrar el menú cuando se haga clic en un elemento.
- Liberar body scroll lock después de cambios de ruta.

Verificación:
- npm run typecheck
- npm run lint
- npm run build

Precauciones:
- No cambies mucho la estructura de estilos.
- No instales un paquete nuevo.
- No dañes la accesibilidad.
- No refactorices código no relacionado.

Informe de finalización:
- Causa
- Archivos modificados
- Cambios realizados
- Resultado de verificación
- Riesgos restantes
Esto ya es mucho más estable que un prompt genérico de “arréglalo”.
El Rol Humano en el Trabajo Basado en Bucles
Trabajar con bucles no significa entregarle todo a la IA. En realidad, aclara más el rol humano.
La persona debe encargarse de:
| Rol | Contenido |
|---|---|
| Definir objetivo | Decidir qué resolver |
| Limitar alcance | Decidir hasta dónde pueden llegar los cambios |
| Definir verificación | Decidir qué debe pasar para considerar terminado el trabajo |
| Controlar riesgos | Definir lo que no debe hacerse |
| Aprobación final | Revisar diff y resultados |
La IA debe encargarse de:
| Rol | Contenido |
|---|---|
| Exploración de código | Encontrar archivos relevantes |
| Análisis de causa | Enumerar posibles causas |
| Implementación | Modificar código |
| Verificación | Ejecutar tests y builds |
| Corrección iterativa | Corregir de nuevo cuando falla |
| Reporte | Resumir resultados y riesgos |
En resumen, la persona es gestora y revisora del trabajo. La IA es ejecutora y primera analista.
Precauciones
El enfoque por bucles no siempre es bueno. Un bucle mal diseñado puede ser peligroso.
Evita especialmente peticiones como estas:
Arregla todo como mejor te parezca.
Optimiza todo el código.
Instala cualquier paquete si hace falta.
Sigue aunque fallen los tests.
Estas peticiones tienen alcance amplio, poco control y muchas posibilidades de efectos secundarios.
En su lugar, usa instrucciones como estas:
Modifica solo archivos relevantes.
Pregunta antes de instalar paquetes.
Corrige una causa a la vez.
Si la verificación falla, corrige de nuevo según el mensaje de error.
Si el mismo fallo se repite 3 veces o más, detente e informa.
Las herramientas de codificación con IA pueden aumentar la productividad, pero cuando tienen permiso para editar archivos y ejecutar comandos, también aumenta el riesgo. Por eso, un buen bucle siempre debe incluir permisos, verificación y condiciones de detención.
Conclusión: La Habilidad en Vibe Coding Es Diseñar Bucles
Ser bueno en vibe coding no significa escribir frases de prompt bonitas.
La esencia real es esta:
Diseñar una estructura repetible donde la IA planifique, implemente, verifique, corrija fallos y reporte cuando la verificación termine.
El vibe coding está pasando de técnica de prompts a diseño de sistemas de trabajo.
En la práctica, recuerda estas cuatro cosas:
- Divide el trabajo en tareas pequeñas.
- Explica el procedimiento del bucle.
- Incluye comandos de verificación.
- Define condiciones de salida y detención.
El buen vibe coding no es decirle a la IA “hazlo como quieras”.
El buen vibe coding es diseñar con claridad hasta dónde debe llegar la IA, cómo debe verificar el resultado y cuándo debe detenerse.